Is managing your WordPress server a nightmare? Imagine spending those precious hours creating amazing content instead of wrestling with server settings and backups. FlyWP can make that dream a reality.
This comprehensive server management solution is designed specifically for WordPress users. Juggling multiple logins and interfaces for various sites can eat up excessive time. FlyWP eliminates that hassle with a centralized dashboard, streamlining your workflow and saving you valuable time and effort.
But FlyWP goes beyond just simplification. It also enhances your website’s security, performance, and even team collaboration. Let’s explore this FlyWP review to learn about the powerful features that make it a top choice for non-technical users, bloggers, freelancers, small agencies, and businesses alike.
We’ll also discuss the different pricing plans available and why FlyWP offers excellent value for money. Let’s start with a brief intro to FlyWP.
Quick Navigation
What is FlyWP?
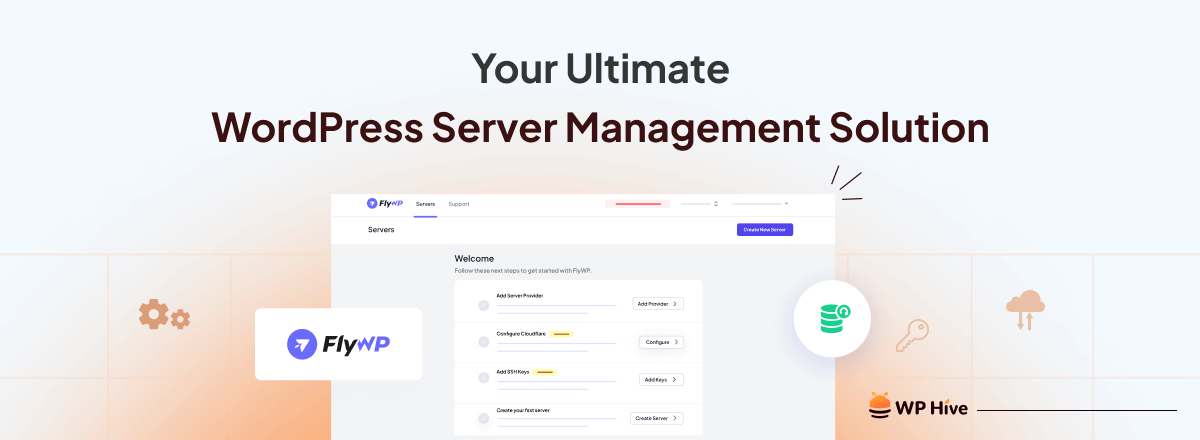
FlyWP is a comprehensive server management solution specifically designed for WordPress. Think of it as a one-stop solution that takes care of all the technical headaches behind the scenes. This platform lets you focus on what truly matters – creating amazing content and growing your online presence. Here’s what makes FlyWP so powerful:
- Effortless management: FlyWP provides a user-friendly dashboard that makes managing your server a breeze, even for non-technical users.
- Security made simple: It offers features like automatic backups, malware scanning, and firewalls, all working together to keep your website secure and protected.
- Performance boost on autopilot: Experience lightning-fast website speeds with FlyWP’s built-in optimization tools.
- Seamless integrations: Connect your FlyWP server with popular services like Cloudflare for even more powerful functionality.
- Team collaboration: Easily manage access and permissions for team members who work on your website.
In addition to the wide range of FlyWP features, it comes with a user-friendly graphical user interface (GUI). This intuitive GUI empowers even non-technical users to fine-tune their servers for peak performance.
Who should use FlyWP as a server management platform?
FlyWP is a great server management platform for a variety of users who want a simpler way to manage their WordPress websites. Here’s a breakdown of who can benefit the most:
People looking for easy server management
FlyWP is a good fit for anyone who wants a user-friendly and automated way to manage their WordPress server. Whether you know coding or not, this server management platform frees you up to focus on other aspects of your website or business.
Non-technical WordPress users

FlyWP is particularly valuable for those who don’t have extensive technical knowledge or experience managing servers. Its user-friendly interface eliminates the need for complex command lines and server configurations.
WordPress bloggers and content creators
It simplifies server management for bloggers and website owners to focus on creating content and growing their businesses. They can benefit from features like automatic backups, security measures, and performance optimization.
Freelancers and small agencies
FlyWP helps manage multiple WordPress sites for clients efficiently. Features like team collaboration, multiple servers, and user access control streamline the workflow for agencies and freelancers.
Businesses with limited IT resources
Businesses that don’t have a dedicated IT team can leverage FlyWP to manage their WordPress servers without needing to hire additional technical staff. You can use FlyWP’s website management tools to save money and speed up your workflow.
Key features of FlyWP: What helps it stand out
FlyWP has all the required features to become the best control panel for WordPress. It empowers you to manage your WordPress websites with ease by offering a comprehensive set of features. You can streamline your workflow and boost your website’s performance easily with FlyWP. Here’s a closer look at the key features:
1. Unmatched server flexibility
FlyWP doesn’t lock you into its infrastructure. Choose from a wide range of popular cloud providers like DigitalOcean, Google Cloud, Amazon EC2, Vultr, Akamai, and Hetzner. You can even use your own dedicated server, giving you ultimate control over your WordPress environment.
2. Effortless WordPress management
Automatic updates for plugins and themes ensure your site stays secure and up-to-date. The user-friendly interface provides easy access to the WP Config Editor for advanced configuration, while multisite support allows you to manage multiple WordPress installations from a single platform.
3. Fully functional backups and recovery
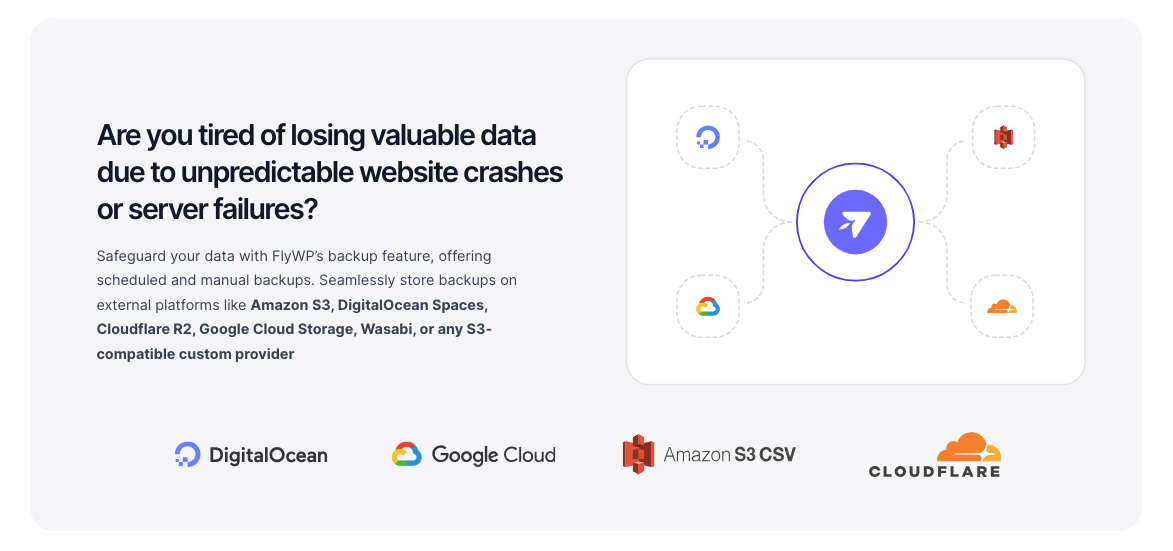
Data loss is a major concern for any website owner. FlyWP provides peace of mind with its comprehensive backup and recovery system. Schedule automatic backups regularly to ensure your website data is always protected.
You can also create additional backups on-demand whenever needed. FlyWP lets you store your backups in reputable cloud storage services like:
- AWS S3
- DigitalOcean Spaces
- Cloudflare R2
- Google Cloud Storage
- Wasabi
- Custom (Any S3 compatible backup provider)
4. Seamless staging environments
FlyWP eliminates the risk of breaking live sites with its intuitive and functional staging environment. You can easily create a replica of your live site where you can experiment with changes without affecting your visitors.
This is a perfect way to test new themes, plugins, or website updates before deploying them to your live site. Staging environments are also ideal for training new team members on WordPress maintenance tasks without affecting the live site.
5. Blazing-fast performance
Website speed is crucial for user experience and search engine ranking. FlyWP offers built-in full-page caching and Redis caching to improve website loading times significantly. FlyWP also seamlessly integrates with popular caching plugins to help you optimize website performance.
6. Developer-friendly options
FlyWP caters to the needs of WordPress developers. It supports Git repository integration for automatic code deployment, allowing developers to push changes effortlessly.
Moreover, its WP-CLI support grants developers full root access and helps them manage complex WordPress tasks efficiently. FlyWP also comes with features like website staging, detailed deployment logs, and Bedrock compatibility.
7. Team management and collaboration
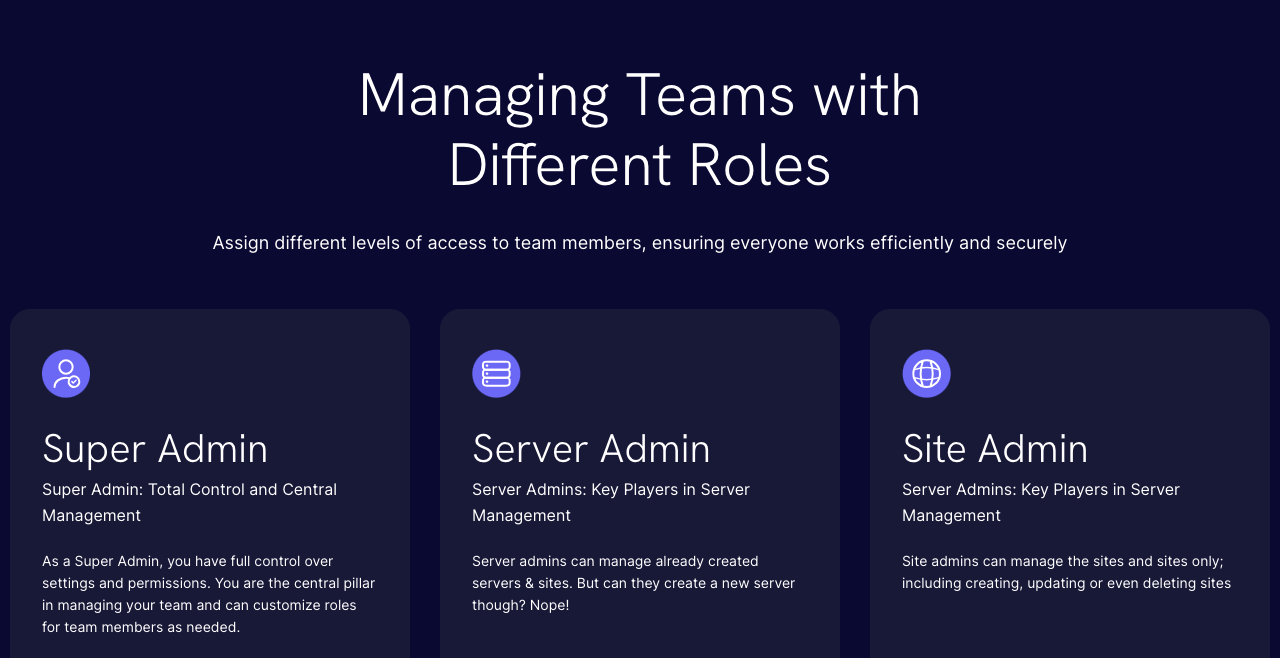
By empowering each team member with precise roles, FlyWP ensures seamless coordination and optimized performance in server and website management endeavors. Its structured approach ensures that each team member contributes efficiently within their scope in the organization. Currently, it has three types of role-based access.
- Super Admins have total control over settings and permissions, serving as the central pillar in managing your team. You have the freedom to customize roles for team members, ensuring efficient delegation of responsibilities.
- Server Admins play key roles in overseeing server infrastructure, handling configuration, monitoring, and security measures.
- Site Admins excel in managing website intricacies, from content creation to application setup and appearance customization.
8. Top-notch security features
FlyWP prioritizes data security with state-of-the-art technology and best practices. It automatically deploys expert-recommended firewall rules. Additionally, its Docker-based site isolation ensures each website operates in a secure environment, shielding them from potential risks.
With free SSL certificates for every new site and seamless integration with Cloudflare, it offers a comprehensive security suite to safeguard both data and visitors.
9. Centralized dashboard
Juggling multiple logins and interfaces for different aspects of your website management can be a hassle. FlyWP eliminates this frustration by providing a centralized dashboard. It offers a single access point for managing all your WordPress sites, server settings, backups, and team permissions.
How to create and manage a server with FlyWP
Let’s learn how you can create a server and manage it using FlyWP.
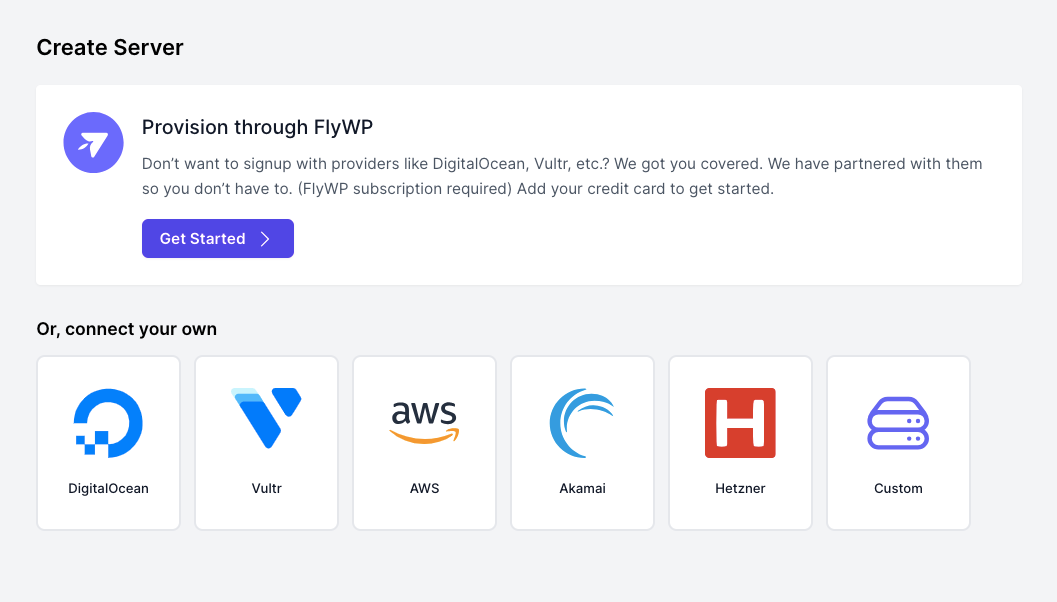
1. Create your new server
Log in to your FlyWP account. Then the first step is creating a server. Click on the ‘Create New Server‘ button. It will take you to the next step where you can choose from the following three options:
- Provision your server through FlyWP (FlyWP subscription required)
- Connect your own server associated with DigitalOcean, Vultr, AWS, Akamai, or Hetzner
- Configure a custom server of your choice
It may take three to five minutes to provision the server. Make sure to provide the required pieces of information correctly. Since web servers are sensitive in nature, a simple mistake can cause the server to not work properly. Follow this guide for a detailed tutorial- Getting started with FlyWP.
3. Add your site to the server
You can create a site from the server settings page. FlyWP also has a dedicated site creation section. We’ll show the steps of creating and managing a site in the next part of this article.
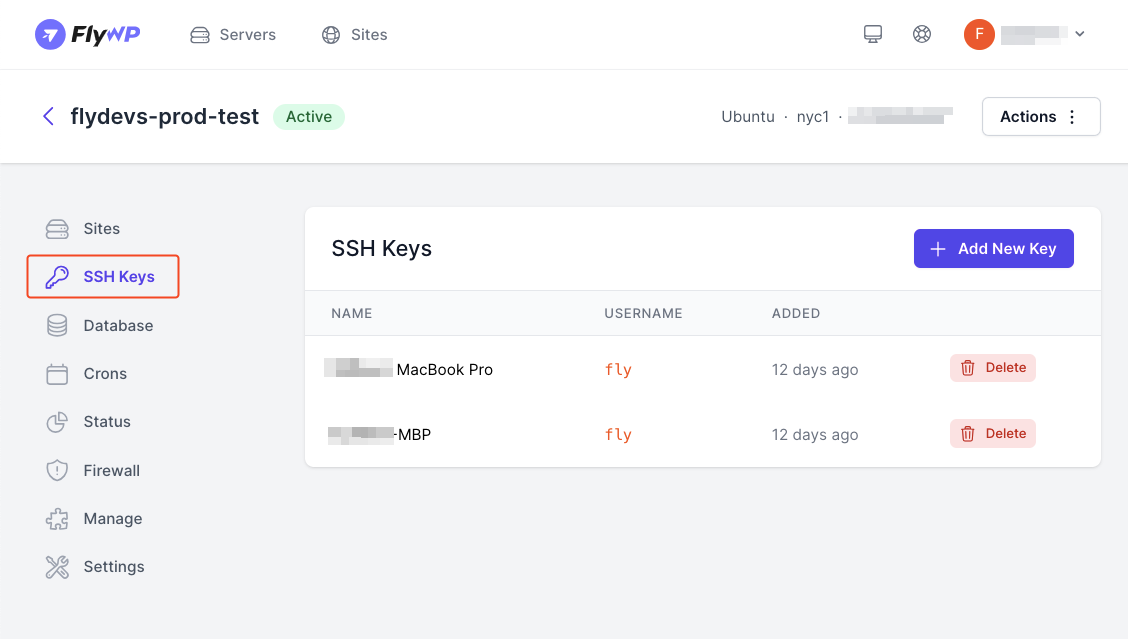
3. Add an SSH key
FlyWP lets you authenticate and encrypt connections between devices. You can easily add your SSH keys by navigating to the SSH Keys section of the server admin panel. Click on the ‘Add New Key’ button and provide a name and public key to complete the process.
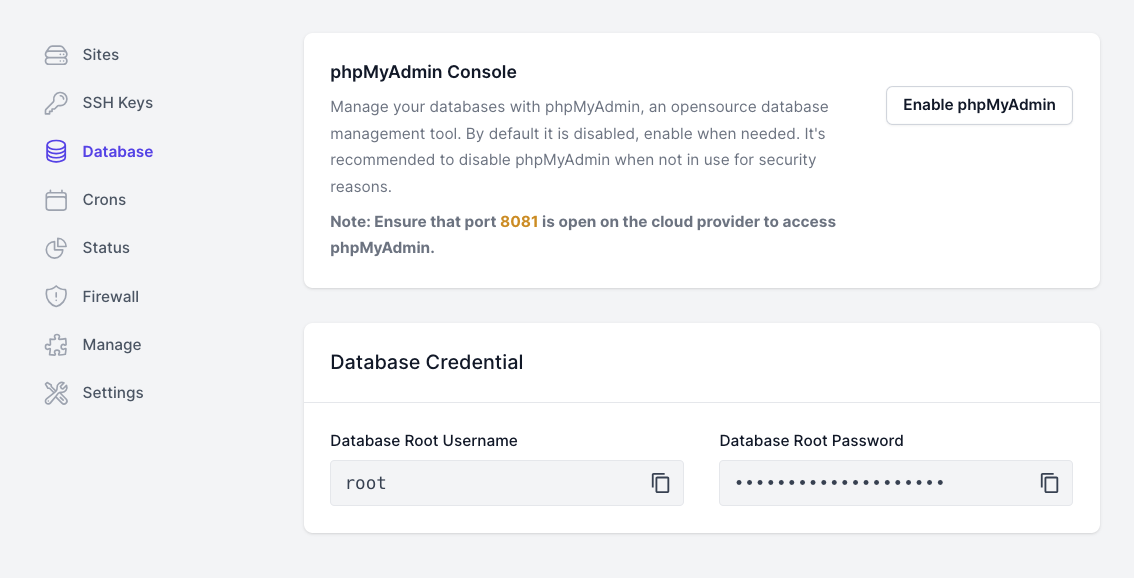
4. Manage your database with phpMyAdmin
You can manage your databases with phpMyAdmin using FlyWP. You can choose the database root username and root password from here. It lets you copy the credentials for further usage. You can also enable phpMyAdmin from this section.
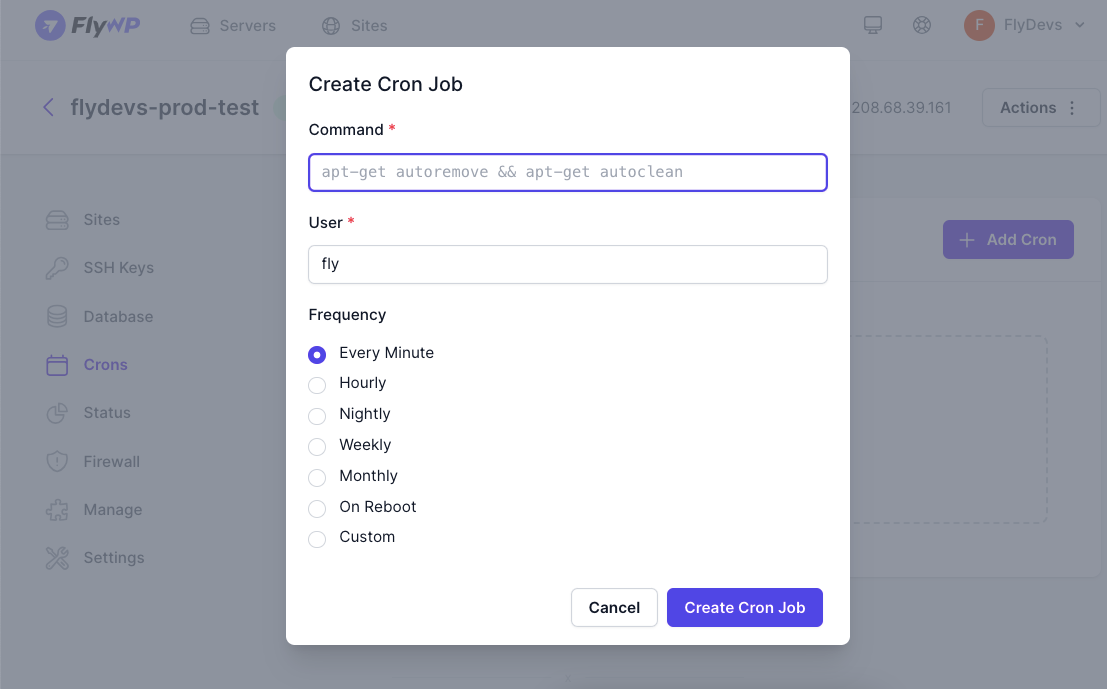
5. Add cron jobs if required
You can create a cron job within the FlyWP server control panel. Go to Crons from the side panel and select the frequency you prefer. Hit on ‘Create Cron Job’ to fix the schedule that runs assignments at prescribed times.
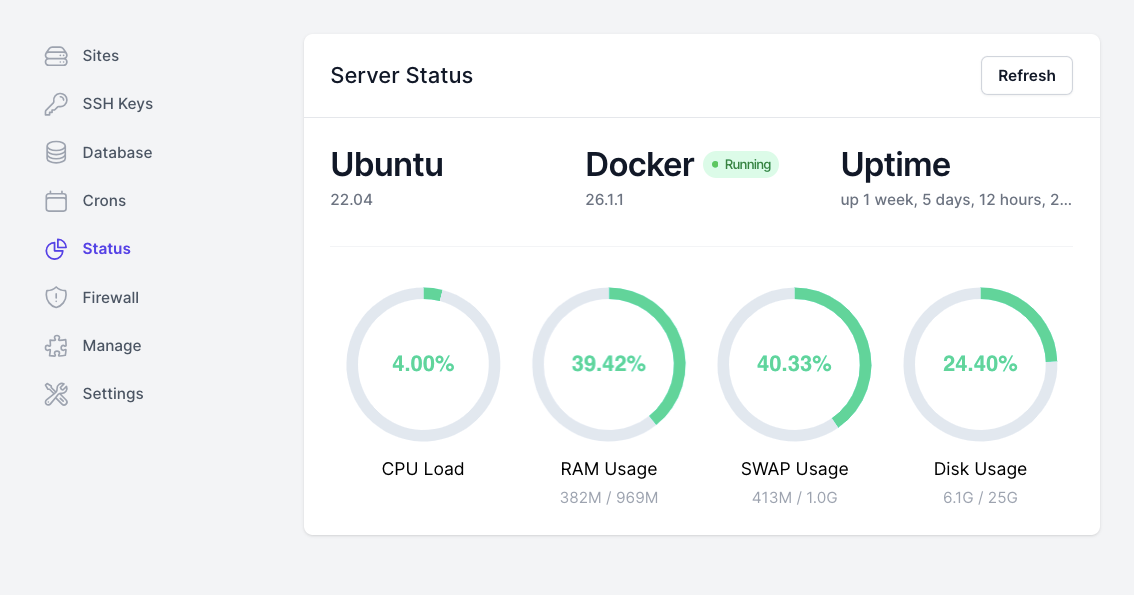
6. Monitor server status from your dashboard
The server status section lets you monitor the current usage status of your resources. You can check the CPU load, RAM usage, SWAP usage, and disk usage from here. The system will show a red color if any of the resources are likely to run out. Then, you can take the necessary steps to keep the website up and running properly.
7. Add firewall rules for your server
FlyWP lets you add new firewall rules to enhance your server’s security. Navigate to the Firewall option from the server admin panel. Add a rule by providing the name, port, and IP address.
Note: If you do not provide a ‘From IP Address’, the specified port will be open to any IP address on the Internet.
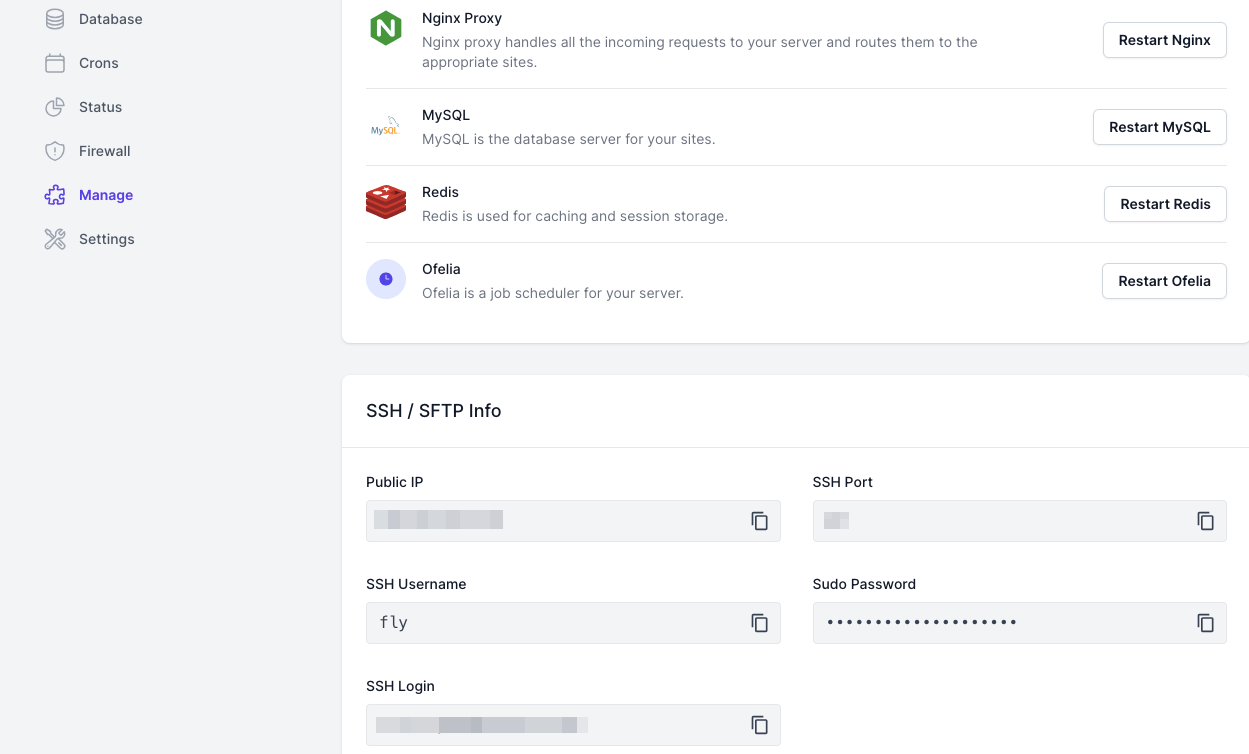
8. Manage all your services from a single place
This section has the list of all available services including Nginx Proxy, MySQL, Redis, and Ofelia. You can manage them easily from this section. If you scroll down, you’ll also find the SSH and SFTP information on this page. Copy the credentials if you need them.
9. Configure your server metadata
Go to the Settings option to configure the server metadata. You can also set a maintenance window for your server. During this time, periodic maintenance tasks will be performed, such as applying server updates, security patches, upgrading docker images, etc. to ensure your server is running smoothly.
If you want to delete the server, this is where you’ll find the Delete Server button. Be careful when doing this; once you delete a server, you will lose all the associated sites and data.
How to add a new site to your server and manage it with FlyWP
Here are the steps to adding a new site and managing it with FlyWP:
1. Create a site with WordPress installation
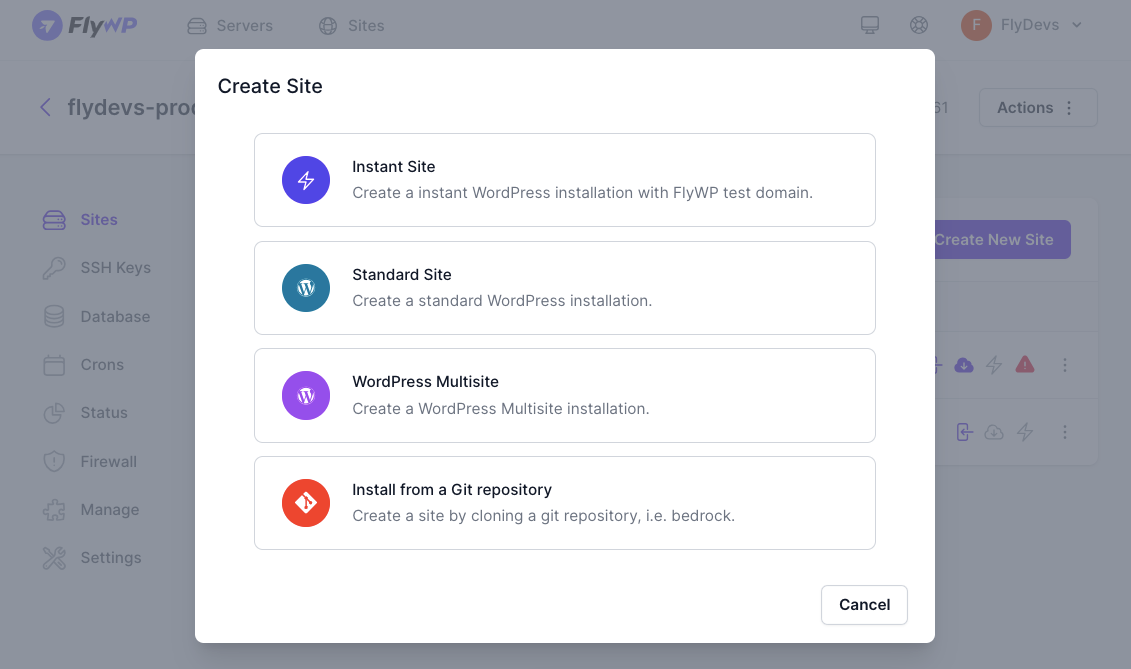
Once you have a server ready at your disposal, it’s your time to create a website and add it to the server. Go to Sites and click on the ‘Create New Site‘ button. Select the server where you want to host the website.
FlyWP lets you create a site in four ways. You can:
- Create an instant site using the FlyWP test domain
- Create a standard WordPress site
- Create a WordPress multisite installation
- Install a site by cloning from the Git repository
Upon successful WordPress installation, you will be able to see the site Overview from the site admin panel. You can visit the site, access the WordPress backend (using magic login), and clone the website from this section.
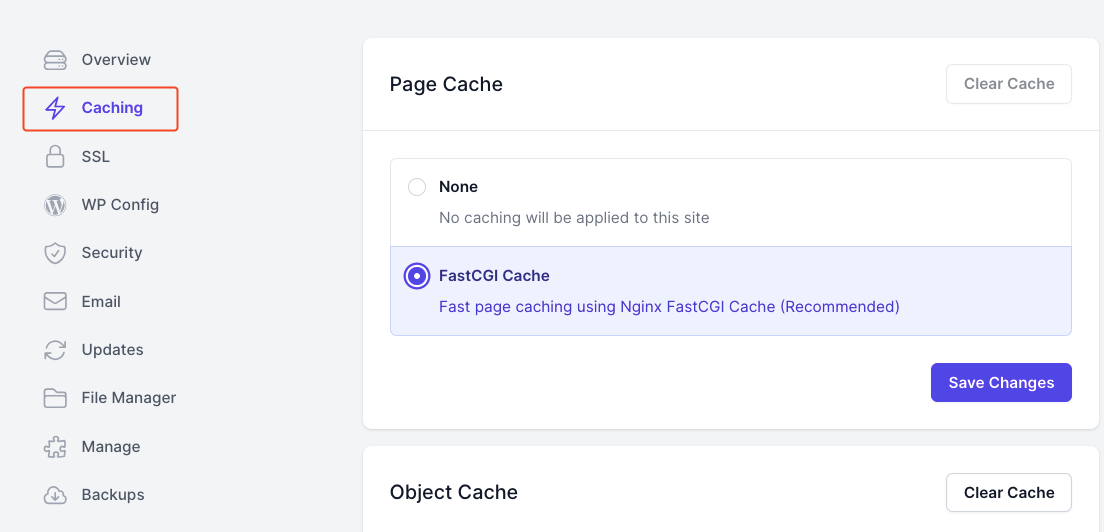
2. Enable caching to improve performance
You can speed up your website by applying caching to the site. FlyWP uses Nginx FastCGI cache and object cache to improve the site speed. You can enable or disable them by navigating to the Caching section from the side panel.
3. Activate SSL certificate for security
You can also activate and manage SSL certificates from your site dashboard. FlyWP provides free ‘Let’s Encrypt Auto SSL‘ for its users. You can use this free SSL certificate. The free certificate expires every 3 months, but FlyWP renews the certificate automatically.
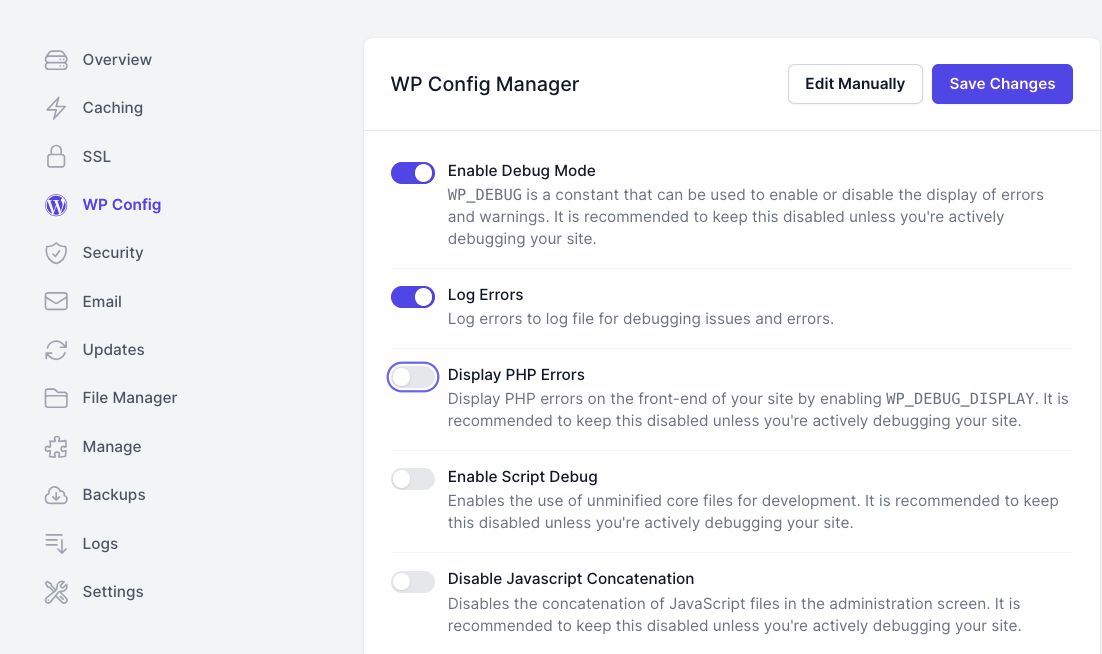
4. Manage WP Config settings from the dashboard
FlyWP has an intuitive GUI to help you manage the WP Config file effortlessly. You can enable debug mode, disable JS concatenation, disable WordPress core updates, and many more using this section. You can also edit the wp-config.php file manually from here.
5. Implement the best security practices for your site
FlyWP packs a lot of security features that can safeguard your website from malicious attacks and other unexpected sensitive issues. You can access all the security tools from the Security menu of the site dashboard.
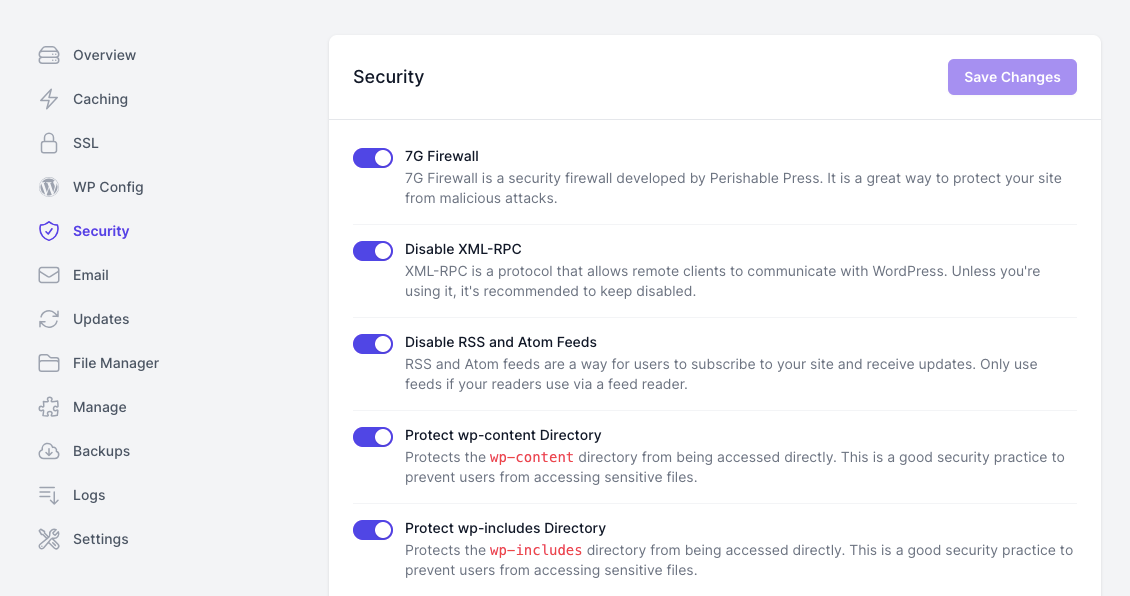
Let’s have a quick look at the important security measures you can activate using FlyWP:
- Enabling 7G firewall
- Disabling XML-RPC
- Disabling RSS and Atom feeds
- Protecting wp directories
- Disabling login, and more.
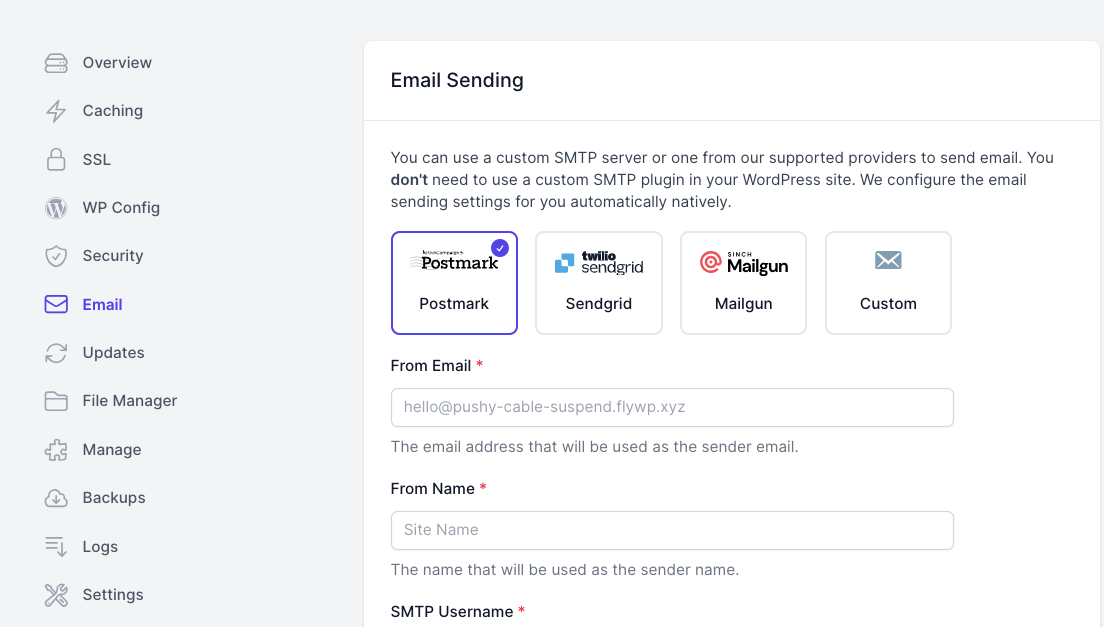
6. Enable email sending with an SMTP server
With FlyWP, you don’t need a 3rd-party SMTP plugin to send emails. Just configure your connection from the FlyWP site dashboard, all your emails will go through the configured gateway without needing an additional plugin. You can use a custom SMTP server or one from FlyWP’s supported providers including Postmark, SendGrid, and Mailgun.
7. Manage plugin and theme updates
FlyWP has a centralized place to manage all types of updates, such as WordPress core updates, theme updates, and plugin updates. Go to Updates and you’ll see the list of all active and inactive plugins and themes along with their current versions and available updates (if any). You can upgrade to the latest version from here.
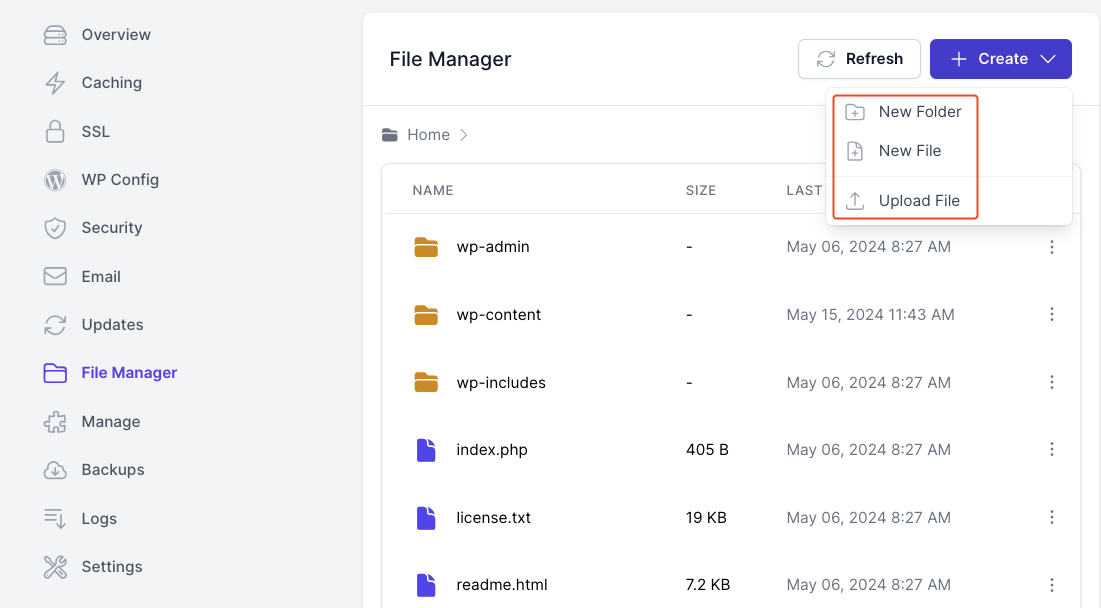
8. Manage files and folders seamlessly
You can manage all WordPress files within the FlyWP dashboard. Go to File Manager to find all available files and folders. You can create a new folder, file and upload a file from this section. Simply click on the ‘Create‘ button and choose the action you want to take. Even, you can rename or delete the existing files by accessing the three-dot menu beside each file and folder.
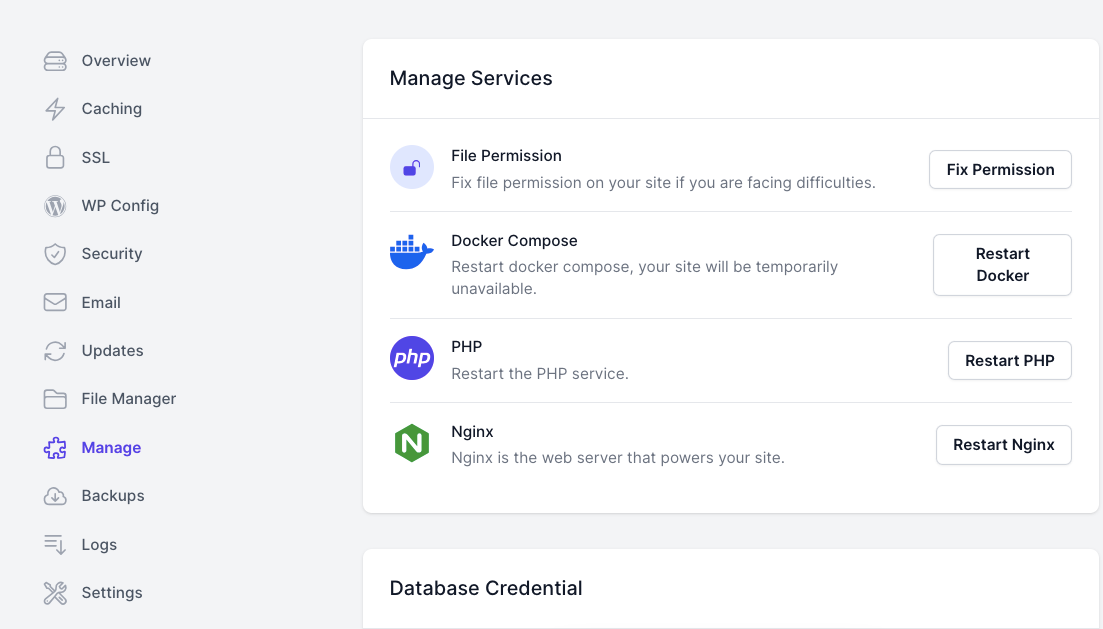
9. Manage available services and database
Navigate to the Manage section from the left side panel to manage your services such as Docker, PHP, and Nginx. Restart these services or fix file permissions on your site for optimal performance. You can also access the database credentials from this section.
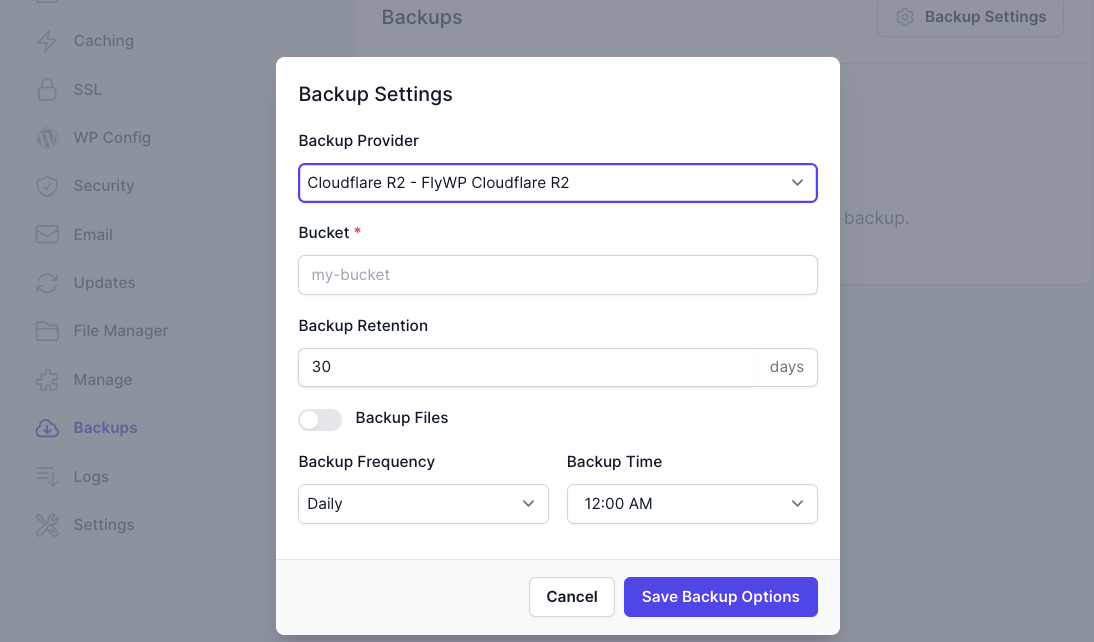
10. Configure backup settings for your site
You can manage the backups from this section. Choose from your backup provider (you need to add a backup provider beforehand), name your bucket, define backup retention days, select whether you want to backup files, and fix the backup frequency and time- then you’re ready to go. Hit the ‘Save Backup Options‘ to complete configuring.
11. Check the log file to find errors
The next option is Logs. This section has the log file where you can get comprehensive insights into any issues occurring on your website. These logs accurately document PHP errors, facilitating quick identification and resolution of problems.
12. Maintain your site with additional settings
In this section, you can configure important PHP settings and add multiple site aliases. Simply go to Settings and find the PHP Settings area to define crucial metrics like:
- PHP version
- PHP memory limit
- Max execution time
- Max file upload size
- Max input time, and more.
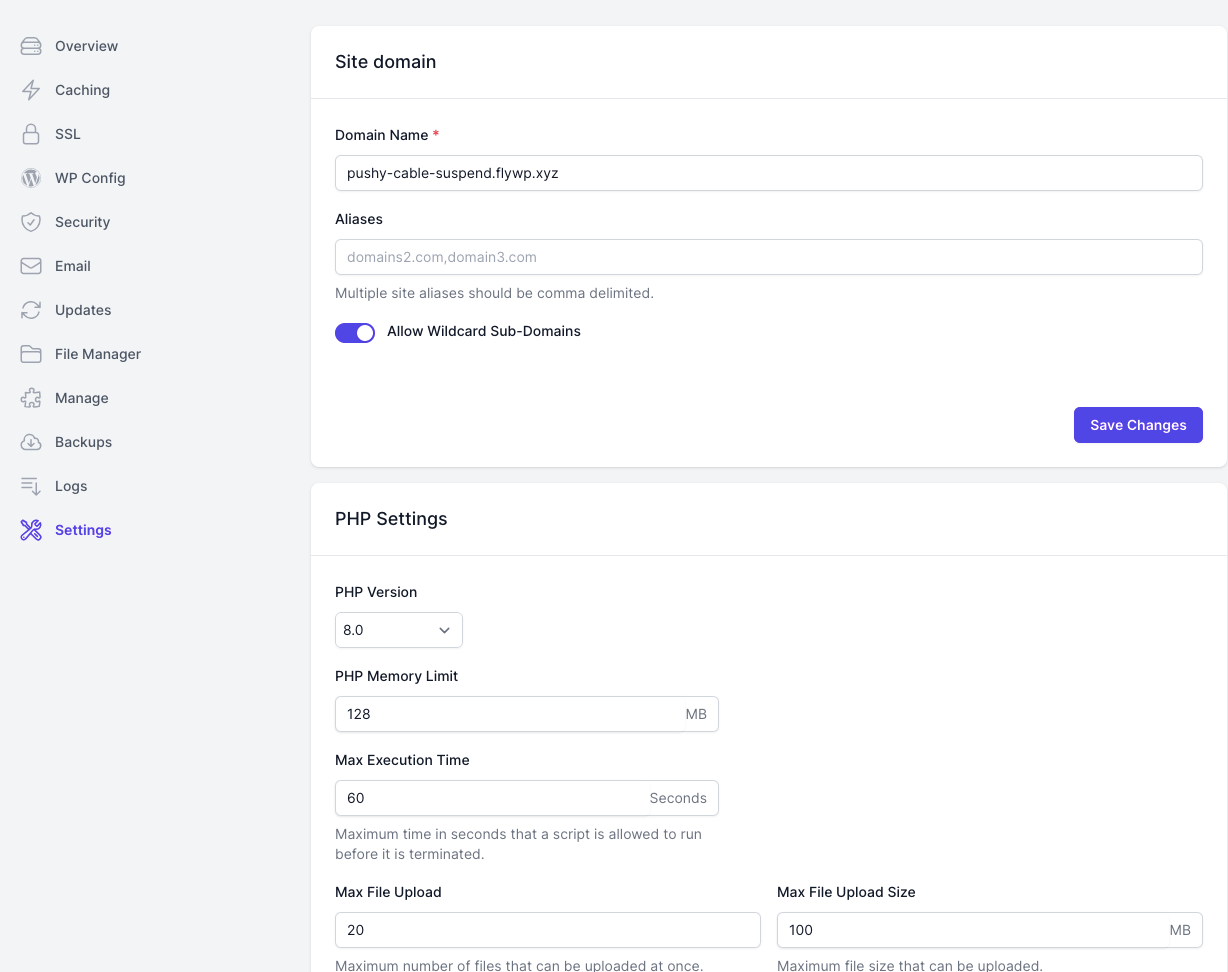
You can also clone your website for staging, testing, or server config experiments from this section. If you scroll down to the bottom of the page, you’ll also find a site deletion button.
<<< Learn how to use and configure FlyWP from documentation >>>
Explore the additional features for the admins
The above two parts were all about server and site management. Let’s explore a few additional features of FlyWP that empower the admin with the ability to add a new server, backup provider, and more.
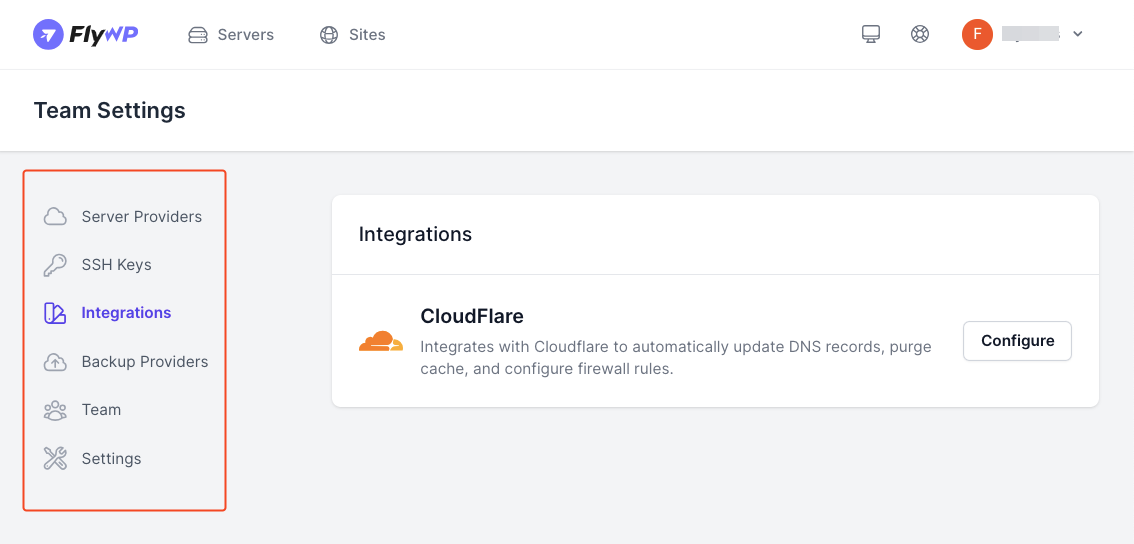
Click on the drop-down menu in the top right corner of the dashboard. Here you’ll get the list of your teams along with the settings option. Click on Settings to expand the following functions:
- Add your preferred server providers: Go to Server Providers > Add Provider.
- Add SSH keys: Add new SSH keys for every server you create.
- Integrate Cloudflare with your site: Navigate to Integrations and configure Cloudflare.
- Choose your backup provider: Go to Backup Providers > Add New Provider
- Manage your team members: Go to Team > Add New Member and define their roles.
- Edit team name and information: Rename or delete your team from Settings.
Overall, FlyWP has a very user-friendly interface that anyone with little or no technical knowledge can navigate through the platform and succeed in managing his servers and sites effortlessly.
FlyWP pricing plans: Monthly, Yearly, and Lifetime
FlyWP has plans for every type of business ranging from hobbyists and WordPress enthusiasts to large agencies requiring unlimited sites and servers. Currently, you can choose from three plans, each available on both a monthly and yearly basis. You can get two months free and save 20% with the yearly plan.

Hobby Plan: This plan is mainly for personal websites. The monthly plan is $9 and the yearly plan is $90. It comes with 1 server and unlimited sites.
Growth Plan: If you own a small business, this is the right plan. The monthly price is $19 and the yearly price is $190. You’ll get 10 servers, unlimited sites, and site backup.
Business Plan: With unlimited servers and servers, this FlyWP plan is ideal for large businesses. You’ll also get site backup and team features in this tier. The monthly plan is available at $39 and the yearly plan is available at $390.
You can also try the free plan. It includes 1 server and 1 site with all the features of the Hobby plan. You’ll need to upgrade to a subscription once the 14-day free trial ends.
Note: FlyWP offers a hassle-free money-back guarantee. You’ll get 100% refund within 14 days of purchase.
FlyWP review: Our final verdict
In our experience, we’ve realized FlyWP is all about making your WordPress management easy, secure, and efficient. It’s designed to take the stress out of server management so you can focus on what you love. With its easy-to-use features and affordable plans, FlyWP is a fantastic choice for anyone looking to simplify their WordPress experience.
So why not give FlyWP a try? You’ll see just how much easier managing your site can be. With a 14-day free trial and a money-back guarantee, there’s nothing to lose and everything to gain. Make the smart choice for your WordPress site and join the FlyWP community today.


Add your first comment to this post