Looking for a simple and easy-to-follow guide on how to install WordPress in a subdirectory? You’re in the right place. This is a clutter-free tutorial for you, devoid of any unnecessary steps.
There are many ways to install WordPress in a subdirectory. We recommend using the cPanel since it’s the most uncomplicated process.
Carefully follow the steps mentioned in this precise guide to install WordPress in your subdirectory successfully. Before diving deeper, let us show you what a subdirectory is and how it differs from a subdomain.
Quick Navigation
What Is a Subdirectory- Let’s Clear The Concept
A subdirectory is like a folder nested under the parent folder. Here, your domain is the parent directory, and any additional website created in the same domain is a subdirectory.
It usually functions as a subsection of the domain or a staging site for testing purposes.
Why would you need a subdirectory when you already have a website? We’ve answered that in a later part. Now let’s learn why we prefer creating a subdirectory rather than creating a subdomain.
Subdirectory vs. Subdomain- Are They Same?
Many people feel confused when choosing between a subdomain and a subdirectory. Both a subdirectory and a subdomain are subsections under a root directory. You will understand the difference simply by looking at the URL path.
A subdirectory shows a URL like yourdomain.com/subdirectory. And a subdomain’s URL looks like subdomain.yourdomain.com.
Subdomains work like separate websites, whereas subdirectories are considered a distinct segment of the main site.
Subdirectories are easy to optimize for search engines since they share the same domain authority as the parent websites. You should choose a subdirectory if you want to run a small website related to the niche of the main website.
On the other hand, subdomains are less SEO-friendly as you have to build the domain authority from scratch. They are preferable for bigger websites, usually unrelated to the main domain’s content.
The Bottom Line: Search engines consider subdomains as unique websites and rank their content based on the authority of the new domain, ignoring the root website. Evidently, subdirectories have the upper hand in the Subdirectory vs. Subdomain debate when it comes to SEO.
Why You May Want to Install WordPress in a Subdirectory
You have a fully functional website up and running in full swing. Then what’s the necessity to create a subdirectory on WordPress? We’ve gathered the top reasons in this section to facilitate your decision.
- Help Multilingual Audience: Suppose, you have a diverse group of audience from different language backgrounds. You can create subdirectories written in a specific language for each of them.
- Run Your eCommerce Securely: It’s wise to keep your eCommerce shop aside from other segments of the website. You can create a WordPress subdirectory and set up WooCommerce there to run your online store.
- Use Multiple CMSs Within a Single Domain: If you need to run multiple WordPress sites on the same domain, installing each in its own subdirectory (e.g.,
domain.com/blog1,domain.com/blog2) is an efficient approach. - Use The Subdirectory for Testing Purposes: You may have an amazing idea and need a staging site to conduct A/B testing. Subdirectories can be used as a testing ground without deteriorating the existing website’s health.
- Secure Your Root Directory: Keeping WordPress in a subdirectory can add a layer of obscurity, which might protect your site from certain automated attacks that target WordPress sites in the root directory.
- Leverage Domain Authority for SEO: For certain SEO strategies, having a WordPress site in a subdirectory can be beneficial. For example, if your main domain is well-established, adding a blog in a sub-directory can leverage the existing domain authority.
- Avoiding Conflicts: Installing WordPress in a sub-directory can prevent conflicts with existing scripts or applications in the root directory.
By considering these points, you can determine if installing WordPress in a sub-directory aligns with your website management strategy and goals.
Examples of Use Cases
Here are some common scenarios where this subdirectory setup might be beneficial:
Corporate Website: A company might use domain.com for their main site and domain.com/blog for their WordPress blog.
Educational Institutions: A school might have its main website on domain.com and a separate WordPress installation for a student portal or news section on domain.com/news.
E-commerce Sites: An e-commerce site might run their online store on domain.com and have a WordPress blog for content marketing on domain.com/blog.
How to Install WordPress in a Subdirectory- 7 Easy Steps
Since you’re here to learn how to install WordPress in a subdirectory, we assume you already have a website up and running with access to the cPanel. Log in to your cPanel using the credentials. Then follow the below steps cautiously to install WordPress in a subdirectory successfully at the first attempt.
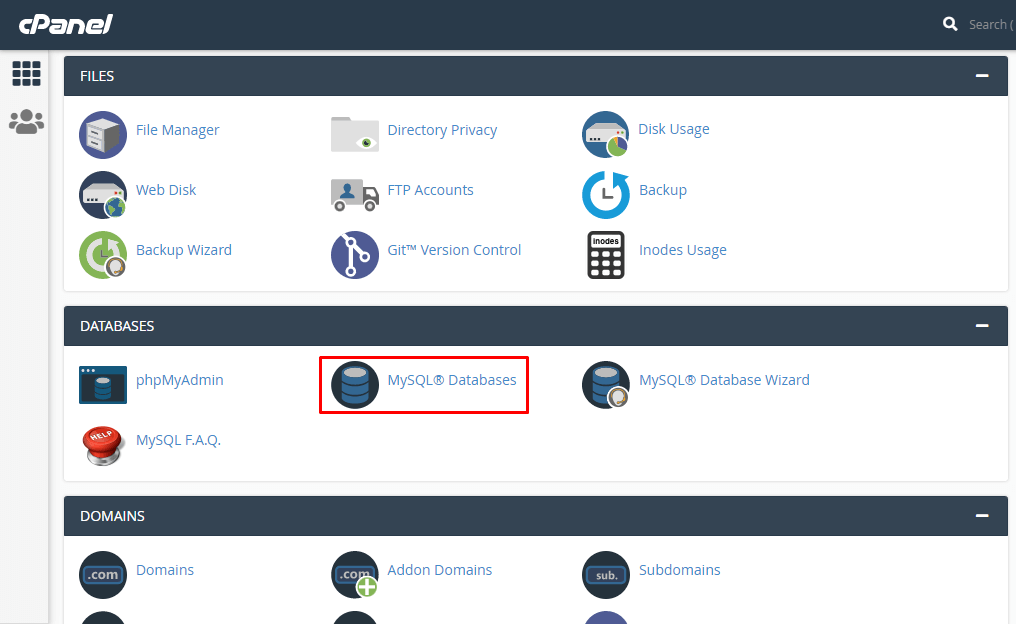
1. Create a New Database
- After logging in to the cPanel, you’ll see multiple options. Scroll down and find MySQL Databases and click on the link.
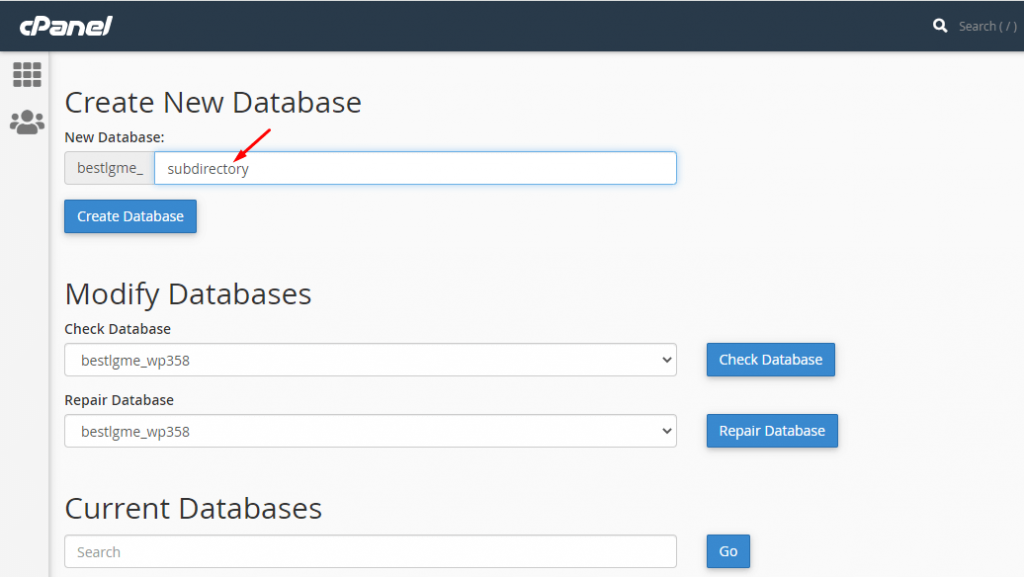
- It will lead you to a new page with options to create a new database or modify any existing database. Give a name to your database. Here we named the database as ‘subdirectory’ to help you understand better. Hit the Create Database button.
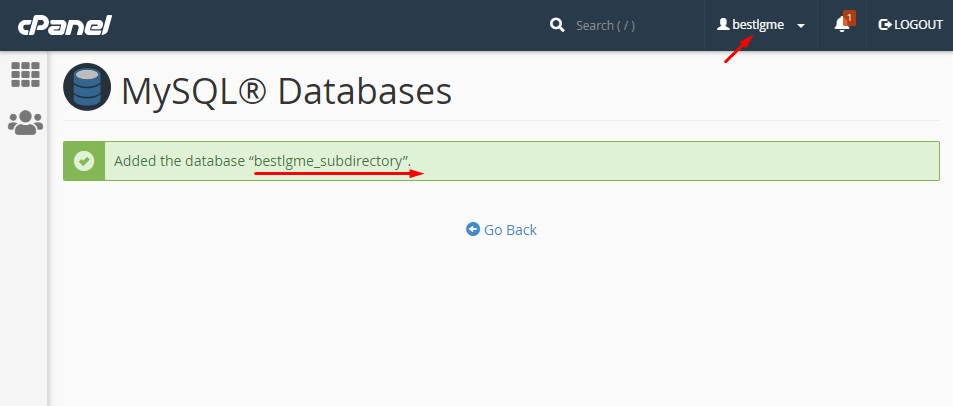
- A database will be added for you containing the username previously given by cPanel.
- Here, the cPanel username is bestIgme, so the database is bestIgme_subdirectory. You’ll need this name in further steps, so take note of this name somewhere safe.
- Now click the Go Back link.
2. Add a New User
- Scroll down the page and find the Add New User section. Give a username and choose a strong password to create a new user. You can use the default Password Generator if you want.

- Here, the username is wptutorialforyou. Now hit the Create User button, and a new username will be created for your database.

- Note down the database username (bestIgme_wptutorialforyou) and password. Go back to the previous page to add this username to the newly created database.
3. Add User to the Database
- Click on the dropdown menu to select both the new user and database for your system.
- Hit the Add button, and your database and username will be synchronized for future steps.

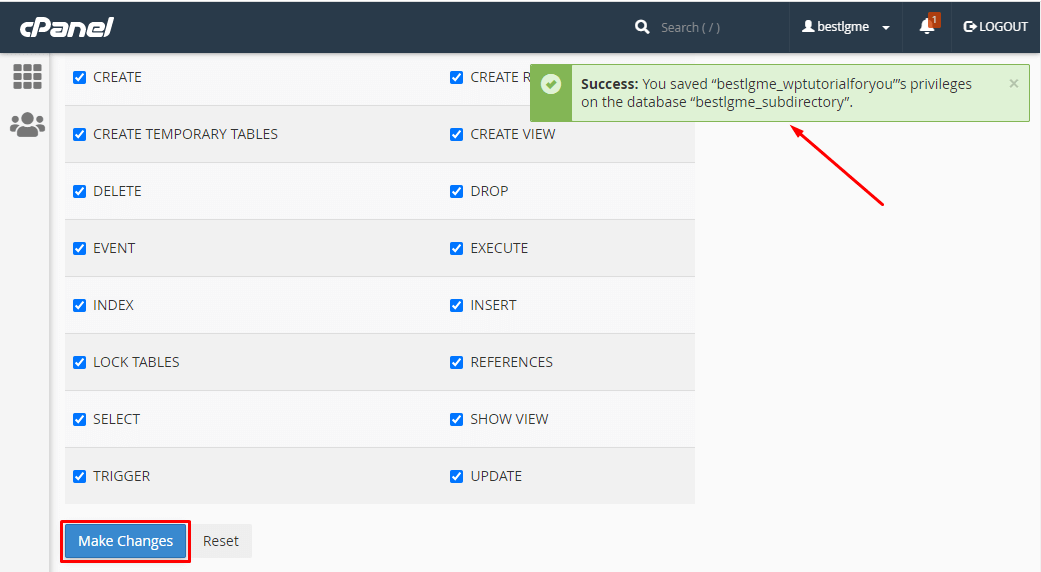
- You’ll be directed to a page with the list of user privileges for the database. Put a tick on the checkbox stating ALL PRIVILEGES.

- Then, hit the Make Changes button available at the bottom of this page. The database and user will get connected at this stage. You’ll see a success notification immediately.
- Click on the Go Back link to complete other required steps.
4. Create a New Folder Inside the File Manager
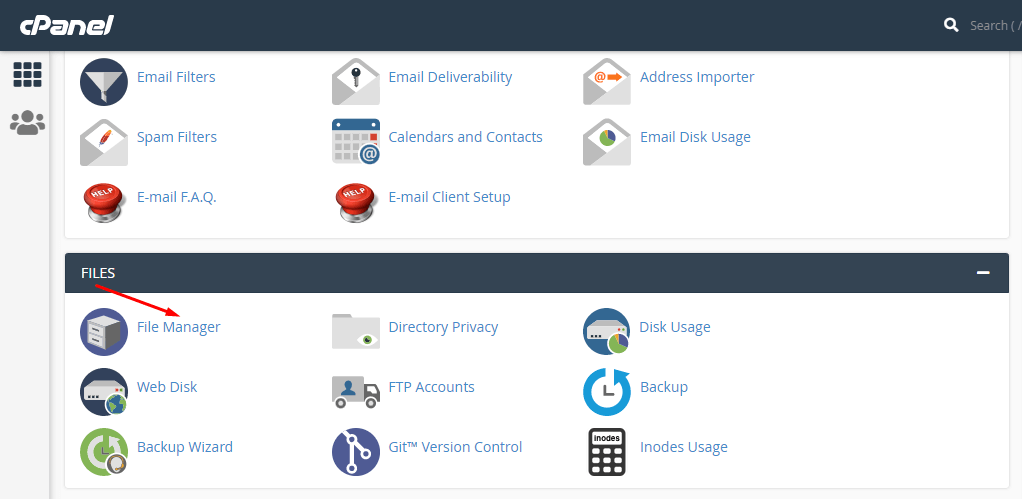
- Select the File Manager option available on the cPanel homepage. You’ll be taken to the folder comprising all files of your database.
- Click on public_html to enter the root folder of your website.

- Choose the Folder option with the + icon.

- Give a name to your folder. Be very careful when choosing this name. This is the URL that will appear just after your domain name. We chose subdirectory-test-url for this tutorial.

- You’ll see a new folder inside the root public_html, as shown in the below picture.

Interesting Fact: As we know the final URL of our Subdirectory now, let’s check if it’s available on the internet.

- You’ll be shown a 404 or 403 error at this stage. Finish the remaining steps to get a fully functional Subdirectory as intended.
5. Upload WordPress to the New Folder
If you don’t have the latest WordPress version downloaded on your computer, follow the next steps to download it.
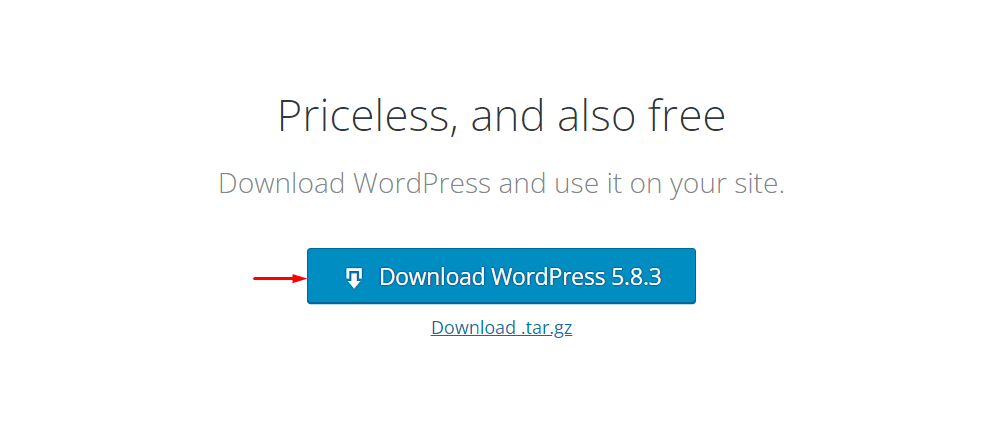
- Visit the wordpress.org website and click the Get WordPress button.

- Download the latest version available on the website. Remember the folder name where you download files on your computer. You will be required to upload it to the cPanel in the next steps.
- The new folder named subdirectory-test-url is empty now.
- You need to upload the latest version of WordPress here to add the subdirectory to the WordPress ecosystem.
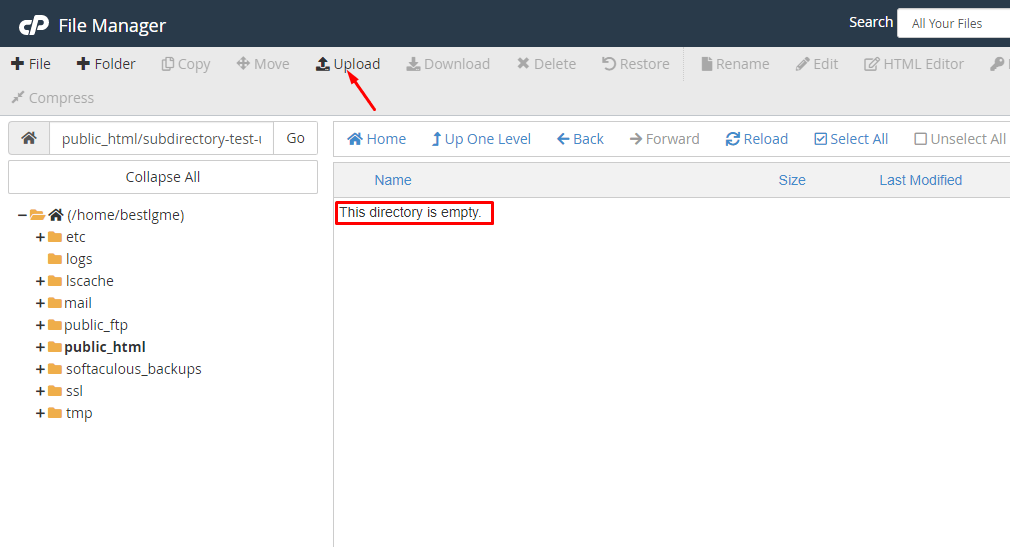
- Choose the Upload option, and you’ll be directed to an uploading page.
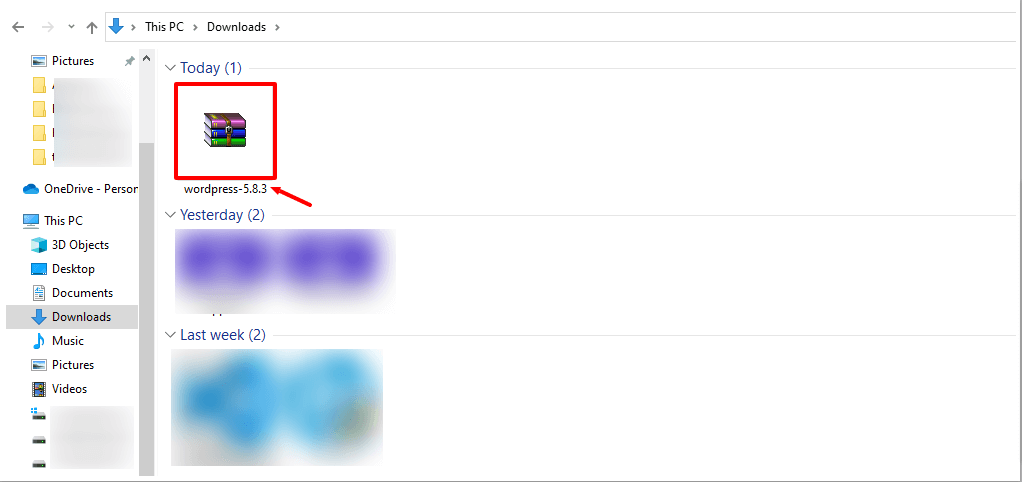
- You can easily hit the Select File button and choose the WordPress ZIP files to start uploading.

- Select the previously downloaded ZIP file and wait for the system to complete the upload process.
- Wait until the uploading progress bar reaches 100% and the color turns green.
- Then click the Go Back link to our target folder subdirectory-test-url.

6. Extract the WordPress Files
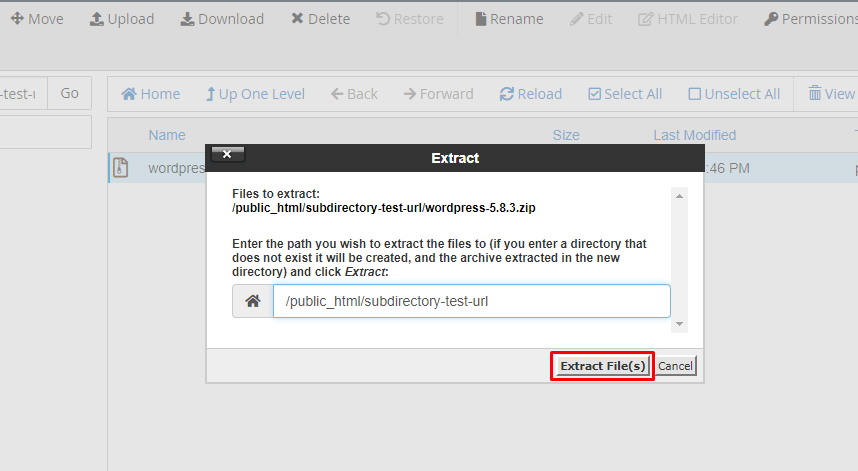
- If everything goes right, you’ll get the WordPress ZIP file ready at your disposal inside the new folder. Select the ZIP file and click on Extract to unzip the compressed files.
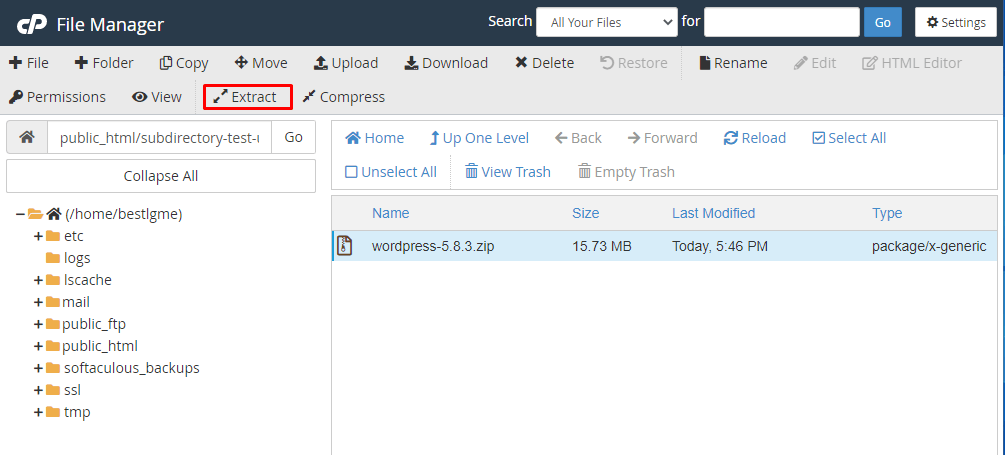
- A small wizard will pop out. Hit the Extract File(s) button to complete the extraction process.
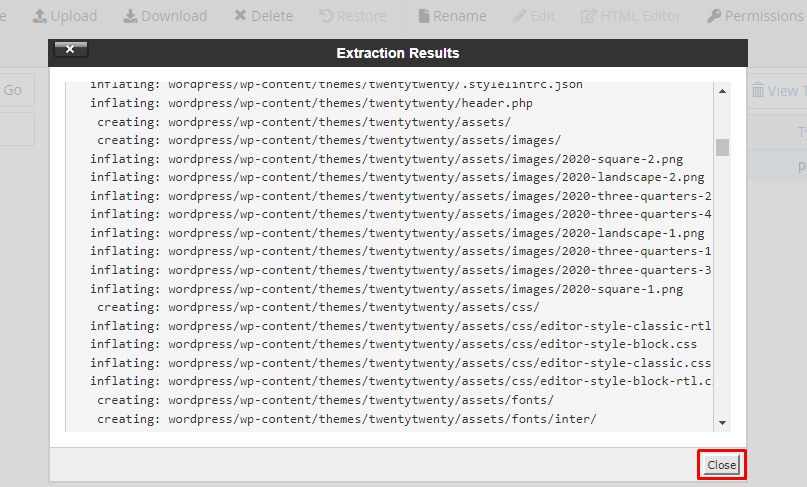
- This wizard will show you the extraction results as displayed in the picture. Click on the Close button to finish the process.
- The chances are high that you’ll see a new folder named wordpress available inside the target subdirectory folder.
- If you don’t find it automatically, click Reload to refresh the folder items.
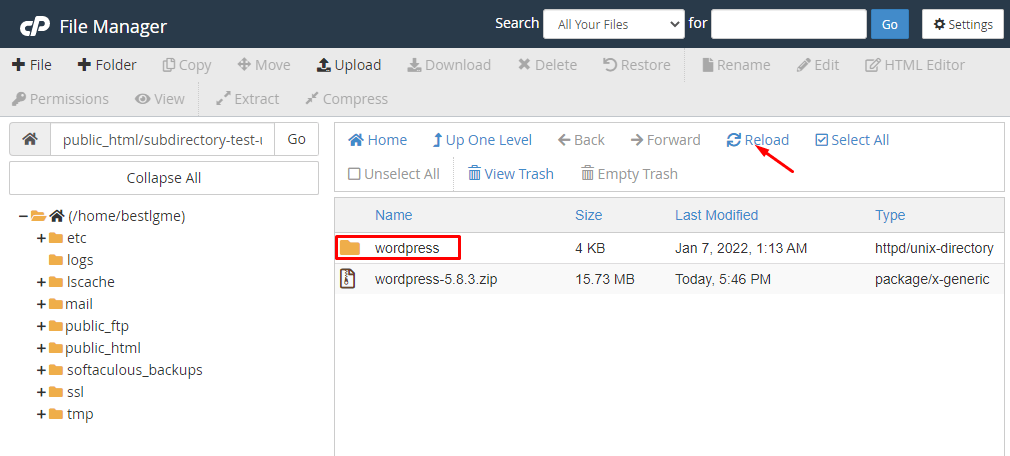
- Now click on the wordpress folder to explore the unzipped files.
- Tick the Select All checkbox and Move all files to the root folder of your subdirectory.

- Delete the wordpress portion from the file path before moving.
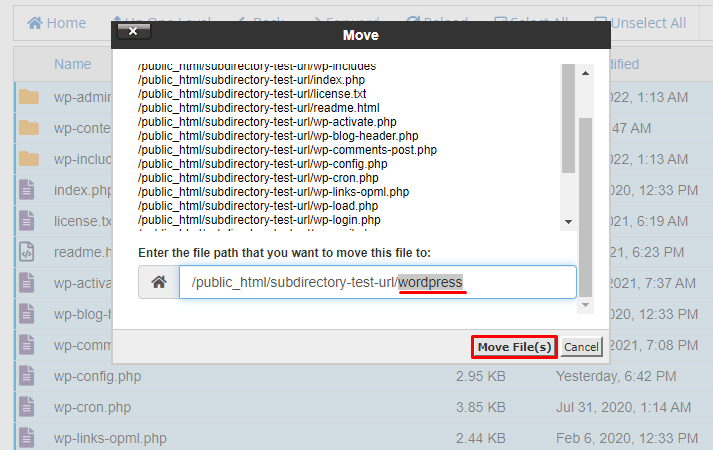
- After omitting wordpress, the file path will be like public_html/subdirectory-test-url for the subdirectory we’re creating throughout this article.
- Then, click Move File(s) to finish the process.
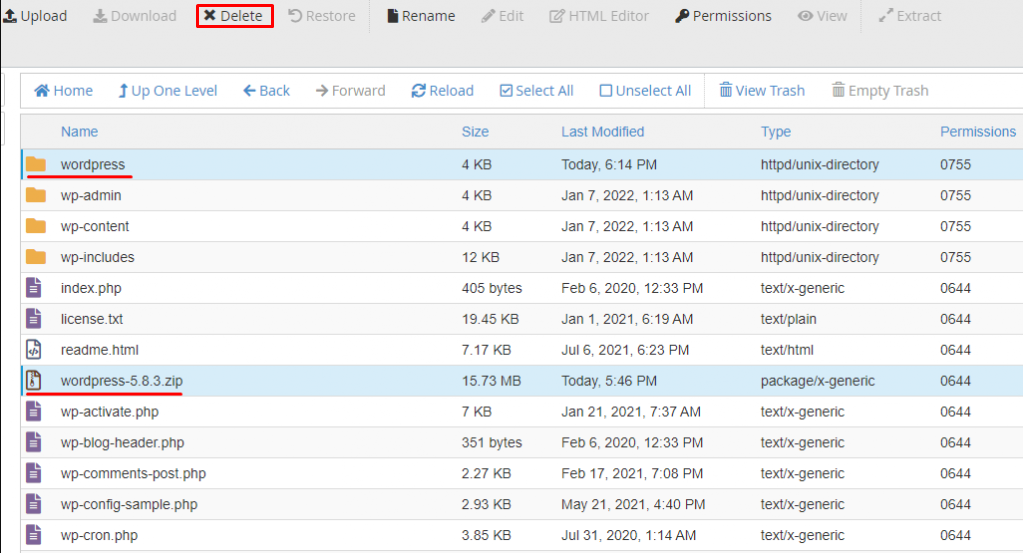
- You’ll see two folders named wordpress and wordpress-version.zip (In this case, the version is 5.8.3) once you cut the items to the desired folder.
- We don’t need these two folders anymore. So mark them and Delete them.
Add Database Info in the WP-Config Codes
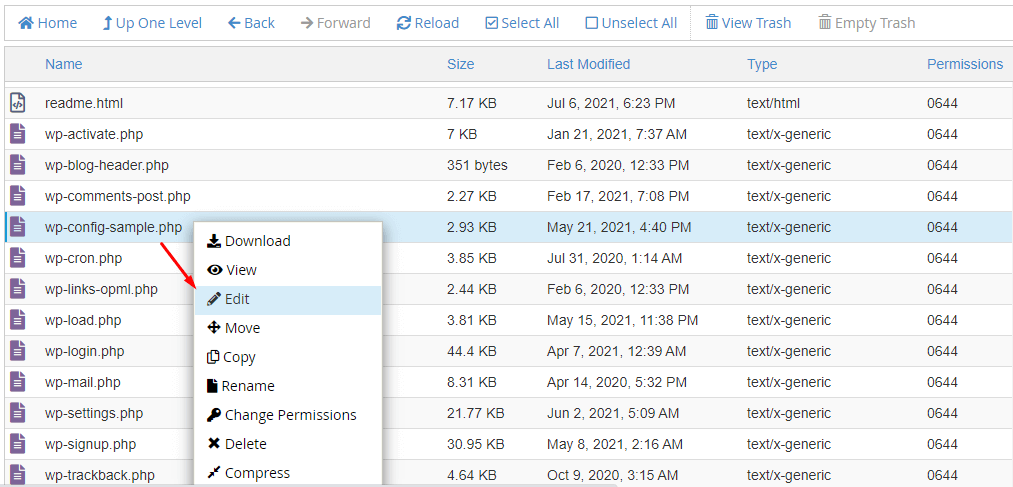
- Scroll down and right click on the wp-config-sample.php, choose the Edit option. It will lead you to the codebase of this file.
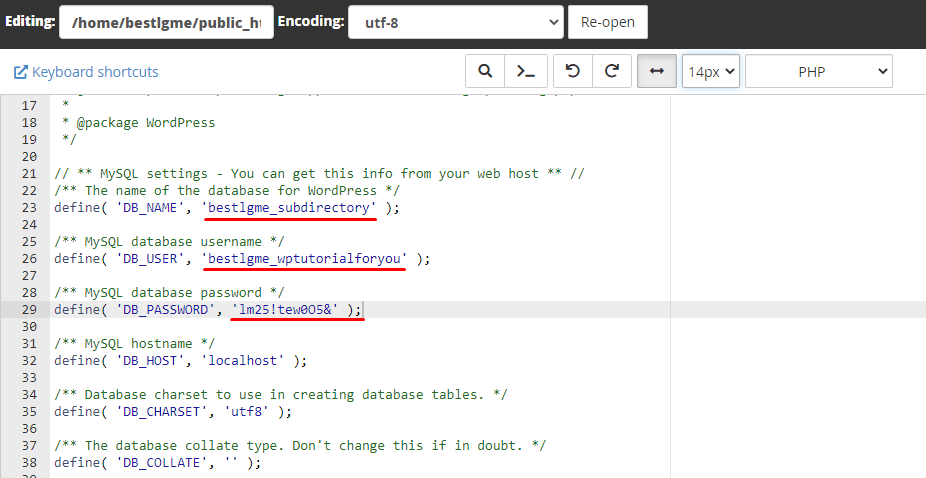
- Hope, you saved the database name, username, and password in a safe place as we did.
- Now, replace the default DB_NAME, DB_USER, DB_PASSWORD fields as provided by WordPress with your credentials.
- We used our credentials here as shown in the picture.
- You’re almost done with the background work. Rename the wp-config-sample.php file omitting -sample portion. The final config file is wp-config.php.
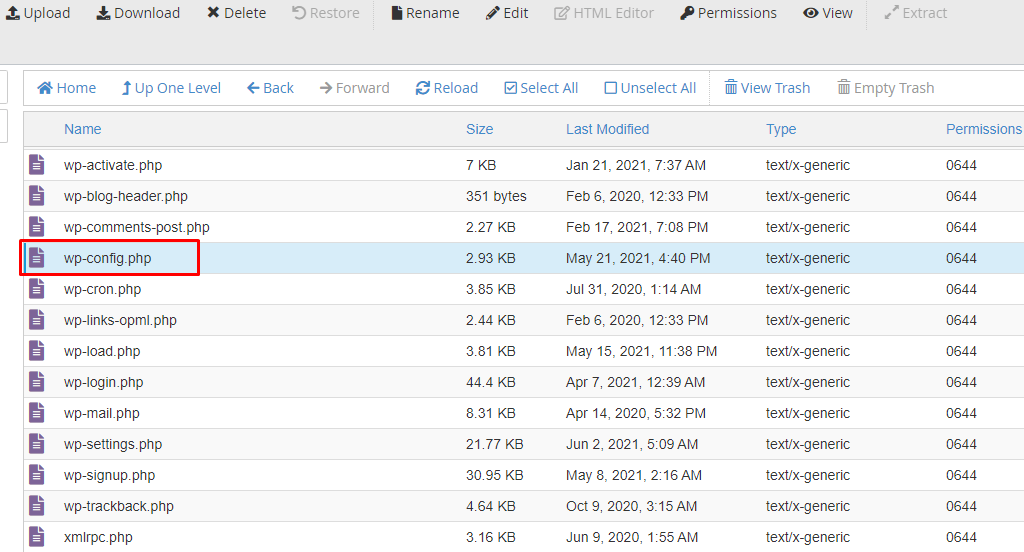
Only one step is remaining. Now you can finally install WordPress in your subdirectory without any error.
7. Install WordPress in the Subdirectory
It’s time to leave the cPanel since your work with the database is complete.
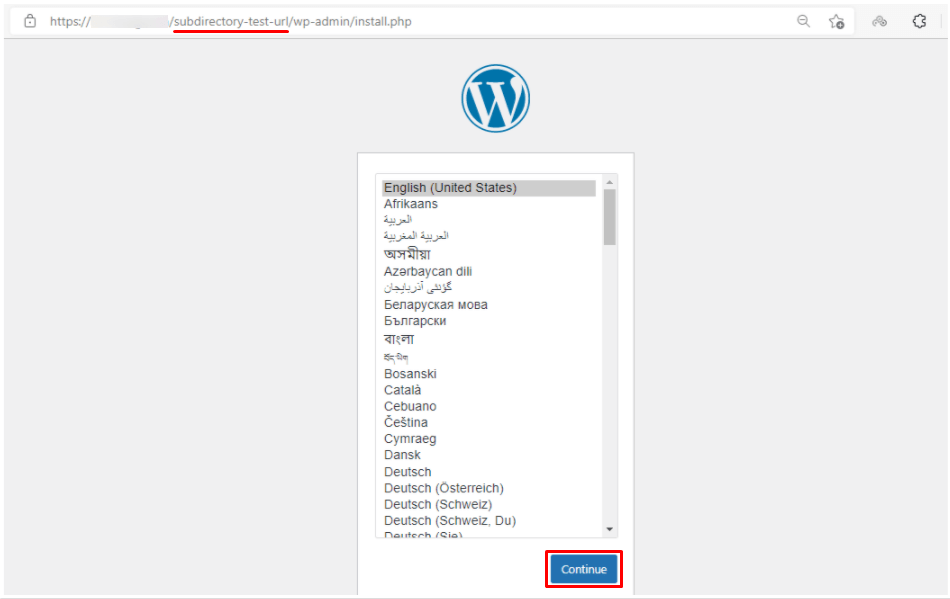
- Go to a new tab on your browser and type the URL of your subdirectory, and press enter. In our case, the URL pattern is example.com/subdirectory-test-url.
Good luck! If each of the above steps is right on point, you’ll see the WordPress installation page.
- Choose your preferred language and hit the Continue button.
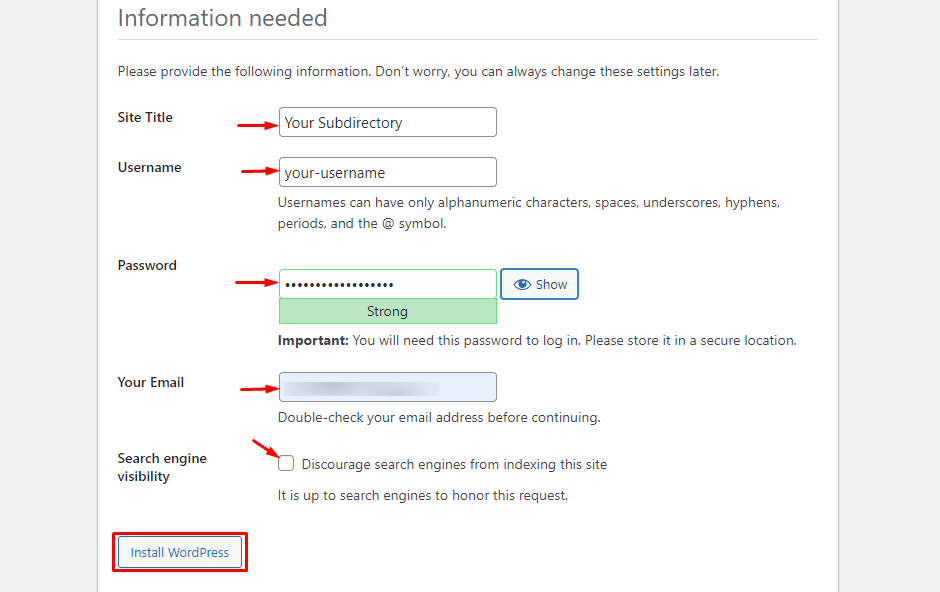
- Give a suitable Site Title, Username, and a strong Password to your WordPress subdirectory.
- Don’t forget to add a valid email to Your Email field. You can discourage search engines from indexing your subdirectory by checking the Search engine visibility option.
- Hit the Install WordPress button to reach the second phase of the installation process.
WordPress will welcome you with a Success message.
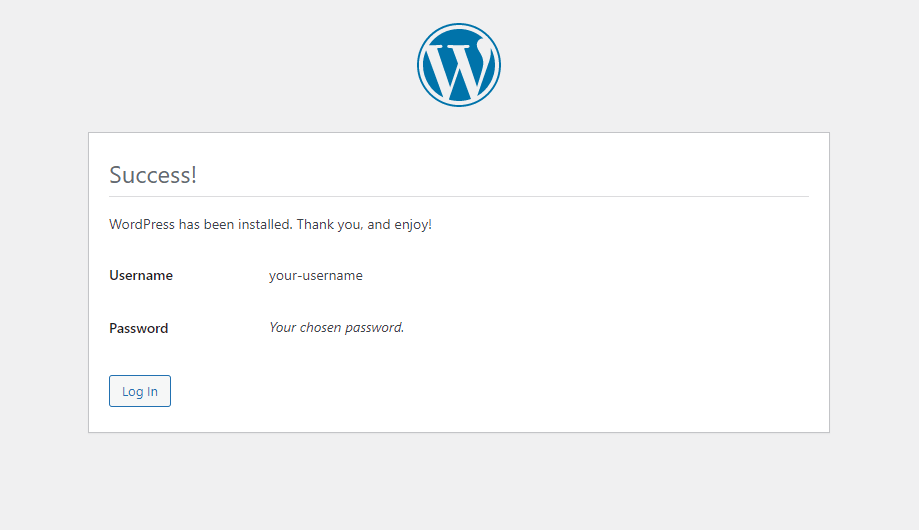
- Now log in to your dashboard by providing the username and password. We used your-username for this tutorial.
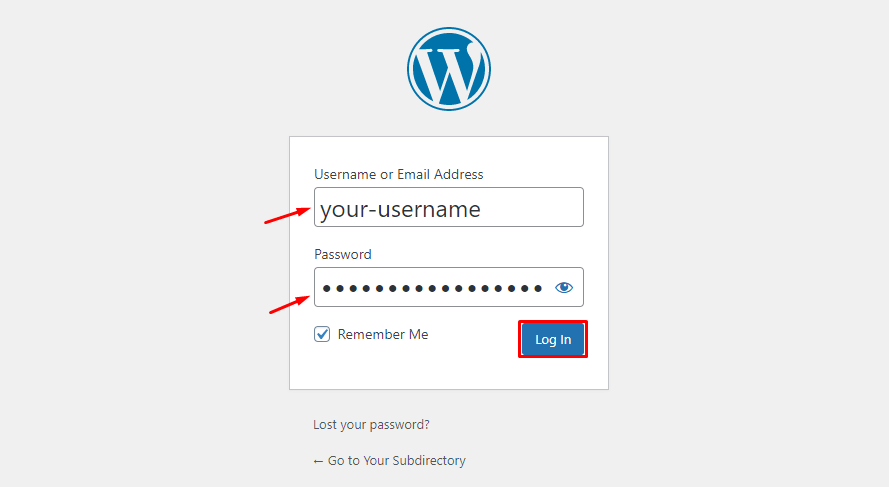
- After successfully logging in, you can access the WordPress sidebar equipped with Dashboard and other available functionalities.

- Let’s check how this subdirectory appears before the internet users. Type the correct URL on the browser and press enter. You’ll see the front end in a default WordPress theme.
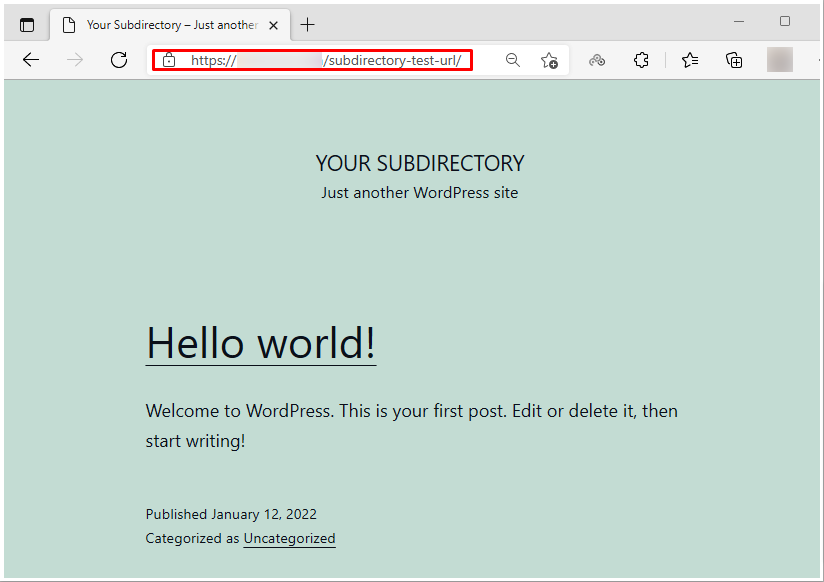
All done!
You came this far? Indeed, you deserve a pat on the back for your patience and effort. Your subdirectory based on WordPress is ready. Now you can use this WordPress subdirectory as a website.
Install necessary plugins and ensure optimal security for a hassle-free WordPress experience.
Bonus Tip – Fix Permalinks (if necessary)
We hope you don’t need this bonus tip. Your subdirectory should be up and running smoothly if created as per our instructions.
Some people may face 404 errors even after doing everything right if they have a separate WordPress installed in the root directory. In case you encounter this issue, we have given the solution beforehand. Fix the permalink issues with simple steps as follows.
1. Open the .htaccess file of your subdirectory
2. Copy the following code-
# BEGIN WordPress
<IfModule mod_rewrite.c>
RewriteEngine On
RewriteBase /your-subdirectory/
RewriteRule ^index\.php$ - [L]
RewriteCond %{REQUEST_FILENAME} !-f
RewriteCond %{REQUEST_FILENAME} !-d
RewriteRule . /your-subdirectory/index.php [L]
</IfModule>
# END WordPress
3. Replace the code available inside your .htaccess file with the copied code from the above step
4. Rename your-subdirectory field with the name of the subdirectory you’re trying to create
5. Save the changed code, and you’re ready to roll.
Moving a Root Install to Its Own Directory: The WordPress Way
If you want to follow the methods recommended by WordPress’s official development guide, this section is for you. Let’s say you’ve installed WordPress at example.com. Now you have two different methods to move wordpress installations into subdirectory:
- Without change of SITE-URL (remains
example.com) - With change in SITE-URL (it will redirect to
example.com/subdirectory)
Method I (Without URL Change)
- After Installing the wordpress in root folder, move EVERYTHING from root folder into subdirectory.
- Create a
.htaccessfile in root folder, and put this content inside (just changeexample.comandmy_subdir):
<IfModule mod_rewrite.c>
RewriteEngine on
RewriteCond %{HTTP_HOST} ^(www.)?example.com$
RewriteCond %{REQUEST_URI} !^/my_subdir/
RewriteCond %{REQUEST_FILENAME} !-f
RewriteCond %{REQUEST_FILENAME} !-d
RewriteRule ^(.*)$ /my_subdir/$1
RewriteCond %{HTTP_HOST} ^(www.)?example.com$
RewriteRule ^(/)?$ my_subdir/index.php [L]
</IfModule>
That’s all.
Method II (With URL Change)
(p.s. If you’ve already installed WP in subdirectory, some steps might be already done automatically).
- Create the new location for the core WordPress files to be stored (we will use
/wordpressin our examples). (On linux, usemkdir wordpressfrom yourwwwdirectory. You’ll probably want to usechown apache:apacheon thewordpressdirectory you created.) - Go to the General Screen. In WordPress address (URL): set the address of your main WordPress core files. Example: https://example.com/wordpress. In Site address (URL): set root directory’s URL. Example: https://example.com
- Click Save Changes. (Do not worry about the errors that happen now! Continue reading)
- Now move your WordPress core files (from root directory) to the subdirectory.
- Copy (NOT MOVE!) the
index.phpand.htaccessfiles from the WordPress directory into the root directory of your site (Blog address). The.htaccessfile is invisible, so you may have to set your FTP client to show hidden files. If you are not using pretty permalinks, then you may not have a .htaccessfile. If you are running WordPress on a Windows (IIS) server and are using pretty permalinks, you’ll have aweb.configrather than a.htaccessfile in your WordPress directory. For theindex.phpfile the instructions remain the same, copy (don’t move) the index.php file to your root directory. Theweb.configfile, must be treated differently than the.htaccessfile so you must MOVE (DON’T COPY) theweb.configfile to your root directory. - Open your root directory’s
index.phpfile in a text editor - Change the following and save the file. Change the line that says:
require dirname( __FILE__ ) . '/wp-blog-header.php';to the following, using your directory name for the WordPress core files:require dirname( __FILE__ ) . '/wordpress/wp-blog-header.php'; - Login to the new location. It might now be https://example.com/wordpress/wp-admin/
- If you have set up Permalinks, go to the Permalinks Screen and update your Permalink structure. WordPress will automatically update your
.htaccessfile if it has the appropriate file permissions. If WordPress can’t write to your.htaccessfile, it will display the new rewrite rules to you, which you should manually copy into your.htaccessfile (in the same directory as the mainindex.phpfile.)
.htaccess modification
In some cases, some people like to install separate versions in a subdirectory (such as /2010, /2011, /latest and etc..), and want that website (by default) used the latest version, then Install WordPress in a subdirectory, such as /my_subdir and in your root folder’s .htaccess file add the following (just change the words as you need):
RewriteEngine On
RewriteCond %{HTTP_HOST} ^(www.)?example.com$
RewriteRule ^(/)?$ my_subdir\[L\]
Now when users go to your root domain (example.com), it will automatically redirect to the subdirectory you specified.
Here’s the rewritten tutorial for installing WordPress in a subdirectory via WP-CLI, ensuring 100% accuracy:
Install WordPress in a Subdirectory with WP-CLI
This method is for developers who love to code. WP-CLI offers a powerful alternative to FTP for installing WordPress in a subdirectory. It allows managing WordPress through commands in a terminal window. Before you begin:
- WP-CLI Installation: Ensure you have WP-CLI installed on your server. Refer to the official WP-CLI website https://make.wordpress.org/cli/handbook/guides/installing/ for installation instructions.
- Database Creation: You’ll need a database to store WordPress data. This can be created through your web hosting control panel or a MySQL management tool.
Step 1: Download WordPress Core: Open your terminal and use the following command to download WordPress core files: wp core download [--path=path_to_your_folder] The --path argument (optional) specifies the download folder. If omitted, files download to the current directory.
Step 2: Navigate to Download Directory: Use the cd command to change the directory to where you downloaded the files: cd path/to/your/download/folder Replace “path/to/your/download/folder” with the actual path.
Step 3: Create wp-config.php and Set Up Database Credentials: Run the following command to create the wp-config.php file and configure your database credentials: wp config create --dbname=your_database_name --dbuser=your_username --dbpass=your_password --locale=en_US --extra-salt="unique_salt_phrase"
Replace the placeholders with your actual database information and a strong, unique salt phrase.
Step 4: Install WordPress: Execute the following command to initiate the installation process:wp core install --url=your_website_url/subdirectory --title="Your Site Title" --admin_user=your_username --admin_password=your_password [email protected]
Replace the placeholders with your desired website URL (including the subdirectory name), site title, username, password, and email address.
Additional Configuration:
After installation, perform these steps for proper subdirectory functionality:
Update WordPress Address (URL): Log in to your WordPress admin dashboard. Navigate to Settings > General. In the WordPress Address (URL) and Site Address (URL) fields, enter the complete URL of your WordPress installation, including the subdirectory.
Copy Index.php and .htaccess: Copy the index.php and .htaccess files from your subdirectory to the main web root directory of your website.
Modify Root Directory’s index.php: Open the root directory’s index.php file in a text editor. Locate the line that reads require __DIR__ . '/wp-blog-header.php';
Change it to reflect the path of your subdirectory, for example: require __DIR__ . '/wordpress/wp-blog-header.php'; (replace “wordpress” with your actual subdirectory name).
This process ensures WordPress functions correctly within your designated subdirectory while still allowing access through the main domain URL.
Top Challenges with Installing WordPress in Subdirectories
These are just a few common issues users may face when installing WordPress in a sub-directory. Most of them can be resolved by carefully following installation instructions, double-checking configurations, and troubleshooting step by step. Here are a few of them:
- File Permission Errors: If your file permissions aren’t set correctly, WordPress may struggle to access necessary files or write to the filesystem during installation.
- Database Connection Issues: Incorrect database credentials or misconfigurations can lead to database connection errors during the installation process.
- .htaccess Configuration Problems: Issues with configuring the
.htaccessfile for URL rewriting and pretty permalinks can result in 404 errors or incorrect redirections. - Sub-directory Access Restrictions: Some server configurations may restrict access to files within sub-directories, causing installation failures or issues with accessing the WordPress site.
- Base URL Mismatch: Forgetting to update the base URL in WordPress settings after installing it in a sub-directory can lead to broken internal links and redirects.
- Conflict with Existing Files: If there are conflicting files or directories with the same names as those used for WordPress installation, it can cause installation failures or unexpected behavior.
- File Upload Limits: Hosting environments may impose limits on file upload sizes, causing issues when uploading WordPress installation files via FTP.
- Memory Limit Exceeded: WordPress may require more memory than allocated by default on some hosting environments, leading to errors related to memory limit exceeded during installation.
- Plugin or Theme Compatibility: After installation, you may encounter compatibility issues with plugins or themes, especially if they are outdated or conflicting with each other.
- DNS Propagation Delays: If you’ve recently pointed your domain to a new hosting server or changed DNS settings, DNS propagation delays can temporarily prevent access to the WordPress site.
Final Thought
Installing WordPress in a sub-directory can offer numerous benefits, such as better organization, enhanced security, and flexibility for managing multiple sites. However, it’s important to be aware of potential challenges you may face during the installation process.
You can troubleshoot effectively and ensure a smooth setup by understanding common issues like file permission errors, database connection problems, and .htaccess configuration issues. Always double-check your configurations, follow best practices, and don’t hesitate to seek help from the experts.
With careful planning and attention to detail, you can successfully install and run WordPress in a sub-directory, leveraging its full potential for your website.
Subscribe to our blog, and follow our Facebook and Twitter handles for more WordPress tutorials, news, articles, deals, reviews, and more.