Running a WooCommerce store can be exciting, but tracking results can feel confusing. You put so much effort into marketing, but are people actually buying or taking any action? That’s where you may need Pixel Manager for WooCommerce to track data for e-commerce businesses.
It connects to many different channels. Some of the benefits of Pixel Manager are accurate data tracking, automatic conversion recovery, and a 30-day money-back guarantee. In this Pixel Manager for WooCommerce review, we’ll share how it can help you see exactly what’s working (and what’s not) in your store!
Quick Navigation
A Brief Introduction to Pixel Manager for WooCommerce
Developed by SweetCode, a company passionate about making online advertising profitable, Pixel Manager simplifies the process of gathering accurate data on your store’s performance. This user-friendly plugin doesn’t require any coding knowledge to set up and integrates seamlessly with popular advertising platforms like Google Ads, Facebook Ads, and more.
SweetCode’s commitment to user experience is evident in its excellent support, comprehensive documentation, and focus on easy installation. It helps you optimize your ads and maximize your return on investment (ROI). So, eliminate the guesswork and take control of your advertising with Pixel Manager for WooCommerce.
Pixel Manager by the Numbers:
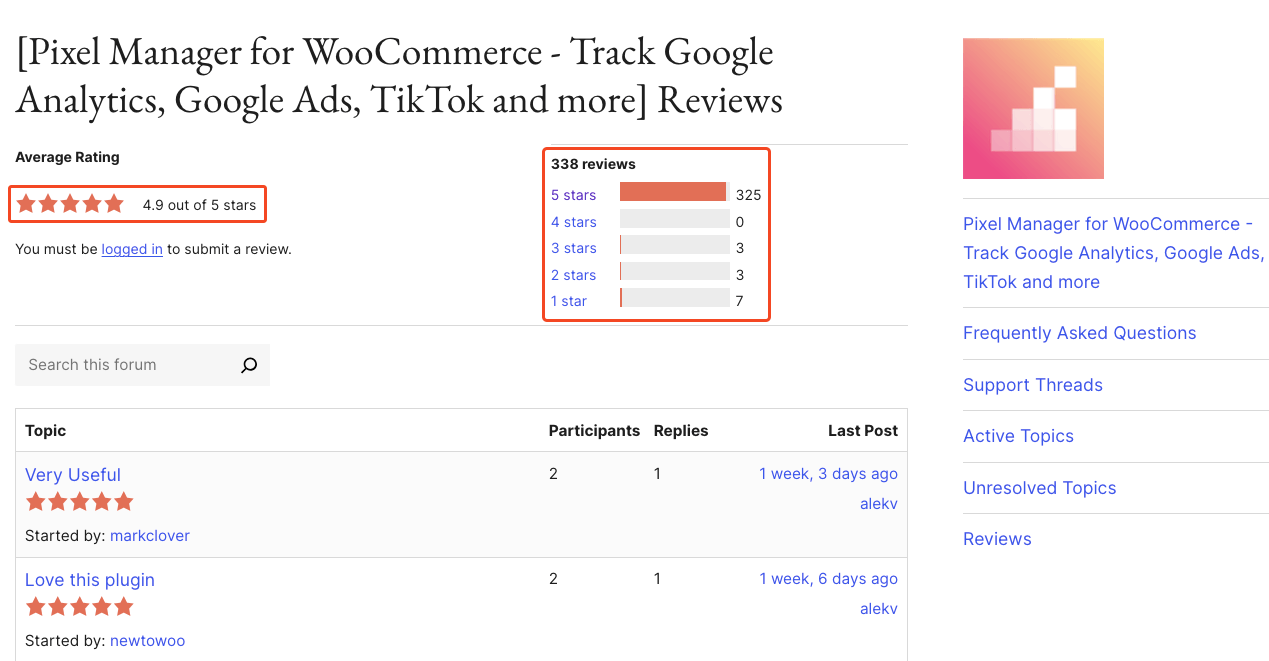
- 4.9 out of 5 stars: People love Pixel Manager and rated it very positively on WordPress Org.
- Less than 24-hour Response Time: SweetCode boasts exceptional customer support, ensuring your questions are answered promptly.
- 2,000,000+ Downloads: Millions of users downloaded Pixel Manager to optimize their WooCommerce advertising.
- 50,000+ Daily Users: Pixel Manager has more than 50k active installations according to the WordPress repository.
Let’s have a look at the key features that nudged too many people to use Pixel Manager to track data for their online campaigns.
Pixel Manager for WooCommerce Review: Features and Benefits
Whether you want to track conversions, analyze user behavior, or optimize your ads, Pixel Manager has the tools you need. The plugin is constantly evolving, with new features (and even beta features) added regularly. Let’s have a look at the major features and benefits of Pixel Manager.
1. Easy Integration with Platforms
With Pixel Manager, you’ll gain a holistic view of your advertising performance across various channels. As a result, these pixels connect your WooCommerce data to conversion reports on a wide range of platforms, including:
- Search Engines: Google Ads, Microsoft Ads
- Social Media: Meta (Facebook) Ads, Twitter Ads, Pinterest Ads, Snapchat Ads, TikTok Ads
- Analytics: Google Analytics, Hotjar
- And More to Come!
2. Explicit Consent Management

For those operating in regions with stricter privacy regulations like GDPR and CCPA, the pro version of Pixel Manager offers additional features to ensure compliance. One such feature is the Explicit Consent Mode, which disables tracking pixels until a visitor explicitly consents to be tracked. This caters to the growing need for user privacy control in online advertising.
3. Data Tracking Accuracy
At the core of Pixel Manager’s value proposition lies its focus on accurate data tracking. Inaccurate data can lead to misleading insights and wasted advertising spending. Pixel Manager addresses this concern by ensuring your reports reflect the true performance of your WooCommerce store. This eliminates the risk of human error during manual setup, which can lead to data inconsistencies.
4. User-Friendly Design
Pixel Manager understands that complex tracking shouldn’t mean a complicated user experience. That’s why the plugin is designed with simplicity and ease of use in mind. The user interface is clean and intuitive. It allows you to set up and manage your tracking pixels without any coding knowledge. We’ll show you how you can use this plugin in the later section of this review.
5. Continuously Evolving with a Clear Roadmap
The developers at SweetCode are committed to staying ahead of the curve by actively adding new features and functionalities. You can see it in their public roadmap, which provides users with a transparent view of upcoming features. This allows you to stay informed about potential improvements that could further enhance your tracking capabilities.
6. Automatic Conversion Recovery (ACR)
While Pixel Manager excels at accurate data tracking, there can be instances where purchases aren’t captured due to technical limitations or browser settings. This can lead to missed conversions and an unclear understanding of your advertising performance. No matter the reason for a missed conversion, ACR helps capture the sale the next time the customer visits your store.
7. Proactive Optimization Suggestions
Pixel Manager goes beyond simply providing accurate data; it actively helps you improve your tracking performance. The plugin utilizes an intelligent feature called Opportunities. This built-in scanner automatically detects potential areas where you can optimize your tracking setup for even better results. This feature demonstrates Pixel Manager’s commitment to providing a tracking tool and being a partner in your e-commerce success.
How to Use Pixel Manager for WooCommerce
1. Buy a Plan or Start a Free Trial
You can start with the Pixel Manager free plugin to explore the features initially. Simply go to the official SweetCode website and choose the FREE trial. You can also buy the paid version of the plugin. Pixel Manager offers several pricing tiers to accommodate different needs:
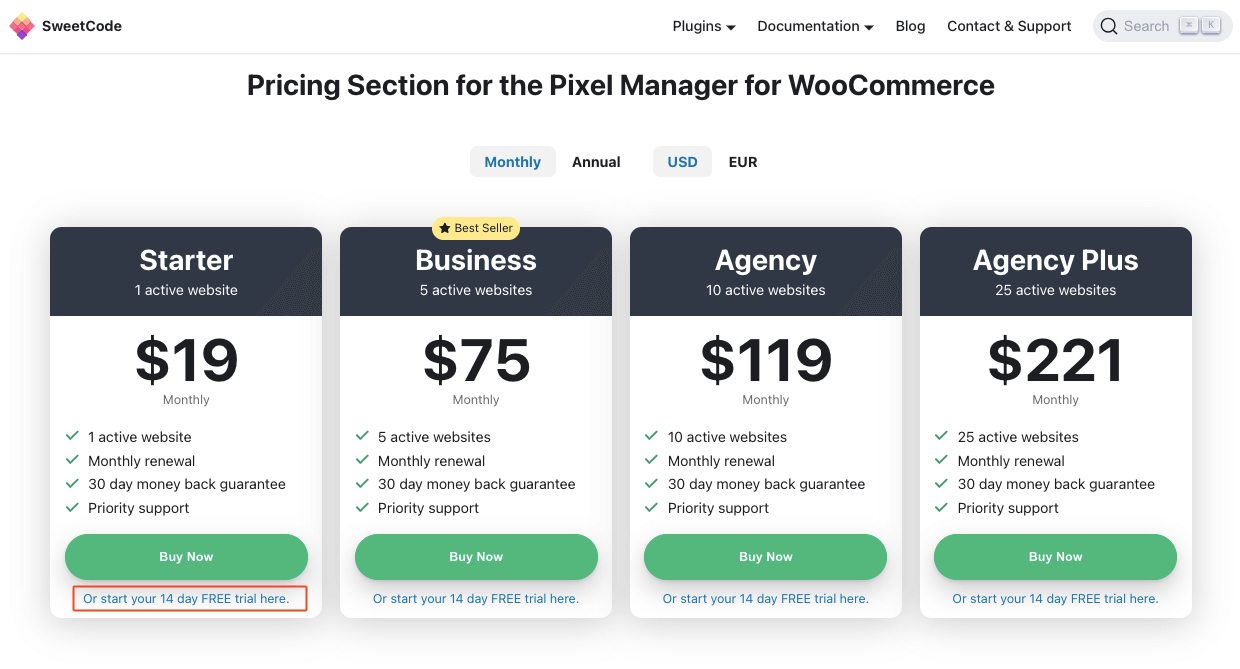
- Starter: $19/month for 1 active website.
- Business: $75/month for 5 active websites.
- Agency: $119/month for 10 active websites.
- Agency Plus: $221/month for 25 active websites.
Each plan includes priority support and a 30-day money-back guarantee, making it a risk-free investment. So, buy the one that suits your purposes. Follow this guide on installing a plugin on WordPress if you need further guidance.
2. Provide the Conversion ID and Other Credentials
Once you have the plugin installed and activated on your WordPress, navigate to Pixel Manager > Main to configure the ad conversion settings. Provide the necessary pieces of information as required.
The free version tracks only Google Ads Conversion ID, Google Ads Purchase Conversion Label, and Meta (Facebook) pixel ID. You need to upgrade to the next tier to track other platform’s ads. We’ve used the Google Ads ID for this tutorial. Let’s see how you can get this data:
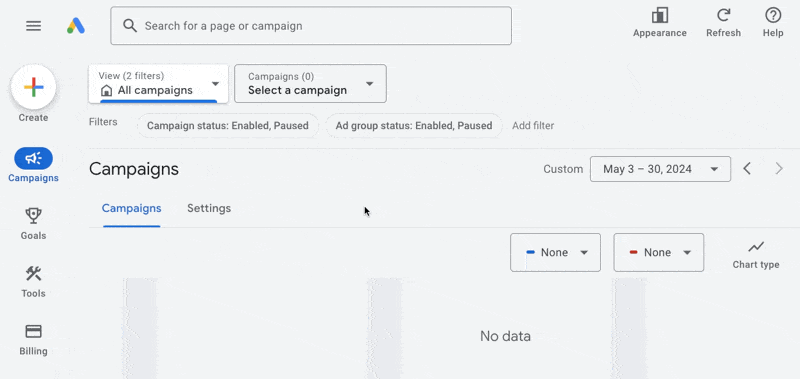
- Log in to your Google Ads account.
- Hit the (+) create icon to initiate a new conversion action
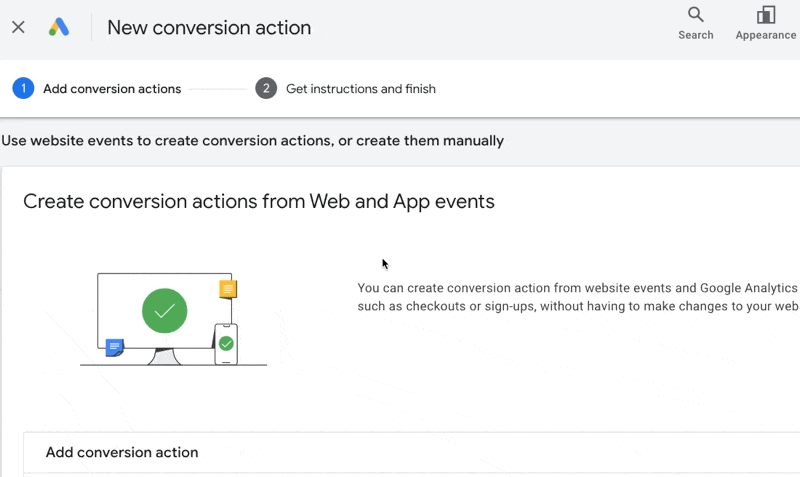
- Select Website from the next page
Then, write the URL for the website where you want to track and measure conversions. Hit the Scan button then press Save and continue if needed. The scanning should lead you to the next steps.
Upon successful scanning, you’ll get two options to track the conversions. Choose the latter one that lets you create conversion actions manually using code. Hit the Add a conversion action manually button to go to the next step.
Now, it’s time to select the goal, and conversion name, assign a conversion value, and define the conversion count for the conversion action. This will help you measure the conversions in the next step of the advertising. Configure the options as per your needs and Save the changes.
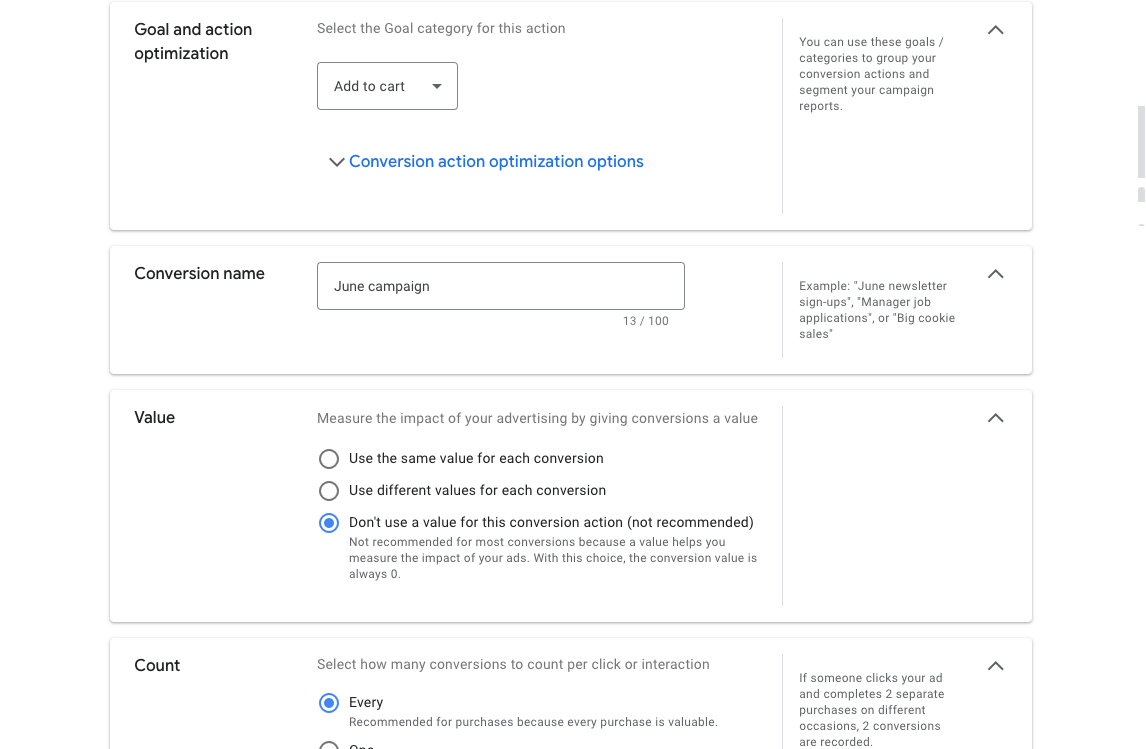
At this step, you’ll get the conversion ID and conversion labels for the conversion actions you’ll be creating. You can also use Google Tag Manager to make sure the actions fire properly on all of your web pages.
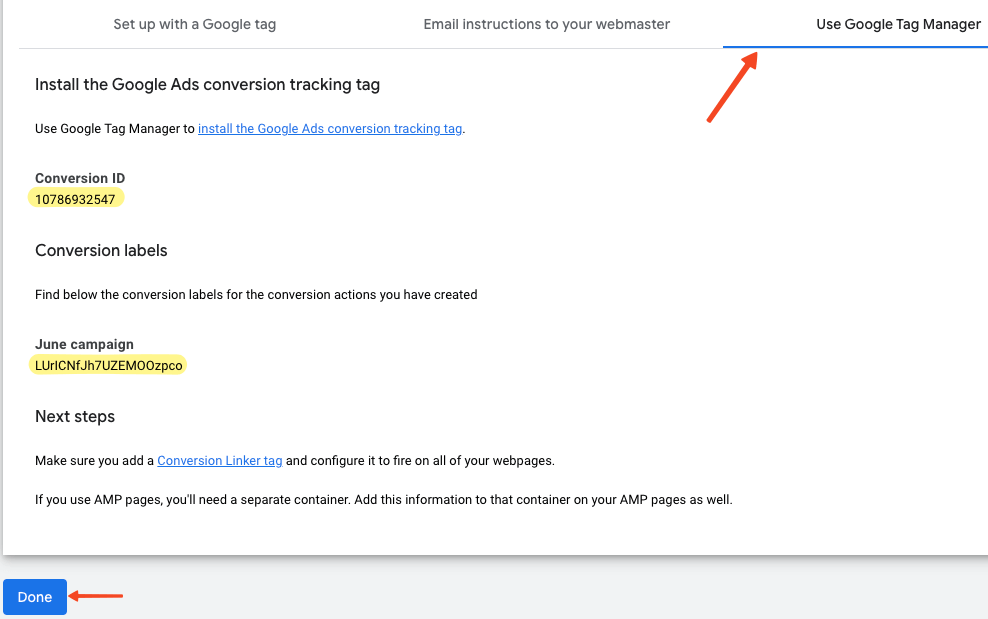
However, now you have the credentials to use in the Pixel Manager plugin as we used at the beginning of this second step of the tutorial part.
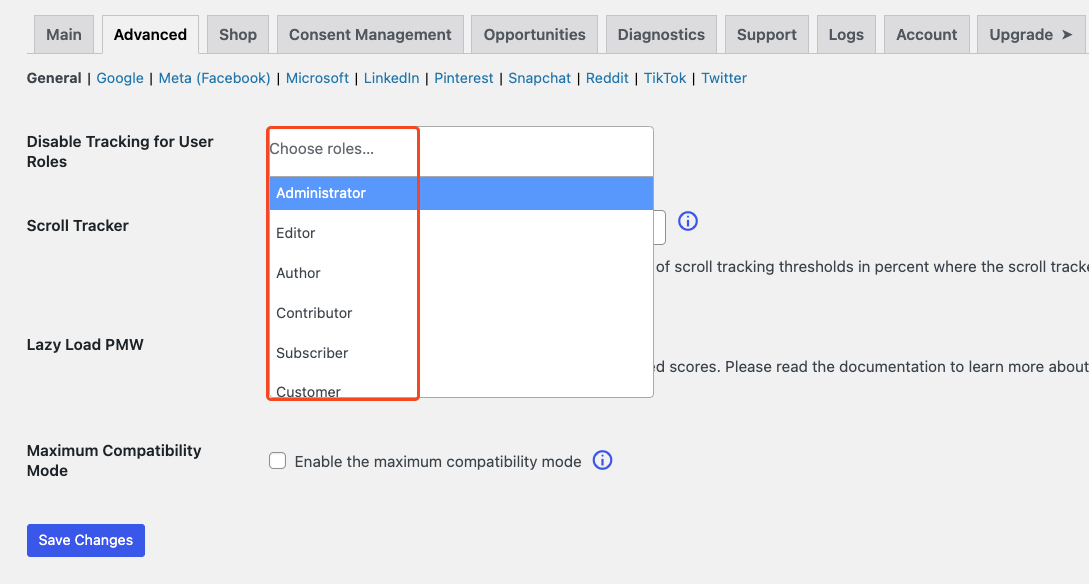
3. Configure the Advanced Settings
The Advanced tab lets you disable tracking for users based on their roles. You can also enable Lazy Load from this section. Enabling this feature will give you better page speed scores.
4. Explore the Shop Tab and Choose Your Settings
Go to the Shop tab for more specified settings menus. Some important options are as follows:
- Order subtotal and order total
- Product identifiers
- Order duplication prevention
- Lifetime value calculation on orders
- Automatic conversion recovery (ACR)
Configure these options according to your needs while running ads and tracking conversions.
5. Comply to GDPR and Other Regulations
You need to ask for permission before using any customer data. This is the basis of GDPR and other relevant regulations. Pixel Manager addresses this issue and lets you enable explicit Consent Mode for your conversion tracking.
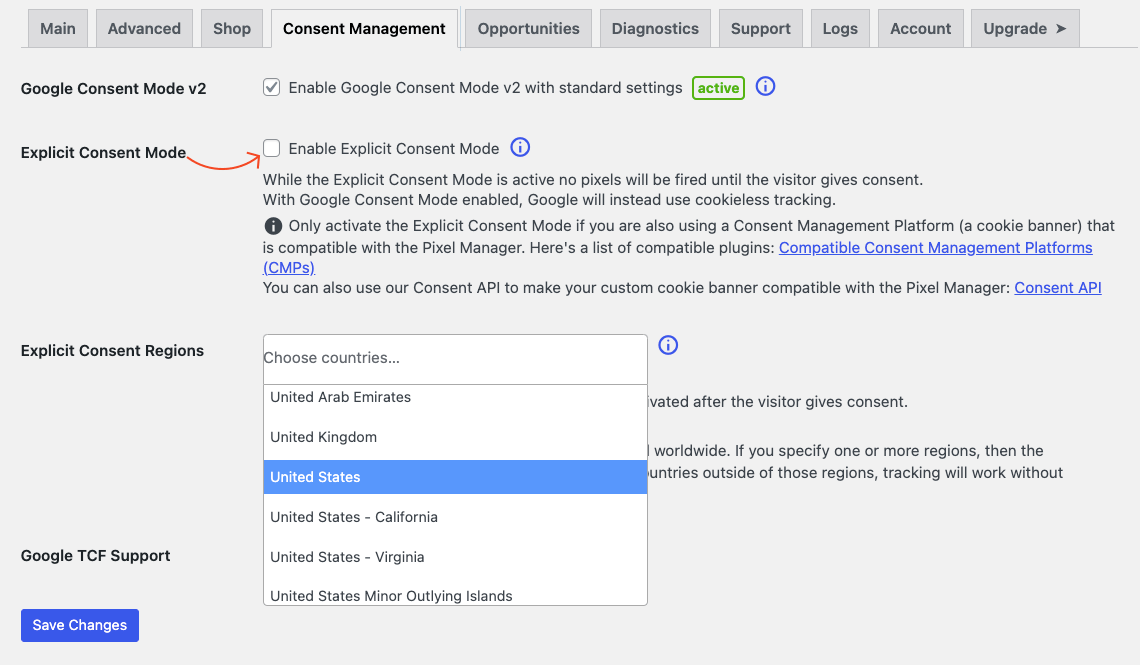
When the Explicit Consent Mode is active, no pixels will be triggered until the visitor grants consent. With Google Consent Mode enabled, Google will utilize cookieless tracking instead. Only enable the Explicit Consent Mode if you are also employing a Consent Management Platform (such as a cookie banner) that is compatible with the Pixel Manager.
6. Navigate Other Available Features
Pixel Manager comes with many functional and useful features that can help you optimize your campaigns and achieve very high ROI.
The Opportunities tab suggests effective tweaks. It helps you discover hidden potential and guides you to maximize the plugin’s effectiveness.
You can diagnose problems related to the payment gateway from the Diagnostics tab. This report helps you understand how effectively your online store tracks customer purchases through your payment gateway. It’s important because accurate tracking ensures you have a clear picture of your revenue and campaign performance.
The Support tab comes with multiple options that let you contact the amazing support team of Pixel Manager. Here are the ways you can get support for Pixel Manager:
- Chat with Pixie: Its AI bot, Pixie, can answer many common questions.
- Support Forum: Join the discussion in the WordPress support forum for Pixel Manager. (Keep sensitive information like debug info private.)
- Email Support: Send your detailed question directly to the support team at: support@sweetcode.com
You can also translate the plugin from here. The last section is Debug Information. This section appears separately with instructions on how to find and send debug information if needed for troubleshooting.
7. Manage Your Pixel Manager Account from WordPress
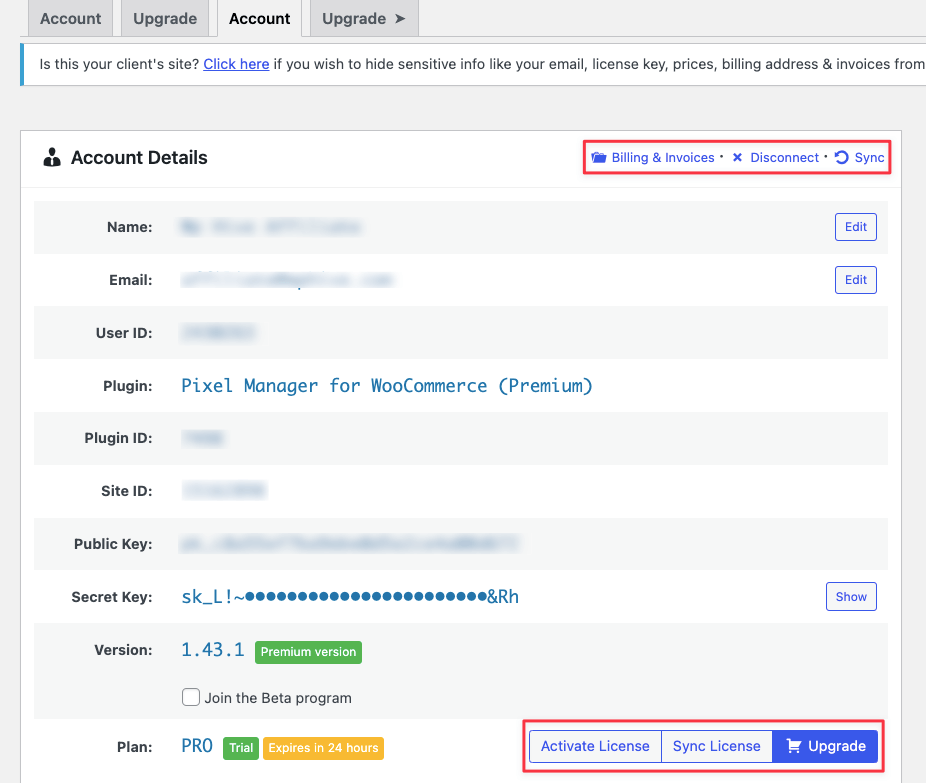
You can edit your name, and email and see other necessary details including the license key within the WordPress backend. Pixel Manager also lets you activate license, sync license, and upgrade to a superior plan.
Important: If you need help in using this plugin and reap its benefits to the fullest, Pixel Manager has a comprehensive documentation section to walk you through each step.
Pixel Manager Reviews: Why Customers Love It
Most of the users rated Pixel Manager highly which helped this plugin boast a stellar rating of 4.9 out of 5 stars based on 338 reviews. Reviews come from a mix of beginners and experienced users. The users are praising its functionality and excellent support. One of the most appreciated features is Pixel Manager’s ability to eliminate the need to use a GTM to track conversion actions.
A small number of users reported encountering issues with LiteSpeed cache compatibility. This can be easily resolved through Pixel Manager’s support team. Report this issue with the error logs, and the support team will instantly help in solving the issue.
Our Verdict on Using Pixel Manager for WooCommerce
Pixel Manager for WooCommerce by SweetCode stands out as a powerful tool for e-commerce businesses. Even for beginners, its user-friendly interface makes setup a piece of cake. More experienced users will appreciate the comprehensive tracking features that go beyond the basics.
Over 50,000 daily users and the endorsement of Google’s Tag Manager team solidify Pixel Manager’s reputation for reliability. As per our experience, by optimizing ad targeting and campaigns, you can significantly boost sales and reduce advertising costs with this plugin.
While some very specific needs might be better met by competitor plugins with unique functionalities, Pixel Manager excels for most WooCommerce stores. Therefore, we wholeheartedly recommend Pixel Manager for WooCommerce, awarding it a stellar 5 out of 5 stars.


Add your first comment to this post