How to Design Dynamic Web Pages in WordPress Using Elementor
A great website opens the window for any organization or person to meet with many potential leads every day. It allows them to gradually build up the audience base by presenting valuable information online for 24 hours. Static web pages were successful in doing this for a long time.
But the idea of dynamic web page design brings a revolution in data presentation systems. It makes the user experience more fluid and increases the likelihood that visitors stay longer on your site.
Elementor is a powerful page builder plugin by which you can design dynamic web pages with beauty and elegance.
In this article, we’ll explain the process of how to design dynamic web pages in WordPress. If you are a WordPress user and looking for a guide on it, this guide will cater to your needs. Let’s keep reading to the end.
Quick Navigation
What is a Dynamic Web Page?
A dynamic web page allows users to change and filter out information based on personal preferences without breaking the page layout. Are you finding it difficult to understand? Let’s break it down with some easy examples.
In an eCommerce single product page, you can add products to the cart, change their quantity, and buy them directly is an example of a dynamic web page. Because when you switch to another product, only the information changes, but the layout remains the same.
How does the Dynamic Web Page Work?
The dynamic web page is a combination of posts and a page. It allows you to publish as many posts as you want on a single web page. If you’re a newbie WordPress user, you might start thinking about blog posts after hearing the word ‘Post’. But the idea of posts in WordPress isn’t so limited.
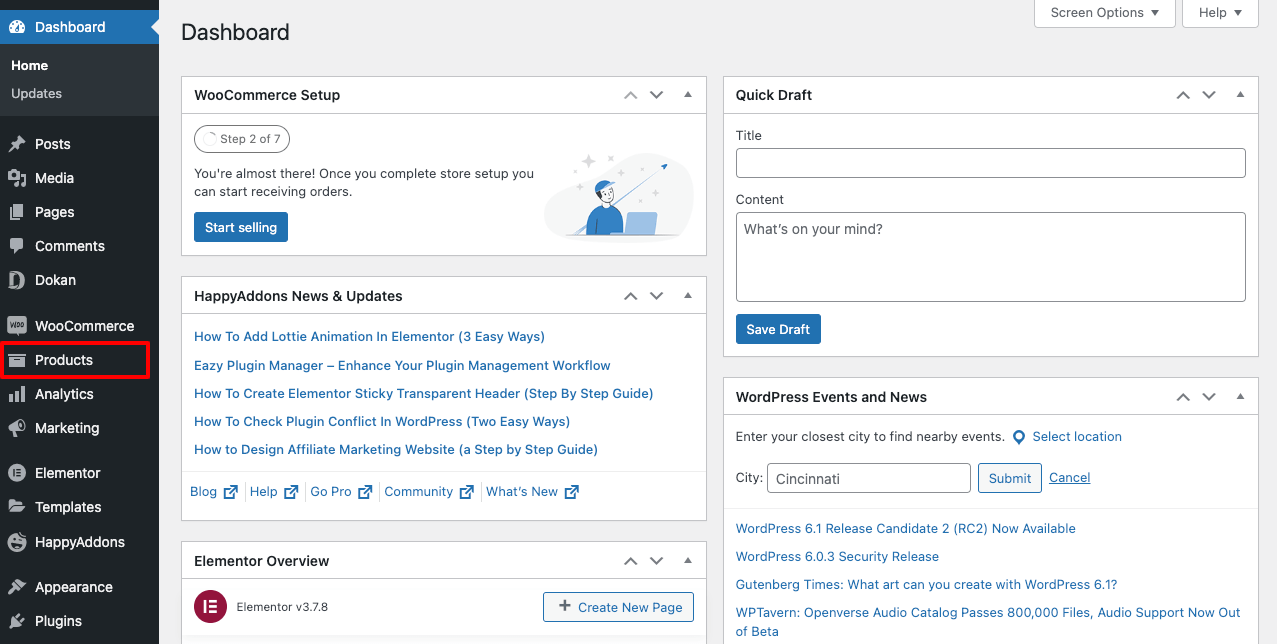
It comes in various forms in WordPress. After installing WooCommerce, Dokan, or any other eCommerce plugin, you’ll get a new section names ‘Product’ on the admin menu bar. This is also a post known as a Custom Post Type. Now, you may ask- what is a custom post type?
A custom post type allows users to publish specific types of content on web pages, maintaining the same layout. Once your posts are ready, you’ve to design a web page so you can integrate them into it dynamically.
Not only for eCommerce. You can create dynamic web pages for any kind of website you want. Suppose you want to dynamically exhibit a short profile of 50 engineering firms, you can easily do it like the video below.
Thinking about how to do it? We’ll show you the process in the tutorial part of this article.
How to Design Dynamic Web Pages: Step-by-Step Guide
Tools we’ll need to explain the tutorial part are:
- Pods Admin
- Elementor
Pods Admin is one of the best Custom Post Type plugins available online. It will allow us to create as many fields as you want to create post content on your website. Next, we’ll use Elementor to design dynamic web pages to publish these post content.
A key reason to choose Elementor is that it’s one of the best drag-and-drop page builder plugins. It allows you to create wonderful websites from scratch without any coding experience. Let’s now dive into the tutorial part of this article.
Phase One – Create Custom Post Type Using the Pods Admin Plugin
If you don’t have the Pods Admin plugin installed on your website, download and install it from the link below. Once the installation is done, it will help us create custom posts.
Here we’ll show you the process of creating custom posts for the 50 engineering firms mentioned above. Keep reading!
Step 01: Create Posts from the Blog Post Section
Creating new posts is very simple. Hope you already know of it.
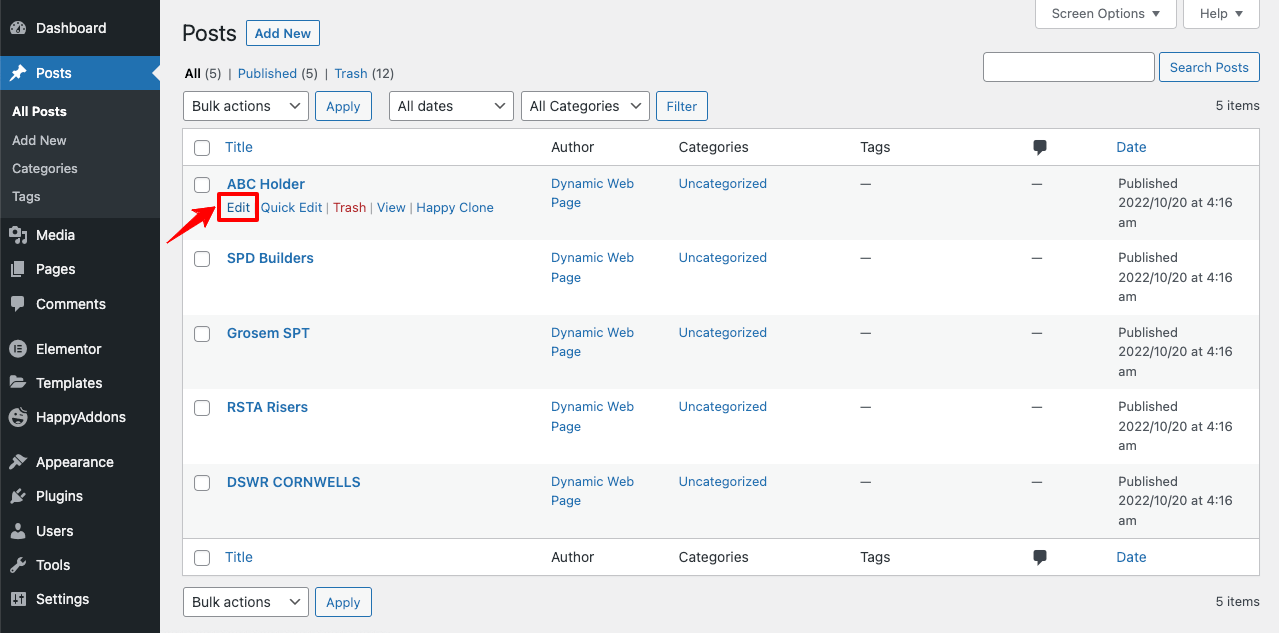
- Go to your blog post section from the dashboard.
- Click on Add New and create as many posts as you need.

Note: You may add a short description of each of these organizations here if you want. To do this:
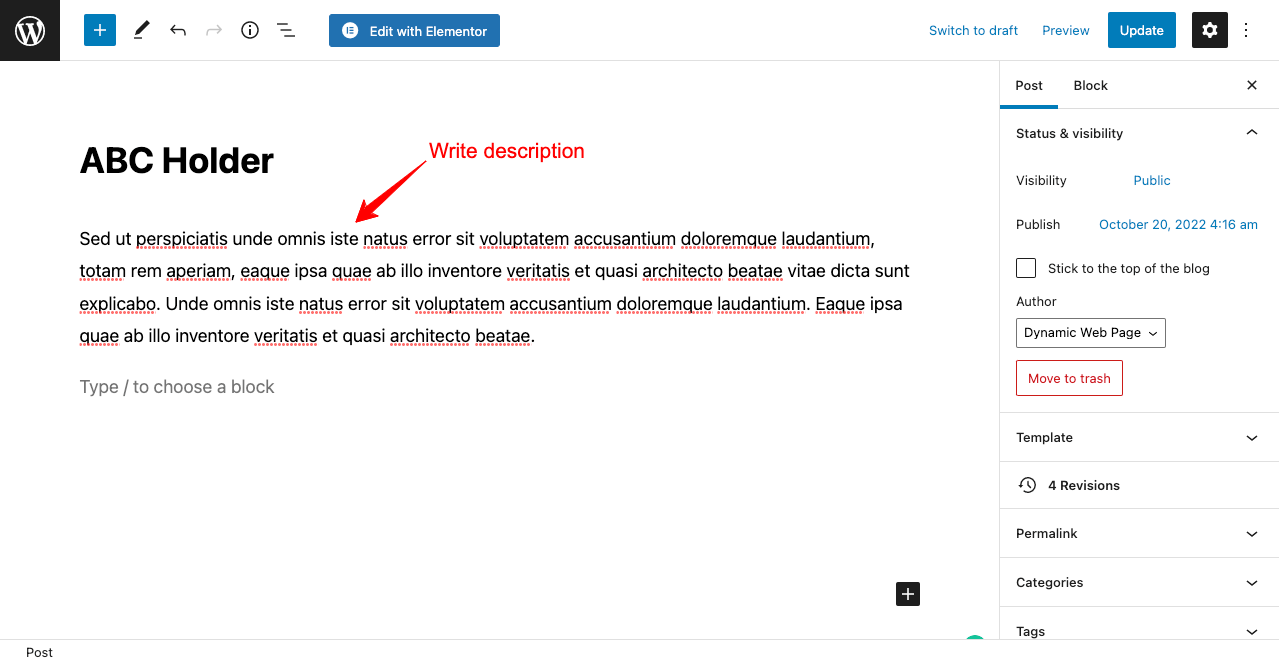
- Click on the Edit option.
- Write descriptions in the block section.
Step 02: Create Custom Post Type with Pods Admin
- Go to Pods Admin > Add New.
- Click on Add custom fields to Posts.

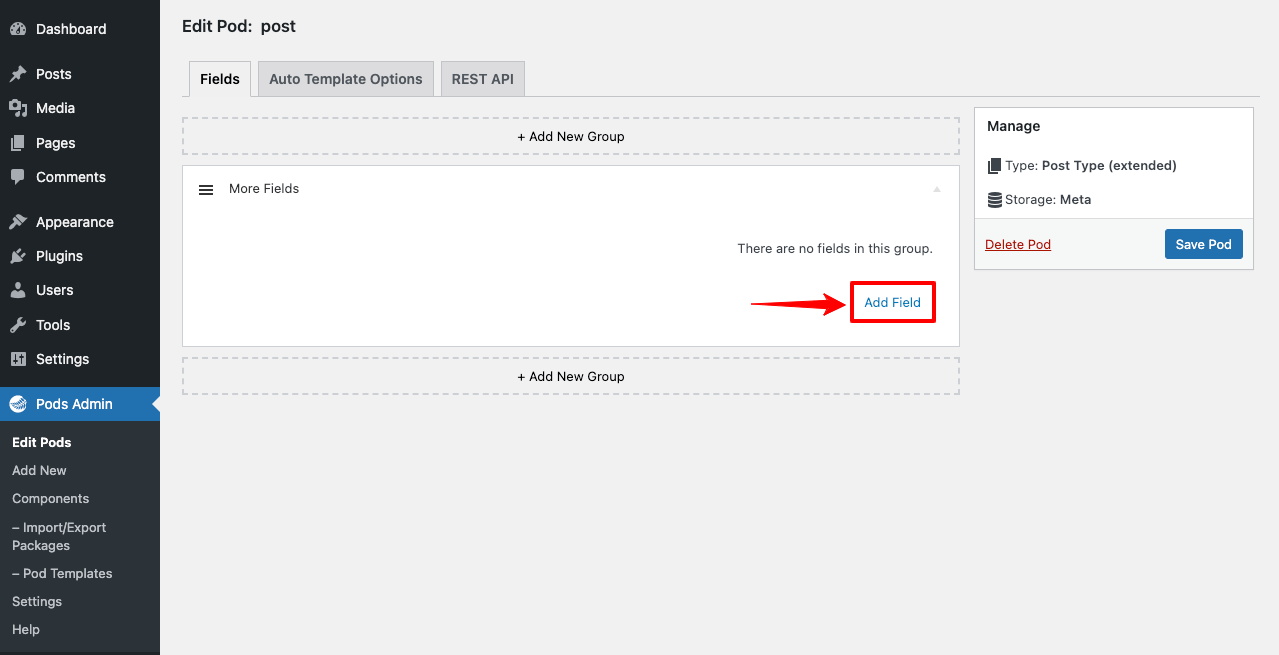
Note: If you don’t find the Add custom fields to Posts option available on this page, don’t worry. Come to the Edit Pods section. You’ll find it there.
- Click on Add Field.
- Name the field Label.
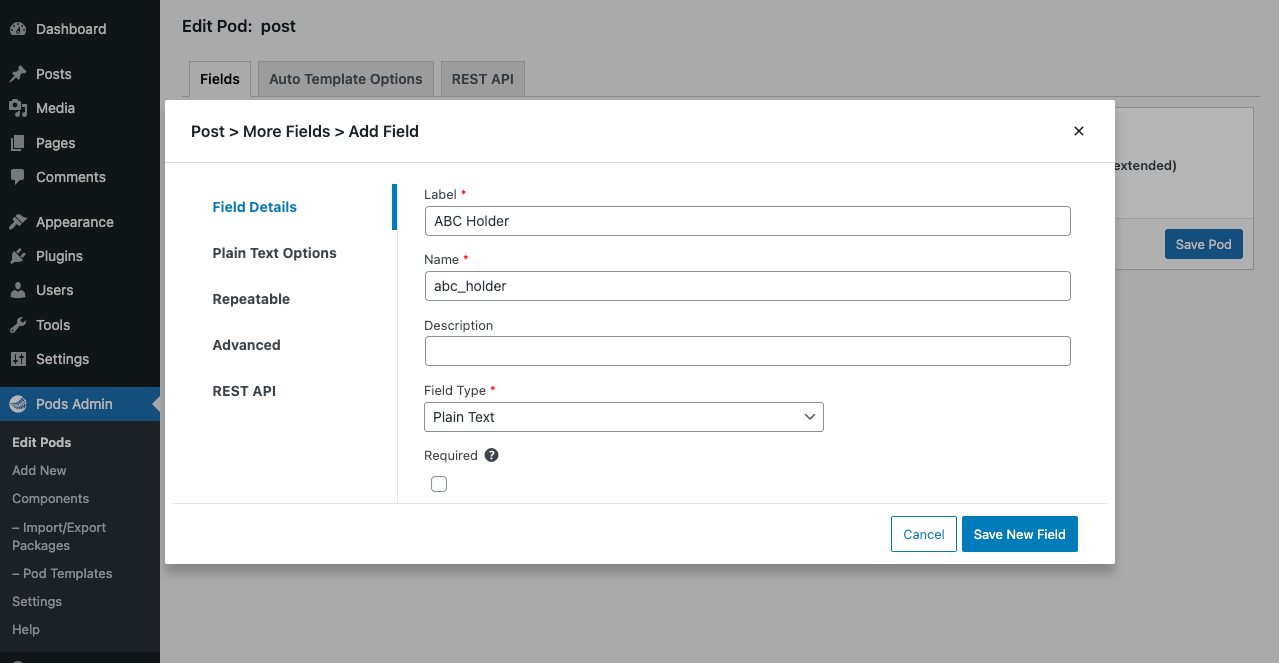
- Create another field for Phone Number.
- From the Field Type dropdown menu, select Phone for this field.
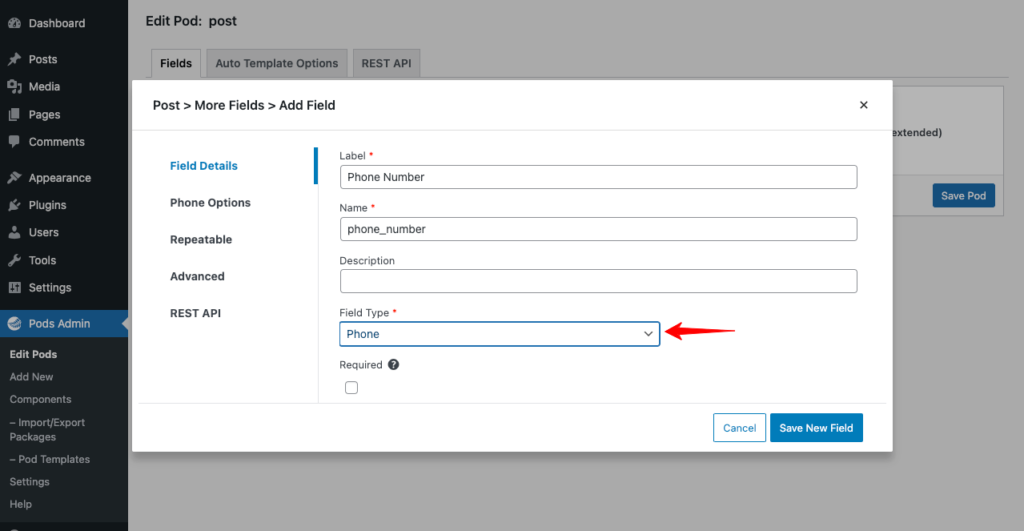
Note: There are numerous field types available in the dropdown menu. Carefully select the type that goes with your Field.
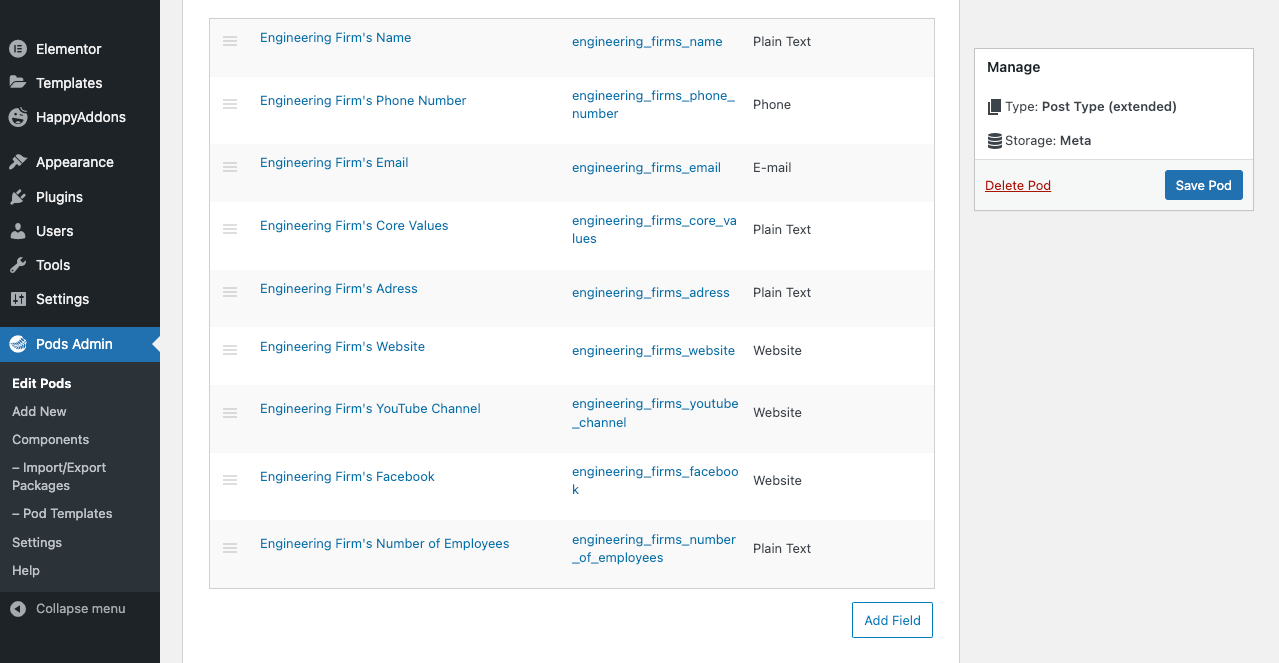
- It’s up to you to create the number of fields you want for your custom posts. We’ve created the following fields you may look for inspiration.
Step 03: Fill Up Information in the Custom Post Type Fields You Created
- Navigate to Blog and click on a blog post.
- You’ll see the fields appearing below the description.
- Fill them up with the necessary information.
- Add a featured image to each of your posts.
Thus, you can prepare your custom posts.
Phase Two – Design Dynamic Web Pages with Elementor
Now we need Elementor and a powerful addon to design dynamic web pages. HappyAddons is the addon we’ll use alongside to complete this tutorial part. You may ask- why HappyAddons? Here is a quick introduction to it.
Indeed, you can design a full-fledged website from scratch only with Elementor. But HappyAddons will provide you with tons of additional features and widgets. Using them, you can add numerous extra functionalities to your website and make it more powerful.
And all these means, using Elementor and Happaddons together can make magic in your website design and functionality. Download them from the links below.
When the installation process is done, start following the steps explained below.
Step 01: Select Single Post Builder From Elementor Templates
- Navigate to Templates > Theme Builder.
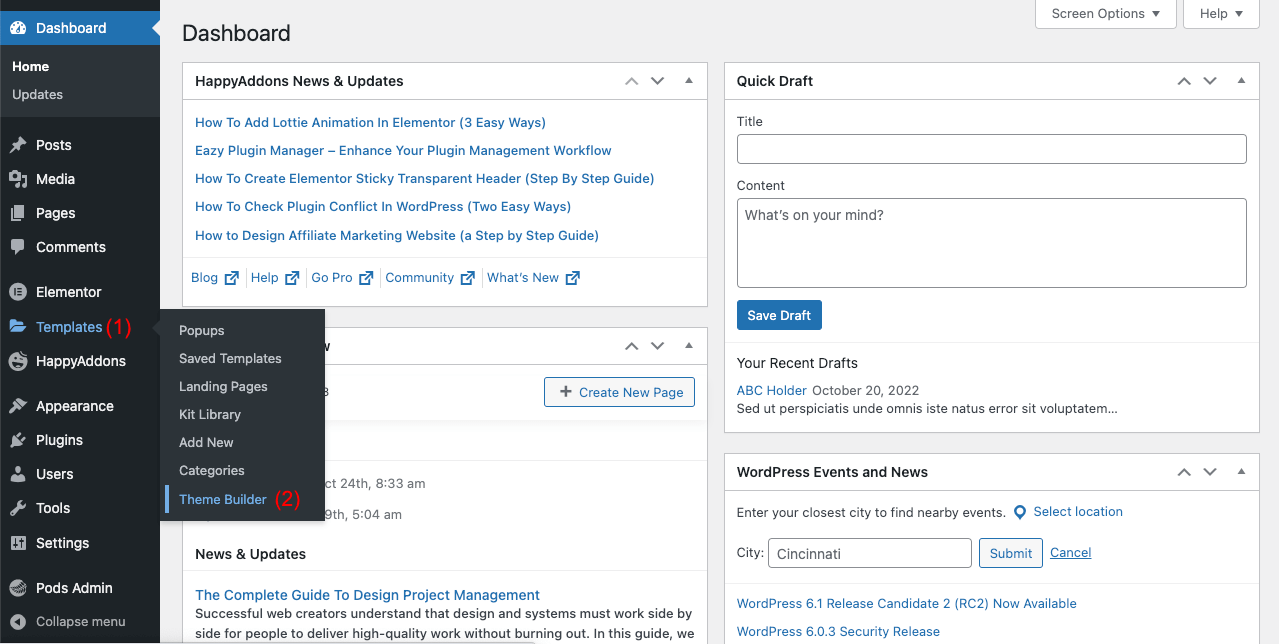
- Select Single Post builder.
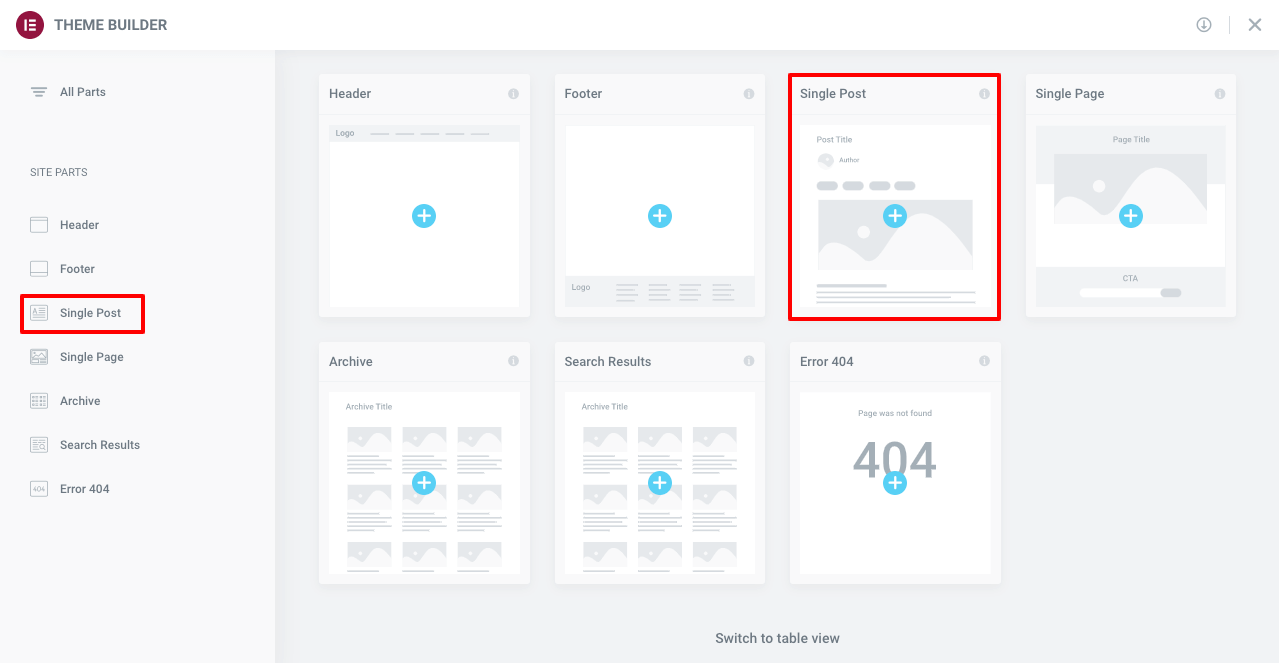
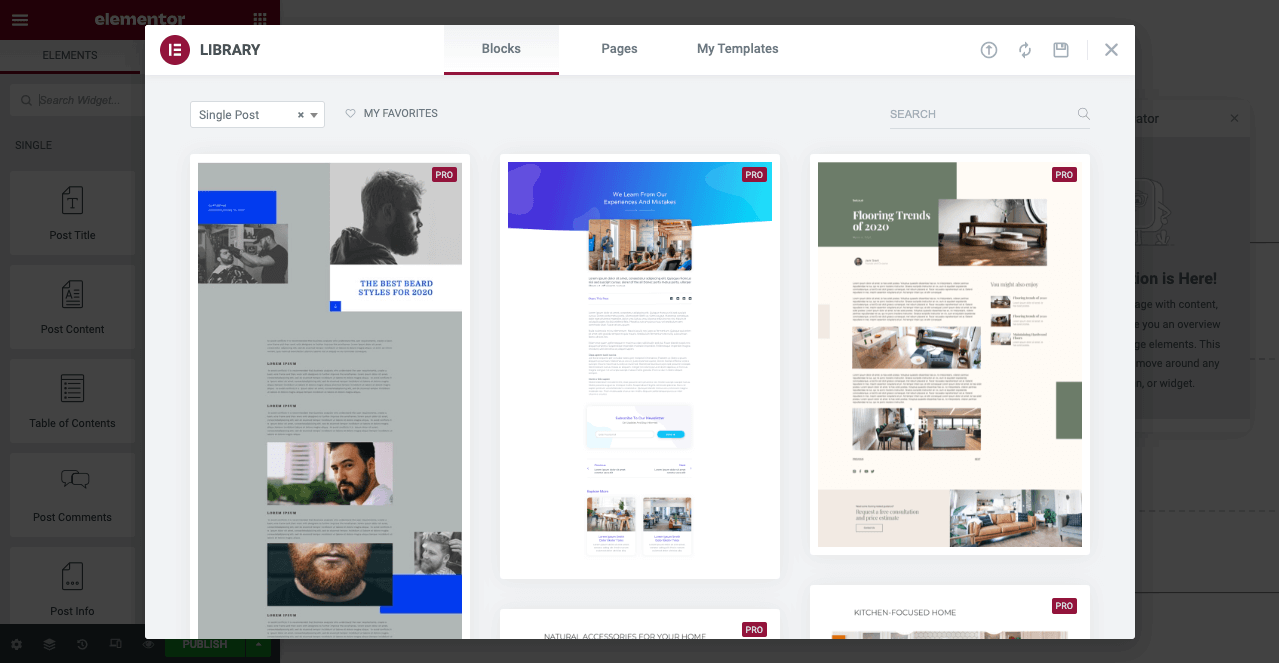
- You’ll find lots of readymade Single Post templates available. You may import one to your canvas if you like or build a brand-new template from scratch.
- This tutorial will show you how to design a single post template from scratch. So, we’re closing the template box without importing anyone.
Step 02: Design a Post Template and Link Up Content Dynamically into It
From now onward, you’ve to touch lots of widgets and features from the Elementor Panel to design different parts of the template.
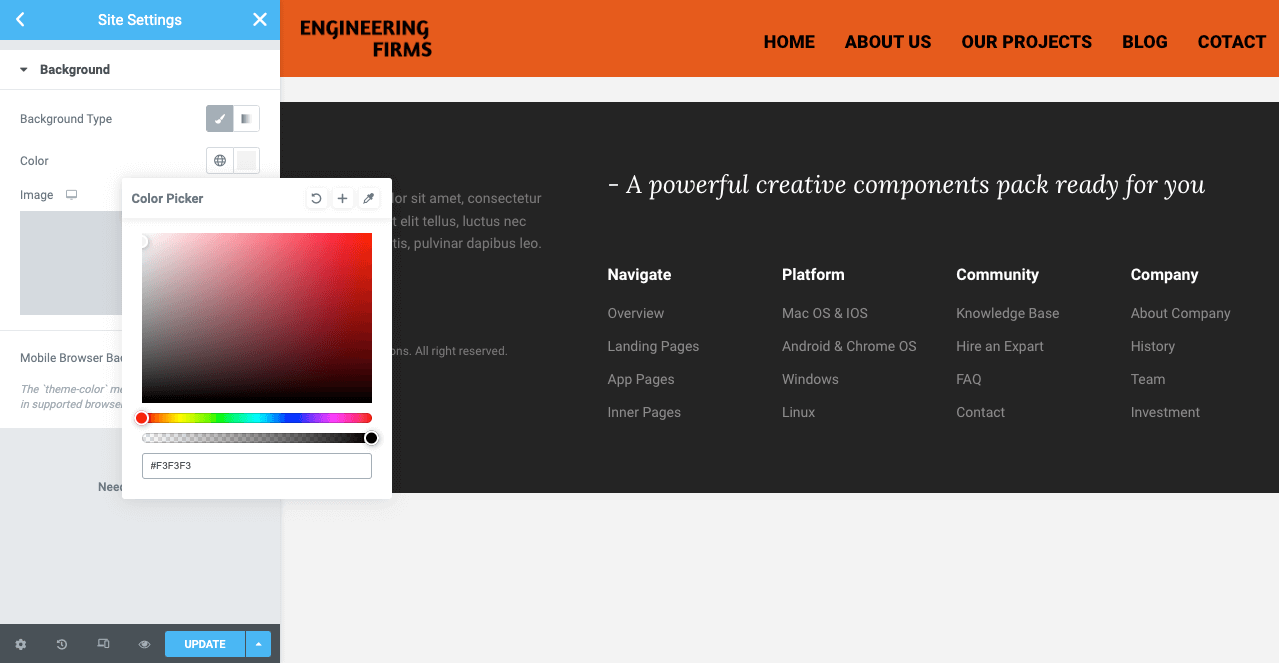
# Change the Background Color of the Single Post Page
By changing the background color of your post template page, you can present your information in a more eye-catching way. To do this:
- Click on the Hamburger icon in the top-left corner.
- Then, navigate to Site Settings > Background.
- Choose the color you wish.
# Show Featured Image
- Choose the layout you need for your post template. (We’re selecting the two-column for this tutorial part).
- Drag and drop the Elementor Featured Image widget on the first column.
- It will automatically show the featured image you added to your first blog post.

# Show Title & the Short Description
- Drag and drop the Heading widget on the second column.

- Click on the Dynamic Tag Icon.
- Find the Pods Field from the dropdown menu and click on it.
- Select the Engineering Firm’s Name from the Settings > Keys option.
View the process from the video below.
- You can change the color, font, size, weight, and more of your title from the Style tab. Do it if you feel it necessary.

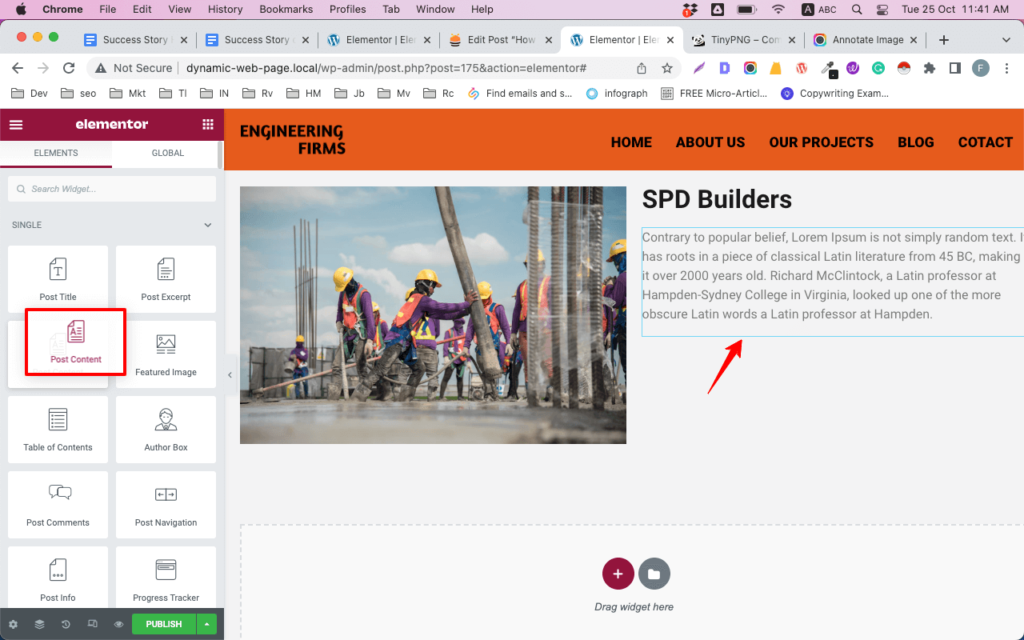
- Drag and Drop the Post Content widget on Elementor Canvas.
- It will automatically show the description you created for your first blog post.
- Change its color, font, and style, as we showed you before.
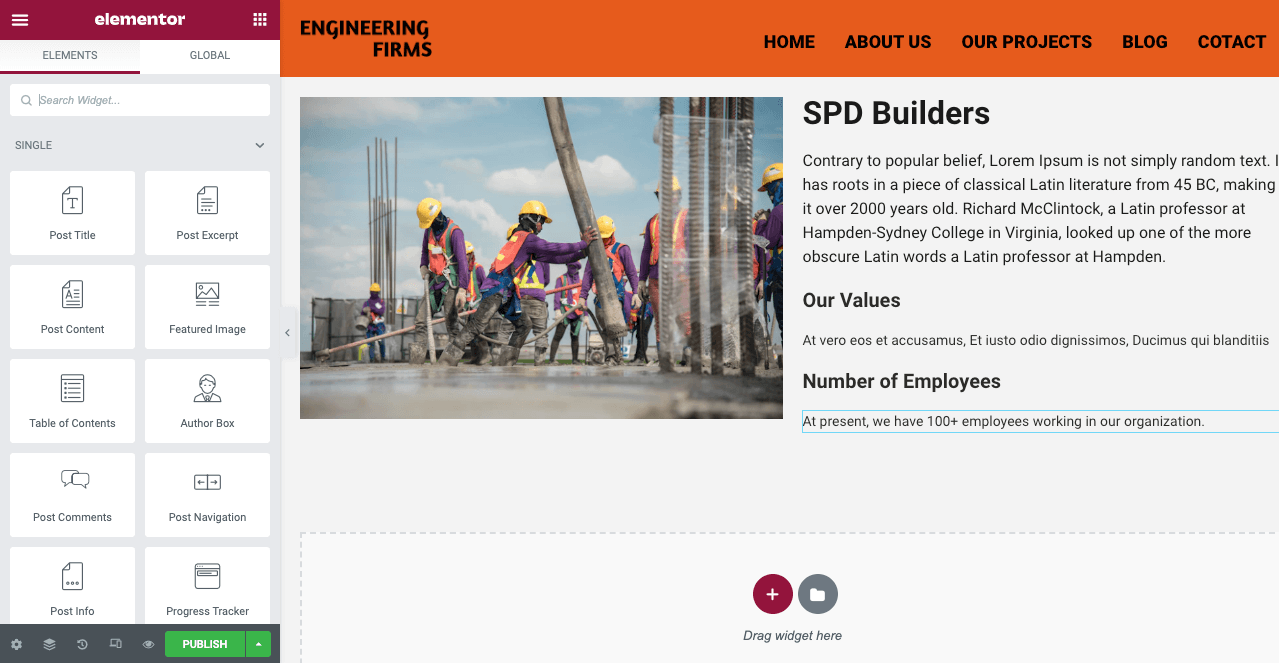
# Show Core Values & Number of Employees
- Drag and drop the Heading widget on your canvas. Type ‘Our Value’ (you may type your heading name)
- Drag and drop the Text Editor widget. From the tag option, select Engineering Firm’s Core Value. You will see the core values you typed in the backend appearing on the screen.
Watch the video below.
- Stylize the text and heading from the Style Tab. We already showed you the process above.
- Similarly, we have used these two widgets to show the number of employees of this firm.
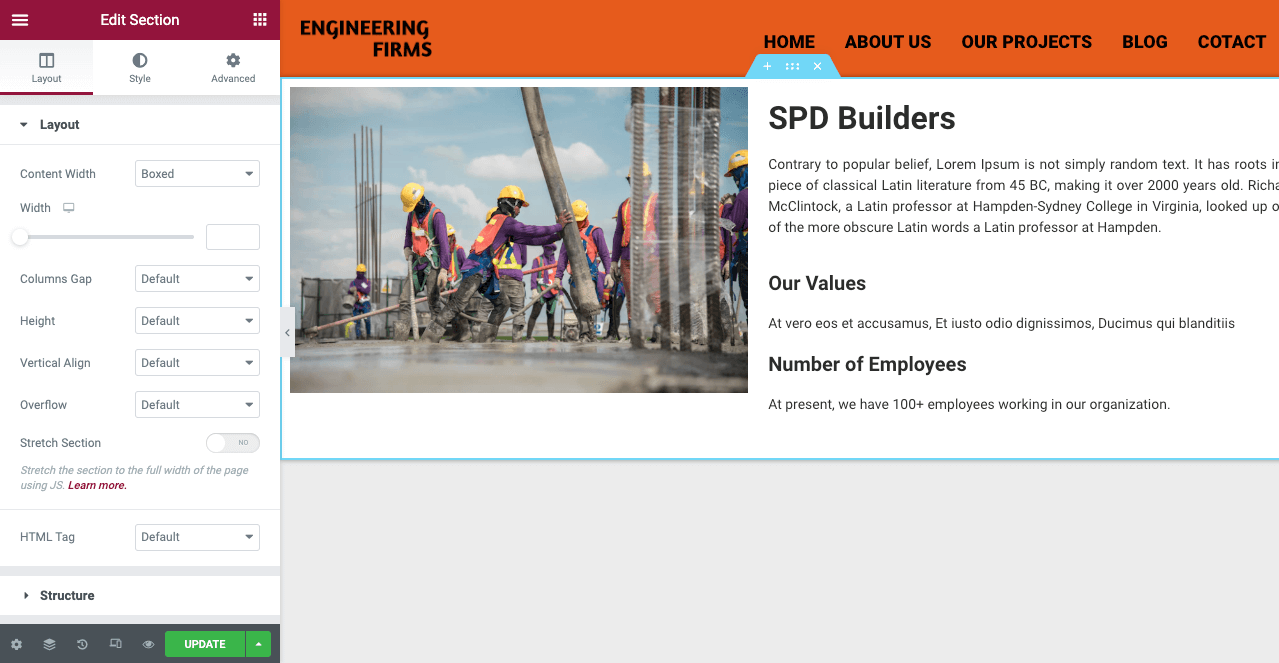
Note: You may find it wired as the bottom text flows outside your featured image’s edge. Never worry. Just click on the arrow button next to the Elementor panel. You’ll see the exact state of your layout.
- Next, select the entire section by clicking on the six-dotted icon.
- Stylize it by adding different flavors from the Elementor Style Tab.
(We’ve changed the background color of this section to white and added the shadow effect)
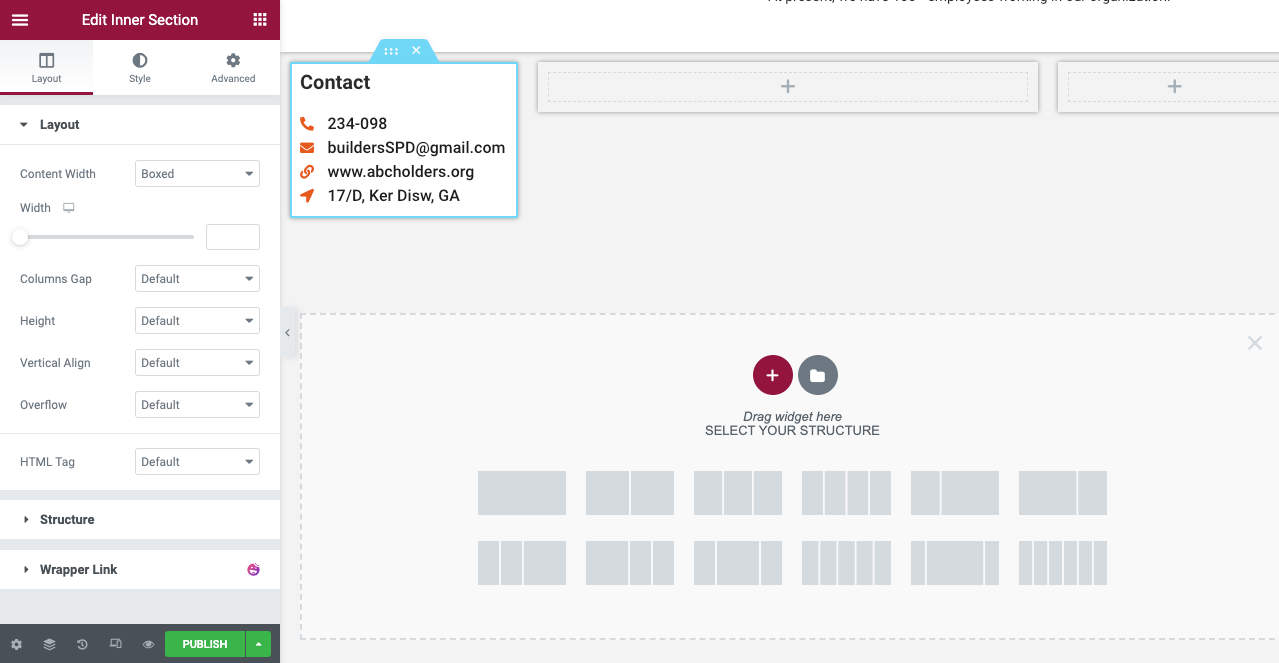
# Show Contact Information
Select a new layout to create a new section
- Drag and drop the Icon Box widget.
- Change its icon from the library to the phone icon.
- Tag the heading box with the phone number.
- Remove the description, as it’s not necessary here.
- Make the right alignment.
- Stylize the phone icon and number from the Style Tab.
- In the same way, you can add other contact information and logo there.
# Add YouTube Video Link
- Drag and drop the Video widget on your Elementor Canvas.
- Add the video URL tag like before to publish your YouTube video.
Not only YouTube links, but you can also add video links from any online sources. Even you can link up videos from your website if you have any.
Note: You can see the video layout got bigger than the left-sided contact column. We have done it for design purposes.

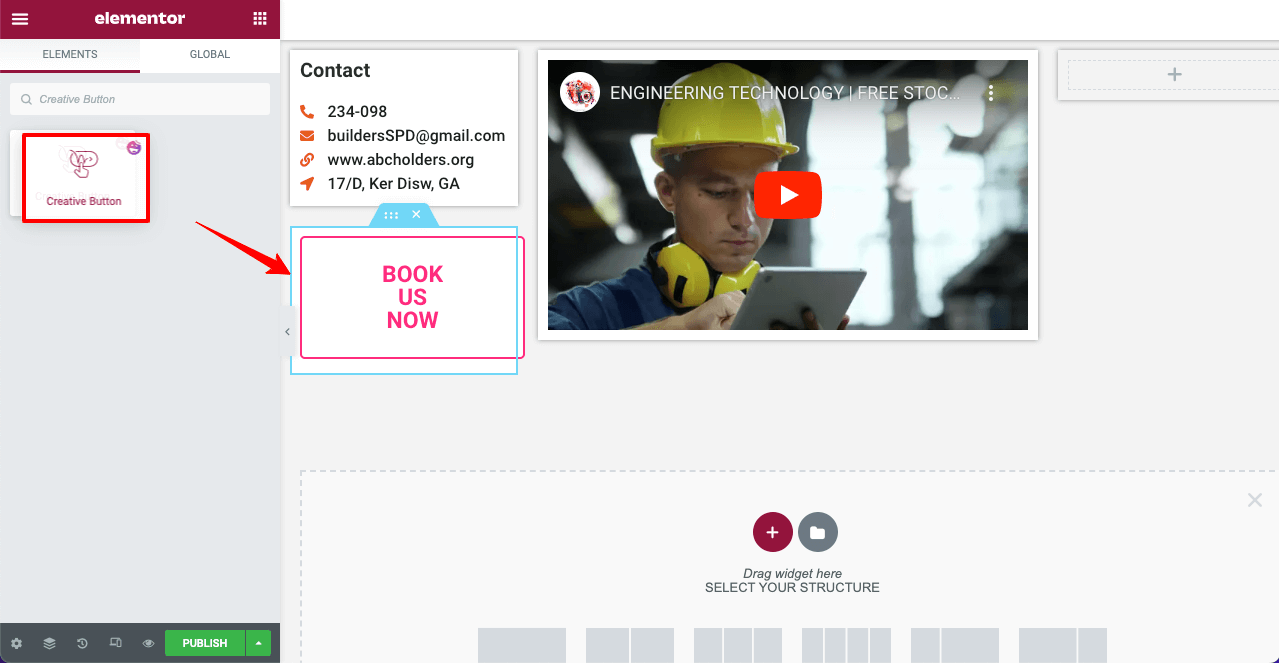
# Add Button
- Drag and drop the Creative Button from your Elementor panel.
- Then, type the text you want to show there and add web page links through tagging.
The Creative Button will allow you to instantly create an animated button to hold your visitors’ focus. We can’t show the animation in this static photo below. But at the end of this tutorial, we’ll show it.
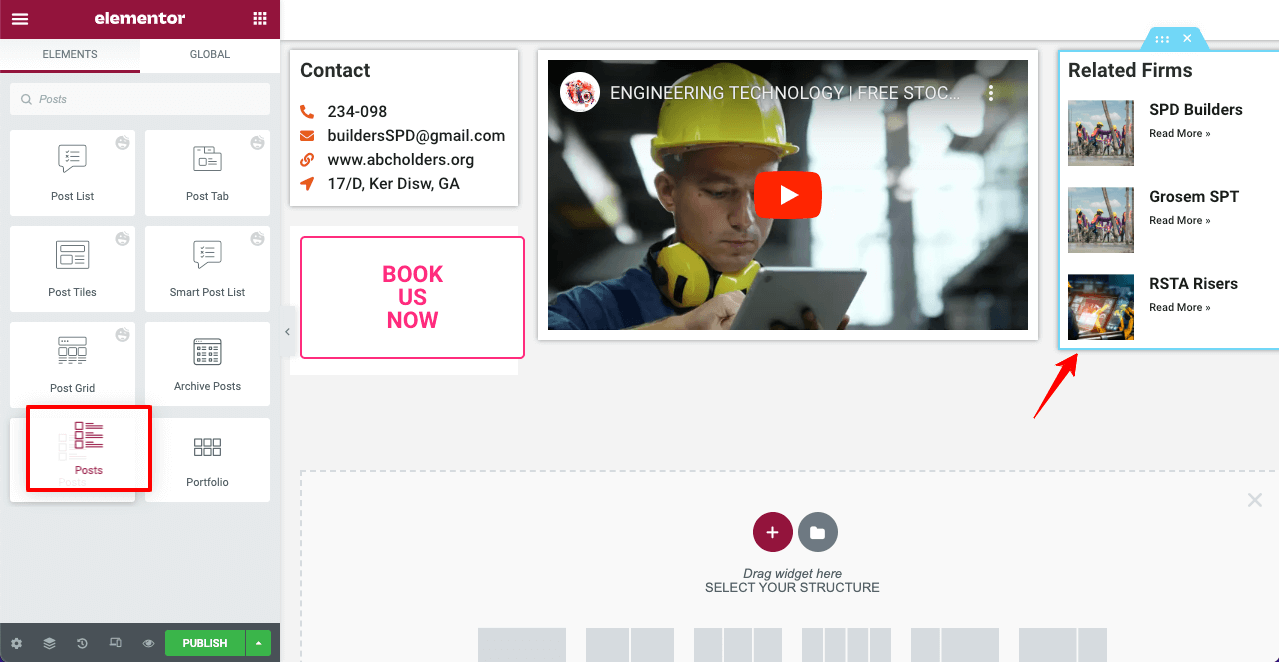
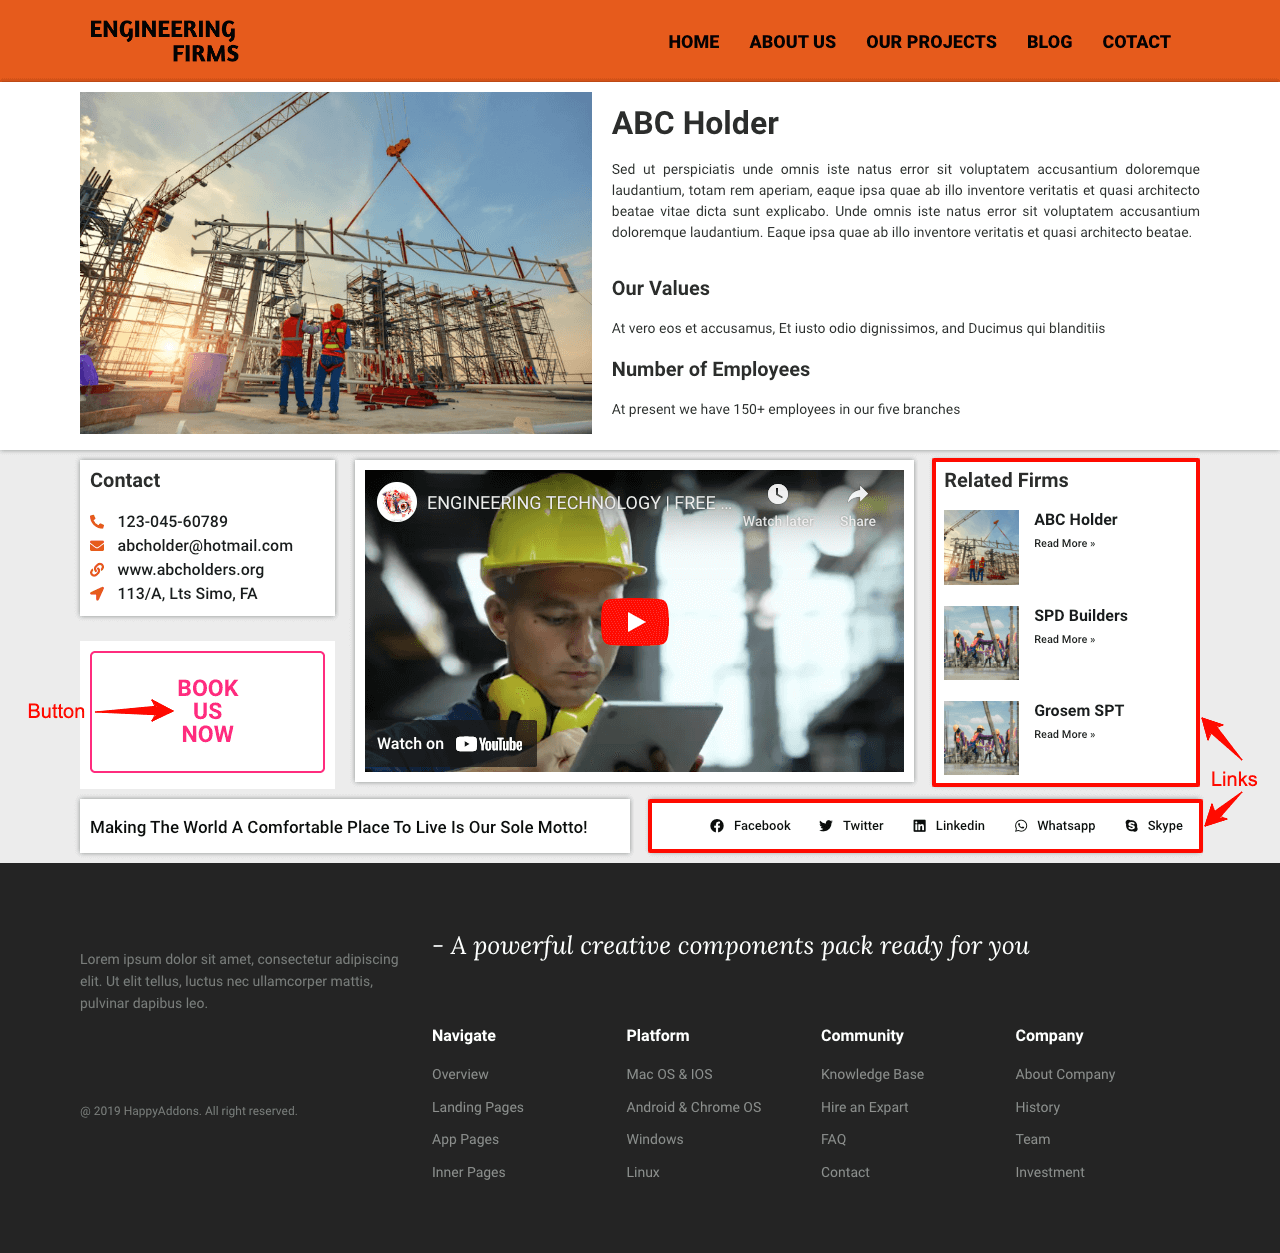
# Show Other Engineering Firms on the Same Dynamic Page
- Drag and drop the Heading widget and give it a name (Related Firms).
- Drag and drop
- From the Content and Style tabs, customize elements in this section.
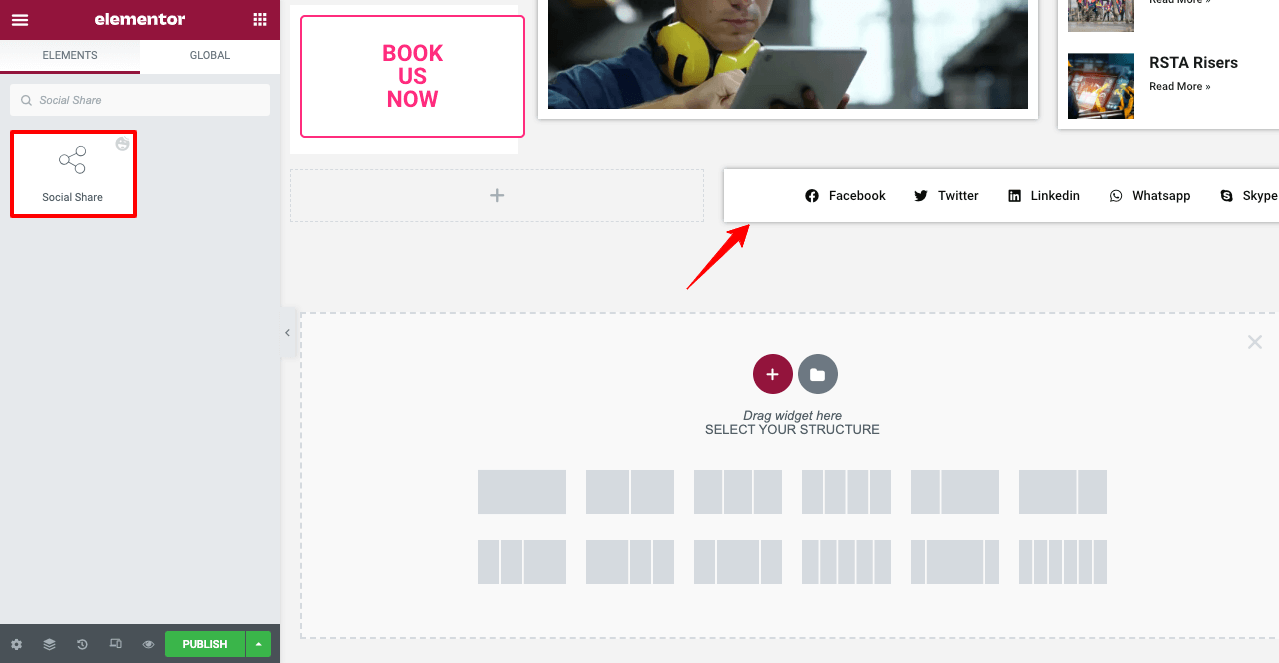
# Show Social Share Options
- Drag and drop the Social Share widget on your Elementor Canvas.
- Add the social media options you want to show there.
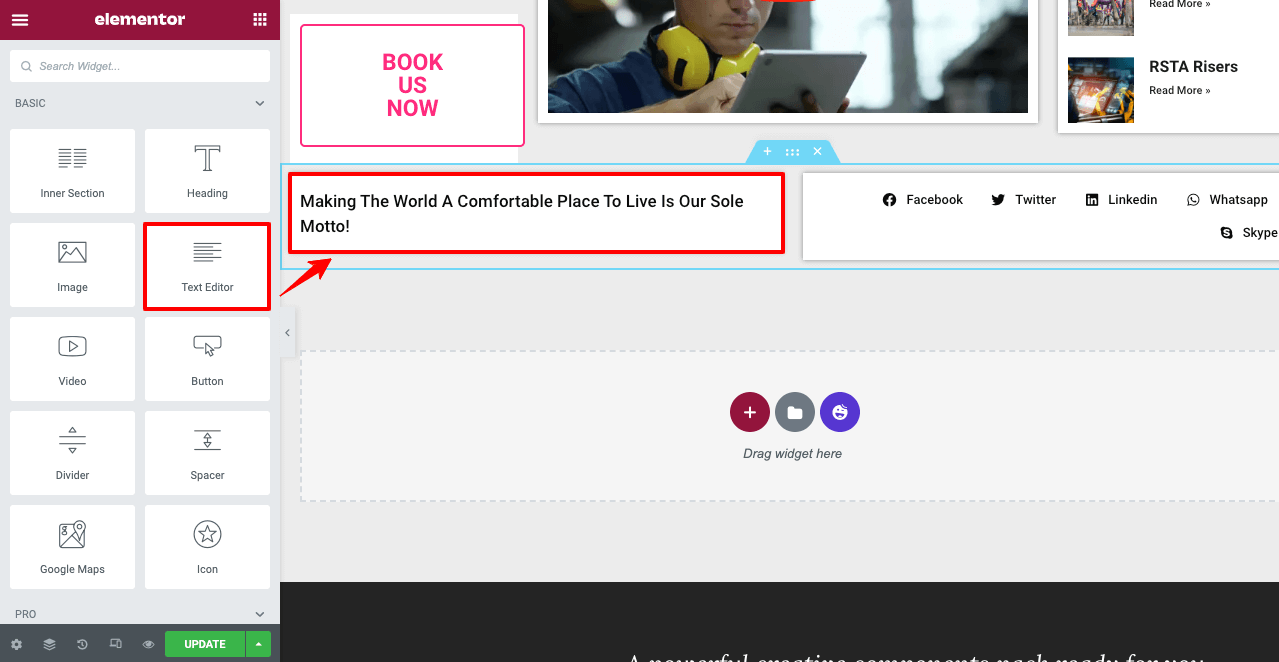
Sometimes, it may happen while designing your page; you want to add some additional information. No worries! Add that information first to your posts from the backend, creating post fields. Then, link up them through tagging.
- Finally, we have added a slogan to use the black space to make it look good.
Step 03: Make the Page Mobile Responsive
- Click on the Responsive Mode button from the end of your Elementor panel.
- Check the layout of your template by changing the device screen size options.
- You may change the widget size, position, font size, etc., to fit them on your web page rightly.
- (We’ve already done these editing and modifications in the video below)
Note: Never delete a widget from any device view. Because it will also delete the widget from other device screens. However, if you make any positional, color, font, text, etc., related changes on any specific device view, it won’t affect the layout on other devices’ screens.
Step 04: Preview Your Dynamic Web Page
Go to the preview page and check if all posts are working. Click any other blog placed in the Related Firms section. If that blog post is loaded on your screen, you can assume that the page has been designed dynamically with perfection.
- We are clicking here on ABC Holders.
- We can see our page is working fine. This is how you can design dynamic web pages on your website.
We hope you can now design more fascinating dynamic web pages by following this tutorial. If you face any trouble mid-way, you can message or comment to us anytime. It will be our pleasure to help you.
Things to Consider When You Create Dynamic Web Pages
Now you know how to design dynamic web pages on a website. But there are some web design principles you must keep in mind. Check out some most important of them.
1. Better User Experience
A good design refers to the perfect combination of design and functionality. If a design is beautiful in appearance but slow in response, it will fail to satisfy the users. Personalized content, minimalism, liquid graphics, etc., are some common UX design trends.
2. Catchy Layout
The page layout is crucial for any website to hold readers’ attention and make them read your content. Create several drafts on your handbook to decide on sections about us, contact information, image gallery, banner, buttons, and others.
3. Page Loading Speed
Embedding too many graphical items may slow down the speed of your dynamic web page. This is why you must check if your web page is light and loads fast. And if you need to embed graphical elements, compress and optimize them beforehand.
4. Futuristic
Over time, you may need to update your posts with new fields and information. Design your dynamic web page templates so that you can update them in the future anytime you need them.
5. Check Your Links and Buttons are Working
Broken links and buttons can never boost your conversion. Rather it sends a negative signal to Google and other search engines. Sometimes, it may happen that you are mistakenly leaving a link/button unfixed. Better you check your page template with other editors before publishing them.
FAQs on How to Design Dynamic Web Pages
Now, we’ll answer some of the most frequently asked questions about how to design dynamic web pages. Keep reading!
Is coding a must to create dynamic web pages?
Yes, coding is a must to create dynamic web pages. But today, there are some drag-and-drop page builders where features and widgets are already prepared by necessary coding and frameworks.
You may try out Elementor and HappyAddons for this if you are a WordPress user. You will find tons of features and widgets ready there. You just have to drag and drop them on your page sections to create a design.
What are the differences between static and dynamic web pages?
Static web pages show you only one stable content. To switch this content, you have to move to another page.
But dynamic web pages can host as many content/posts as you want. When you switch to a different post, the page remains the same.
How can I create a dynamic website for free?
Elementor and HappyAddons are two great page builder plugins you can use to build a dynamic website. Both of them have the pro, and lite versions are available. Using the lite versions, you can design dynamic web pages.
Note: Lite version won’t give you access to the theme builder option for why you’ll miss many important features. However, the Lite versions are enough to build a website with basic structures and format. Checkout
1. Elementor vs Elementor Pro
2. HappyAddons Free vs HappyAddons Pro
What is the difference between regular post type and custom post type?
The regular post type is a simple post where you can store all sorts of information under one category. But in custom post type, you can add values/fields to specify the types of your information. Check the above section of this blog to get a clear answer.
How to create a creative dynamic web page?
Creating dynamic web pages in WordPress is much easier today because of the Elementor page builder plugin. But if you want to design a creative web page, you’ll need some additional widgets to make your website look catchy.
HappyAddons have 17+ creative widgets in its widget list. Using them, you can embed further creative values into your website. Click here to explore them.
Final Takeaways
Dynamic web design has become a trend over the last few years. It doesn’t mean static web pages are completely obsolete today. There are always pages on all websites that don’t require to be dynamic. But when you have lots of posts of the same type, better to publish from a single page. And then, dynamic web pages become mandatory.
In this article, we have tried our best to explain how to create dynamic pages in WordPress. We hope you have found this article helpful enough to satisfy your quests. If you still have any questions unanswered, please let us know through the comment section. We’re eagerly waiting to help you.
Subscribe to us for more interesting articles like this one. Follow our Facebook and Twitter channels for regular updates.
Disclosure: WP Hive earns a commission when you buy through partner links. It does not influence the unbiased opinions of our writers. Learn more →
Share:
https://wphive.com/tutorials/how-to-design-dynamic-web-pages-in-wordpress/
Fuad Al Azad
Fuad Al Azad is a creative writer who loves to blog on everything in between tech, marketing, and eCommerce. Alongside, he is an admirer of fact, fiction, and philosophy.

