
Have you ever wondered why WordPress is so popular? One of the main reasons is, it gives you the freedom to edit anything and everything about your website. Let’s assume you use a theme that doesn’t have the necessary specifications. You can just dig into the code and customize it in whatever way you like.
Though the problem is, the next time you update that theme, new files will be downloaded, and you’ll lose all the changes you made. Frustrating, right?
This is the exact situation where a child theme can help you out. Using a child theme will make you capable to edit any design of your theme without the fear of your work being overwritten by any future updates.
How?
Let’s learn it from this step-by-step tutorial.
Why You Need to Create a WordPress Child Theme

We have just mentioned that using a WordPress child theme will allow you to upgrade the parent theme without losing your customizations. Apart from this significant advantage, there are some more to check.
- Keeping all the files related to the child theme in a separate folder from your parent theme makes them easy to replicate or move from one site to the next.
- Instead of creating a new theme from scratch or install a new one, you can customize a theme that already exists on your website, thus speeding up development and customization time.
- If you aren’t satisfied with your customizations, just disable the child theme and everything will be as it was before.
- Last but not least it’s a great way to start learning about how theme works.
Now let’s make a dive into the main tutorial – how to create a child theme in WordPress.
Related: How to Install a WordPress Theme (Three Easy Ways for Beginners)
How to Create a Child Theme in WordPress?
Creating a child theme would require you to follow 4 simple steps. You will need to create a new folder, create a style sheet, enqueue stylesheets, and activate your child theme to start customization. Let’s get started with the new folder creation.
Note: If you plan to make only minor modifications, such as color changes or a different font, then a custom CSS plugin might be all you need. Many themes nowadays also offer the option to add custom code natively.
However, if you plan to introduce larger changes, such as a complete design overhaul, multiple template changes or anything else, then using a child theme would be a better decision.
Step 01 – Create a New Folder for Your Child Theme
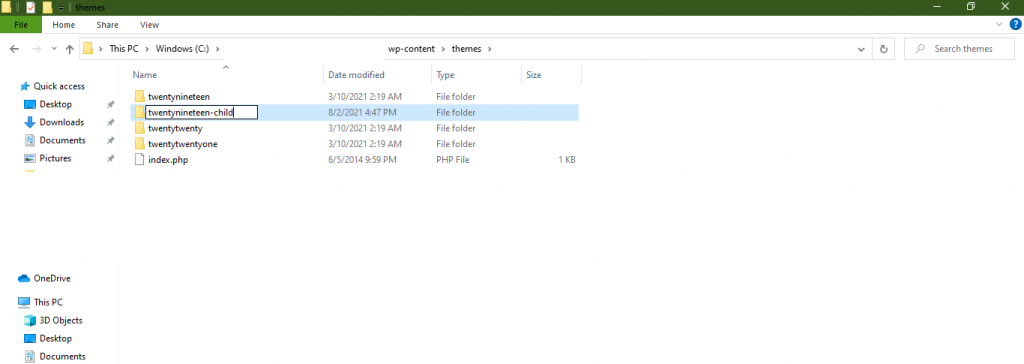
First, you need to open a new folder to create a child theme. If you have installed WordPress locally,
- navigate to “wordpress/wp-content/themes/”. This directory will contain one or more folders, each of which represents a theme installed on your site.
- Create a new folder. You can name it whatever you like. Here we have named it “twentynineteen-child”.
Step 02 – Create a Style Sheet for Your Child Theme
Next, you’ll need to create a stylesheet file to contain all of the CSS rules and declarations for your child theme. Open a text editor like Notepad and paste this code:
/*
Theme Name: Twenty Nineteen Child

Theme URL: http://wphive.com/
Description: Twenty Nineteen Child theme

Theme Author: WP Hive
Author URL: http://wphive.com
Template: twentynineteen

Version: 1.0.0
Text Domain: twentyseventeen-child
*/

@import url(../twentynineteen/style.css);
Now save this file as style.css in the child theme folder you just created.
You can add custom CSS later when you’re ready to begin customizing your child theme. This is the minimum requirement for creating a child theme.
Step 03 – Enqueue the Parent and Child Themes’ Stylesheets
Following this step will ensure you that the child theme inherits its parent theme’s styling so when you activate your child theme, you’re not just looking at a bunch of unstyled text.
To do so, create another file in your child theme’s directory. Name it “functions.php” and add the following code:
<?php

add_action( 'wp_enqueue_scripts', 'enqueue_parent_styles' );

function enqueue_parent_styles() {

wp_enqueue_style( 'parent-style', get_template_directory_uri().'/style.css' );

}

?>
Step 04 – Activate Your Child Theme
You can now go to Appearance » Themes where you will see Twenty Nineteen Child Theme. You need to click on activate button to start using the child theme on your site.
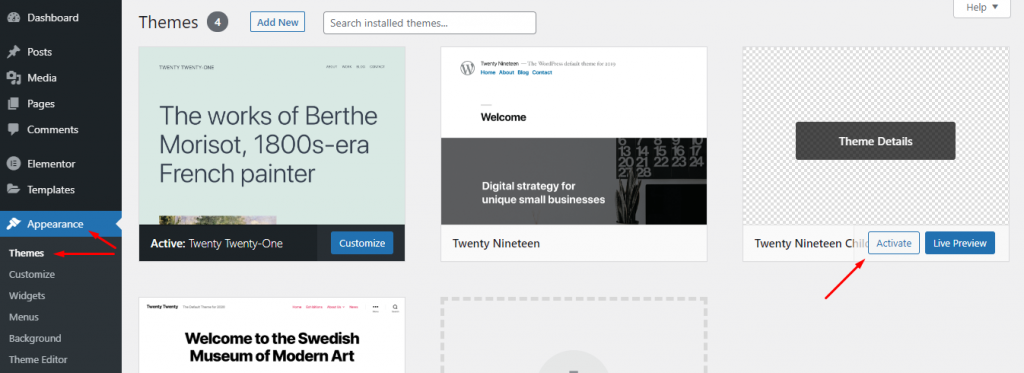
Good news: your child theme is now live! Since you haven’t changed anything in your child theme yet, your site will use all functionality and appearance of its parent theme.

How to Customize Your WordPress Child Theme
Customizing a WordPress child theme will require a bit of CSS and PHP knowledge. And it’s totally up to you how you would like to customize your theme. However, here we have shown some basic modification of our just created child them.
Basically, there are 2 things you might want to customize:
- The appearance of the website: this can be done via CSS
- The output of some pages of the website: this can be done via PHP
Overriding Parent Theme Styles – CSS Magic
Before overriding parent theme styles, there is one other thing of vital importance that you must do. If you were to upload this file in its current state and activate your child theme, WordPress would look to your child theme’s style.css file as the default style file, and see nothing.
As a result, your theme would render with absolutely no CSS styling. Therefore, you need to call the parent theme’s CSS file within your child theme’s style.css file, with the following line of code:
@import url(../parenttheme/style.css);Note: We have already added this line – @import url(../twentynineteen/style.css); to our style.css file.
You need to change the “parent theme” to match the name of your parent theme.
Now when your child theme is activated, WordPress will know to import all of the CSS from your parent theme’s style file before executing any CSS stored in the child theme’s style.css file. Because the CSS contained in your new file will be the last thing WordPress executes, it will take precedence over any preceding CSS.
Alright, now let’s say you want to make some simple changes to your parent theme. What do you do? Just open the style.css file of the child theme and add new styles you want to change your parent theme.
If you know which elements you need to target then use the same selectors in your own child theme.
Here is an example of how we have reduced the overall body size and also removed some padding from the edges. We have also changed some properties for all anchor links which include a different font stack and color choice.
body {
    padding: 0 1.4em;
}
#page {
    margin: 1.667em auto;
    max-width: 900px;
}
a {
    color: #5281df;
    text-decoration: none;
    font-family: Calibri, Tahoma, Arial, sans-serif;
}
a:focus,
a:active,
a:hover {
    text-decoration: underline;
}
If you’re a developer, you might want to use something like browser inspector to find out where the offending styles are in the parent theme CSS.
Then just copy and paste the code into your child theme CSS where you can edit it safely:
h2 {
    font-size: 2.5em; /* Increasing the font size */
    font-weight: bold; /* Making the titles bold */
    margin: 20px 0 10px;
}
After editing the file, just save it.
Overriding Parent Theme Template Files – PHP Magic
Editing with CSS is great and it’s very easy to learn just enough to safely make changes to a WordPress theme but what happens when you really do need to make changes to a template file?
Simple! Just copy the parent theme template file to your child theme directory and make the edits there. WordPress will look in the child theme directory first for template files. And if an alternate version of, say, footer.php or single.php exists, WordPress will use that template file instead.
WordPress will even accept category-XX.php (where XX is the ID of a particular category) in a child theme if you want to make changes to a specific category archive.
Finishing up
Creating a child theme isn’t that complicated but if you want to customize the theme, you would need some expertise in CSS and PHP. So, it would be a great opportunity for you if you want to learn theme customization and design your site simultaneously. Because it will give you the opportunity to experiment with all your learning.
Also, if you’re a veteran, create a child theme to customize your parent theme without having the fear of losing the changes after getting the theme update.
However, if you face any complications while creating a child theme for your WordPress website, just drop a comment through the comment box below. We would love to help you out. Thank you.
Follow us on Facebook and Twitter for more fresh WordPress content.


Add your first comment to this post