
Google Tag Manager is used by more than 40% of all the websites that W3techs tracks. Does that sound like a lot?
If not, this is about 99.5% of all the websites that uses any tracking service. Yes, almost all websites that want to choose a tag manager, use GTM or Google Tag Manager.
If you want to add your WordPress website to that list, look no more. In this article, we will tell you why and how to add Google Manager to WordPress.
Let’s get started!
Quick Navigation
What is Google Tag Manager and Why do You Need It

Google Tag Manager (GTM) is a free tracking tool from Google that allows website owners to add tags to their websites to track and collect user activity.
This allows users to easily collect valuable information about user behavior without using any code.
Google Tag Manager is immensely popular because of its incomparable feature. You can track literally a lot of things using GTM. Some of the common things you can track are –
- Events (certain link clicks, downloads, product add-to-cart clicks, etc)
- Scroll tracking
- Form abandonment
- Shopping cart abandonment
- Video views tracking
- Exit link clicks
- and many more…
So you can just guess the things you can do with Google Tag Manager!
In the following part of our blog, we will share how you can add Google tag manager to the WordPress site step by step.
How to Add Google Tag Manager to WordPress
Adding Google Tag Manager to WordPress involves a similar process, whether you do it manually or without a plugin. Both processes start with you creating a Google Tag Manager account.
Let’s start the manual process first.
How to Install and Setup Google Tag Manager in WordPress Manually
First thing first, let’s take you through the process of creating a Google Tag Manager account.
Create a Google Tag Manager Account
First, visit Google Tag Manager.
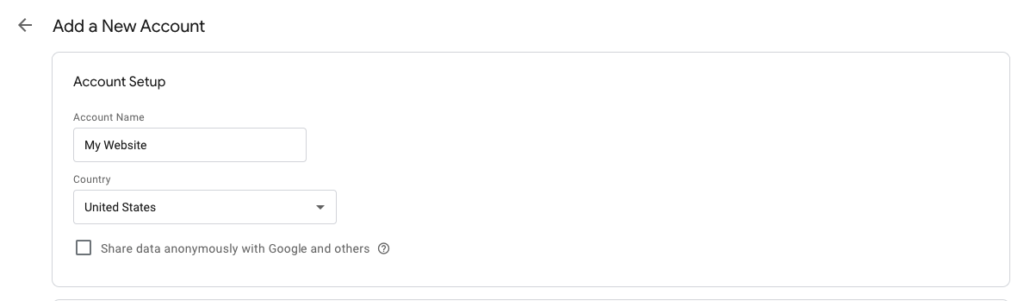
Now you will be prompted to create an account and once you click that. You will see something like the following image.
Give any account name as you wish and select your country.
On the same page, you will also find the Container Setup option. Here, you need to insert your website address and choose the target platforms to track. You can only choose one platform.
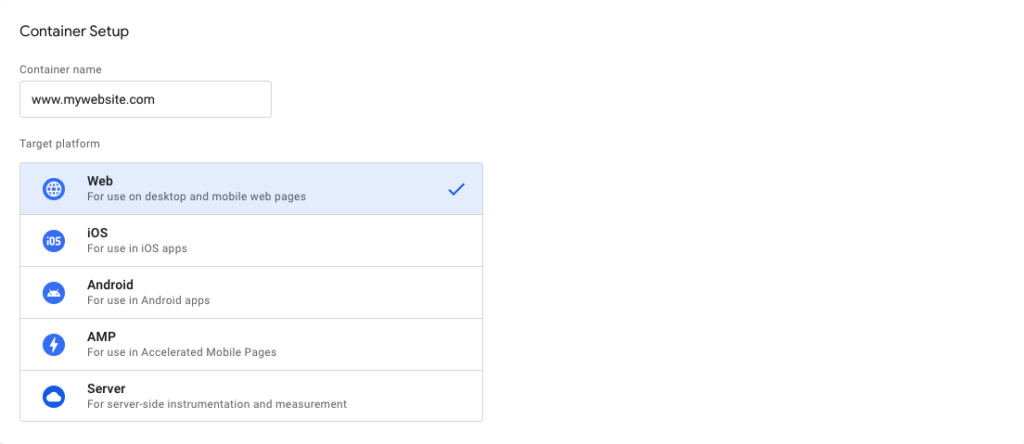
After filling up the information, click on Create.
Google Tag Manager should show you some terms and conditions that you need to accept.
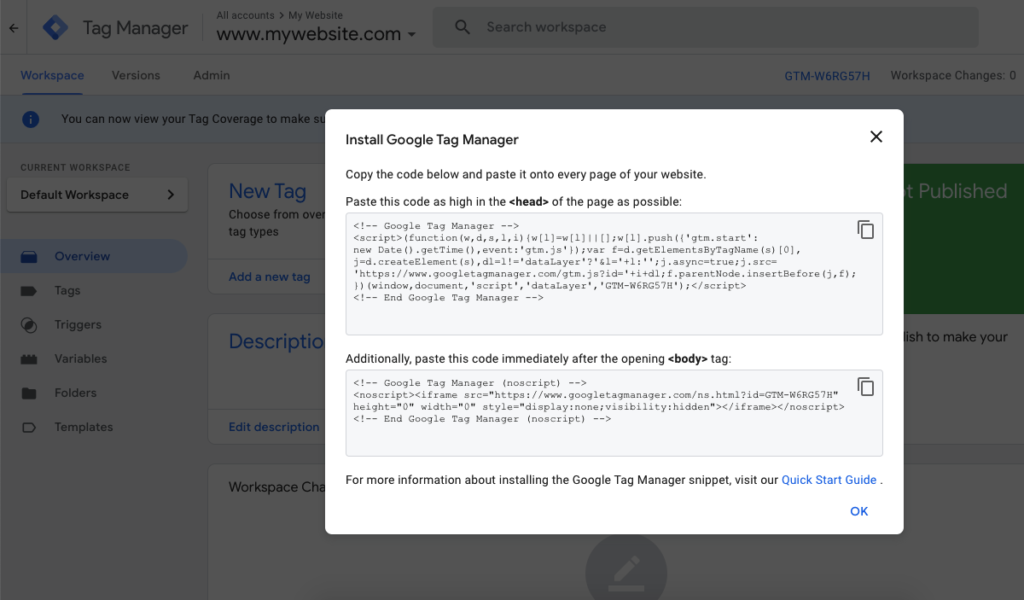
After that, you will see the tracking code as a popup. You should copy and store these codes because these are the code that we will be adding to the WordPress site.
There should be two codes. You need to paste one of them to the <head> section of the webpage, and the second one to the <body> section of your page.
Add the Tracking Code to WordPress
Now we will add the tag manager tracking code to WordPress.
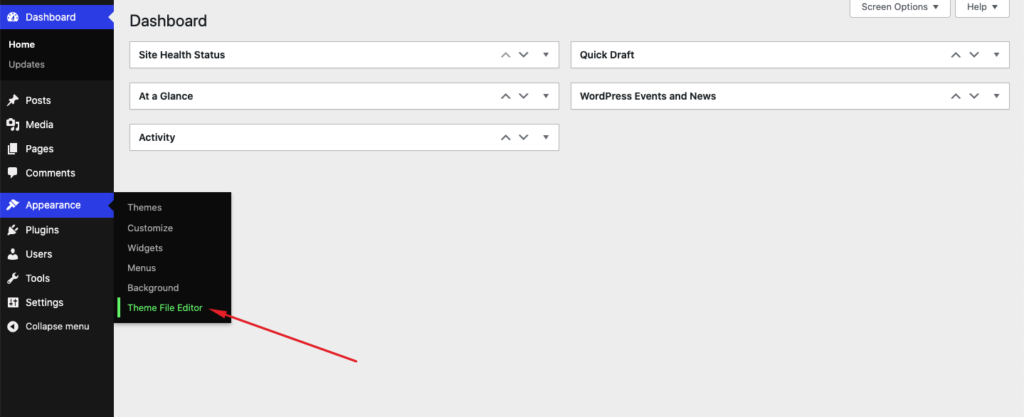
Log in to your WordPress admin dashboard and navigate to Appearance > Theme File Editor from your sidebar.
Now click on Theme Header (header.php) file.
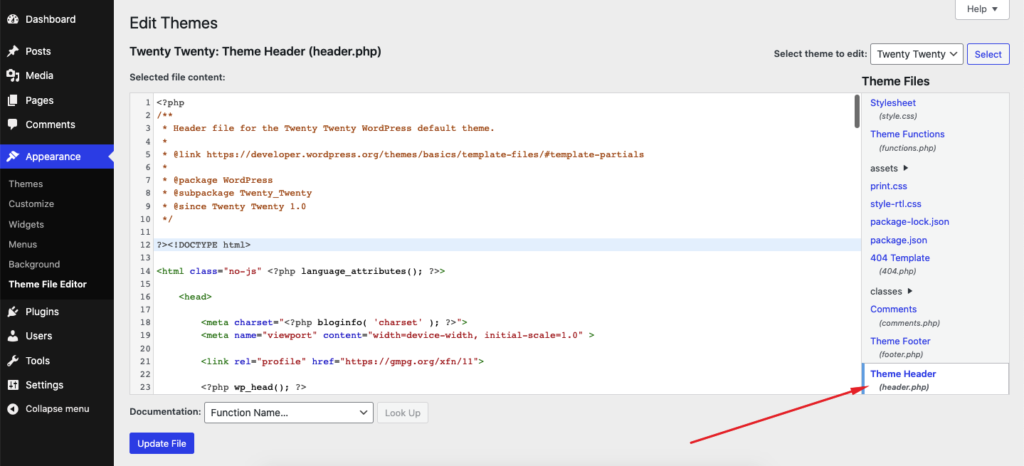
Scroll down, and should find the <head> section, paste the code from the GTM on this section. You should paste it as high as you can.
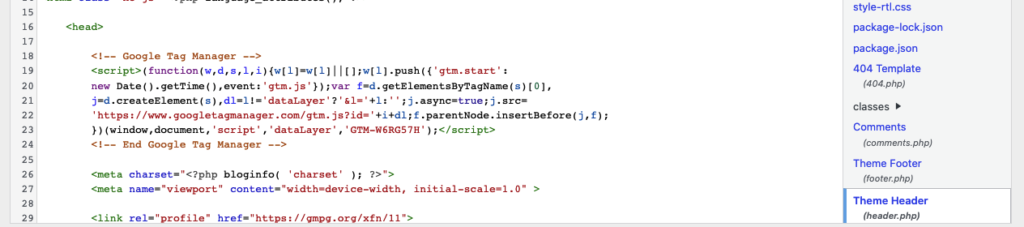
Now we will add the second portion of the code, which should go inside the <body> section.
On the same theme file, find the body section and paste the code. After that save the file.

(Please make sure to not alter any other code on the theme files, as they can break your site.)
With that, you’re done connecting the Google Tag Manager on WordPress. But we do need to debug it from the Google Tag Manager to ensure a successful connection.
Debugging the Connection Status with Google Tag Manager
Again, go back to GTM.
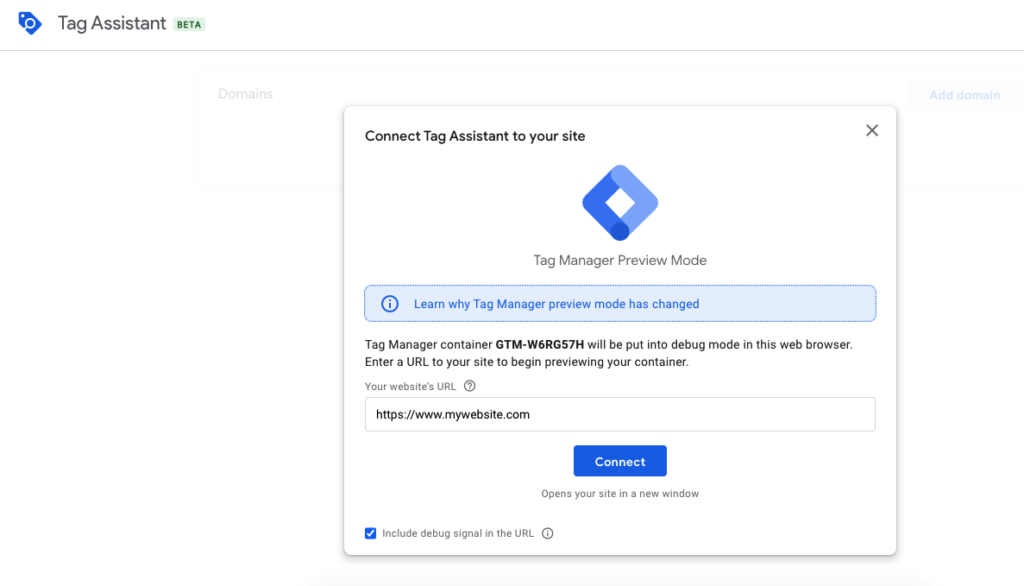
Click on the Preview button from the navigation menu.

After that, a popup will appear to connect the site. Insert your domain and click on Connect.
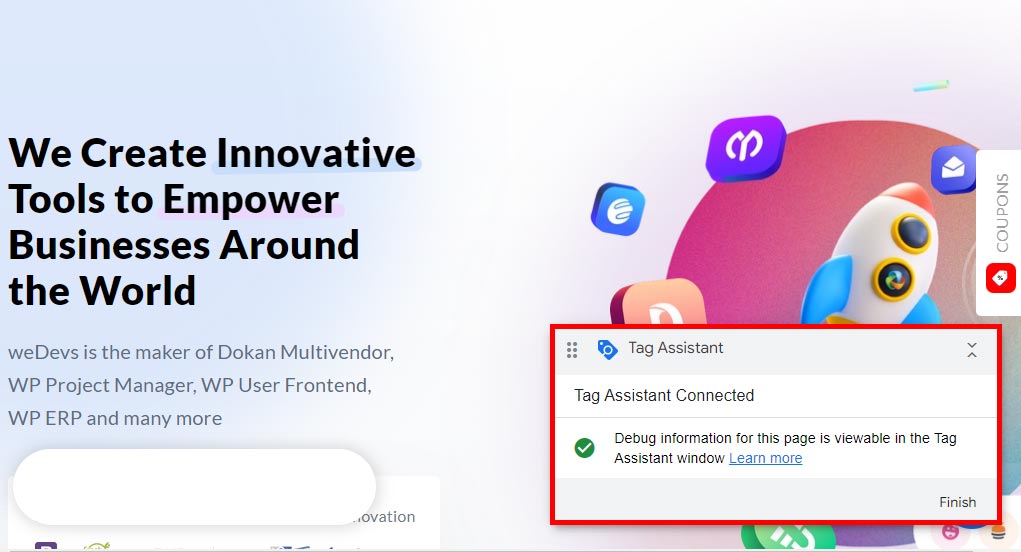
After that, you should see your website appear on a popup window.
If the tag is successfully connected, another popup will appear at the bottom-right corner of the page. It should contain the message “Tag Assistant Connected“.
Once you close the popup window, you will see another confirmation of the successful connection.
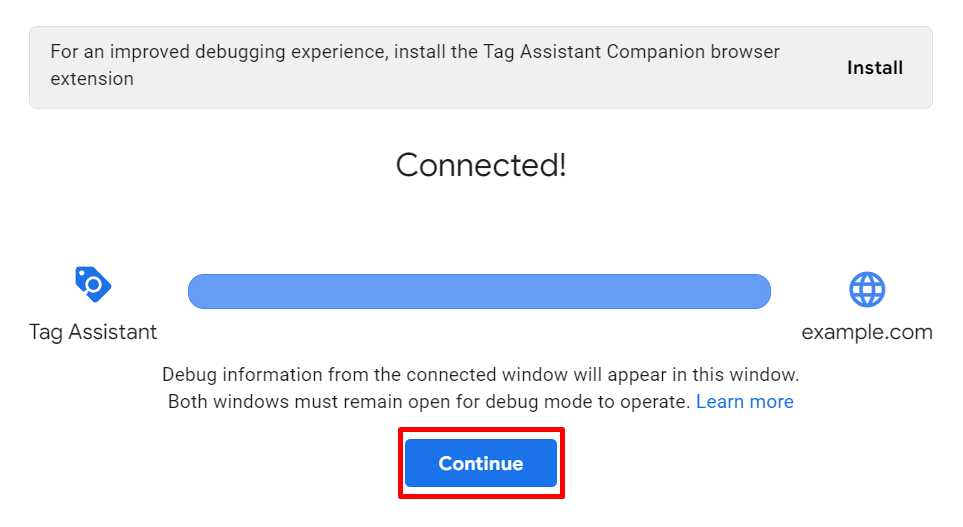
On the next page click on Submit to complete the debug.
After that, you can start creating different tags to track different activities.
Now, if this process seems complicated to you, don’t worry. In the following section, we will show you how to add Google Tag Manager with a plugin as well.
How to Add Google Tag Manager in WordPress With a Plugin
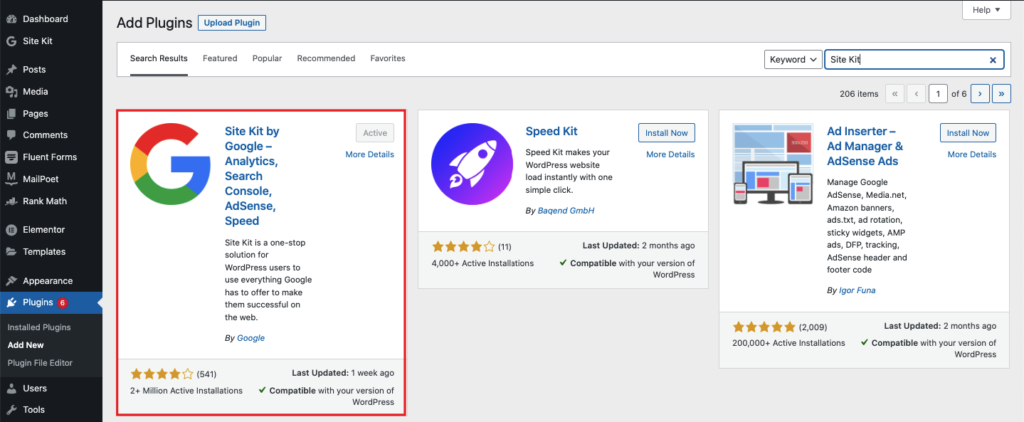
Google has an official plugin for adding its services to WordPress sites. The plugin is called Site Kit by Google.
Install the plugin from WordPress.org, it is free to use.
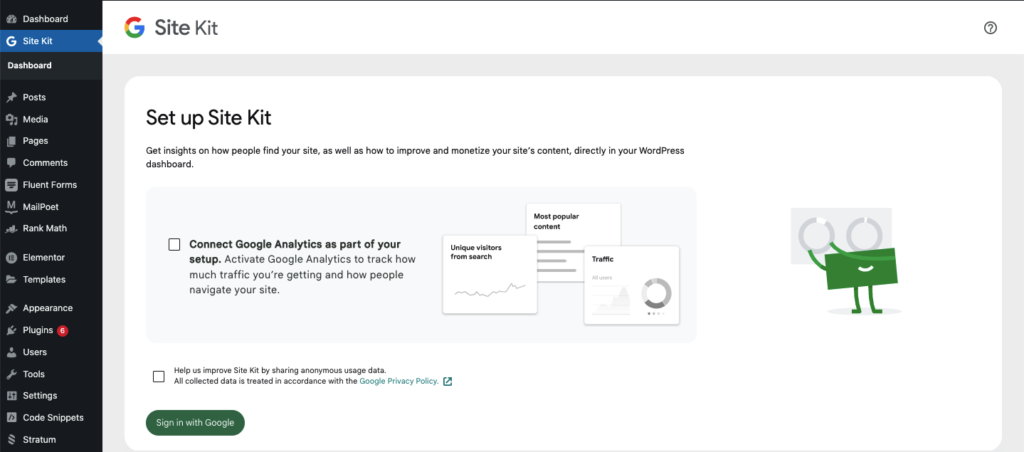
After installing the plugin, you should find the Site Kit option on the sidebar.
Click on it and Sign in with the Google account that you have used to use GTM.
After that, connect your Google Tag Manager account that you created earlier.
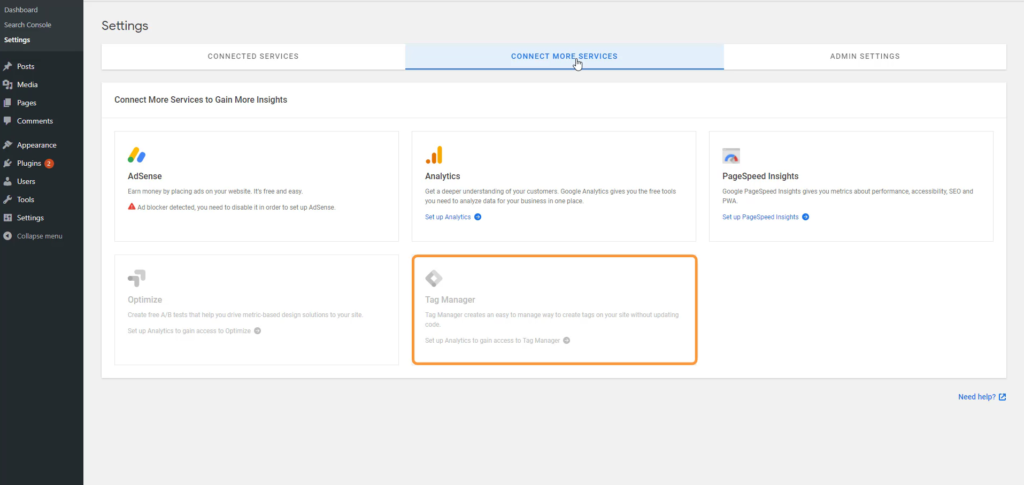
With that, you should be successfully added the tag manager to your WordPress site.
Common Questions that Can Arise While Adding GTM to WordPress
Now we will answer some of the common questions that come up while adding Google Tag Manager to a WordPress site.
Does Google Tag Manager work with WordPress?
Yes, Google Tag Manager works perfectly with WordPress. Google even has a plugin called Site Kit to connect its services with WordPress, which includes Google Tag Manager as well.
How do I add Google Tag Manager to WordPress?
There are three main steps to adding Google Tag Manager to WordPress.
• Create a Google Tag Manager Account
• Add the Tracking Code to WordPress from Theme File Editor
• Add preferred tags on GTM to track.
How do I add a Google Tag code to my website?
You don’t have to manually add every tag code. Rather, Google does the job for you once you connect your website to GTM.
Can I add Google Tag Manager code to WordPress without a plugin?
Yes, it is absolutely possible to add a Google Tag Manager tracking code to your WordPress site without using a plugin. You can add the tracking code from your Theme File Editor.
Wrapping Up
Unless your site is only for personal portfolio or recreational purposes, Google Tag Manager can prove to be invaluable. Even then Google Tag Manager can be useful for tracking your user’s activity on your website.
For business-focused websites, Google tag manager is a must to have. You need to track if the visitor is clicking the button you want to, reading as much as you want them to and many more to ensure that your website sales funnel is working properly.
We hope this article helped you to learn how to add Google Tag Manager to WordPress. If you still have any questions shoot us a question in the comment box below.


Quick, helpful, and on point. Thanks for the guide.
Hi there,
We are glad to help you.
Cheer
Faisal.
Nice guide!
Hi there,
Thank you for your appreciation.
Faisal.