Pressable Hosting Review – A Reliable Hosting Provider by Automattic
In today’s digital landscape, having a reliable and high-performing hosting provider is crucial for the success of your WordPress website. It minimizes downtime, slow loading times, and other performance issues that can frustrate users. So, you need a quality hosting provider to ensure a fast and responsive website to enhance user experience and improve engagement.
Besides, a reliable hosting provider helps ensure that search engines can crawl and index your website effectively and improve your chances of ranking higher in search results.
One such provider that specializes in managed WordPress hosting is Pressable. With a strong focus on performance, security, and ease of use, Pressable offers a range of features and services tailored to WordPress users.
In this Pressable hosting review, we will delve into the key aspects of its managed hosting and explore its notable features, performance optimizations, security measures, and overall user experience. Keep reading to know what Pressable brings to the table and whether it aligns with your specific WordPress hosting requirements.
What is Pressable by Automattic?
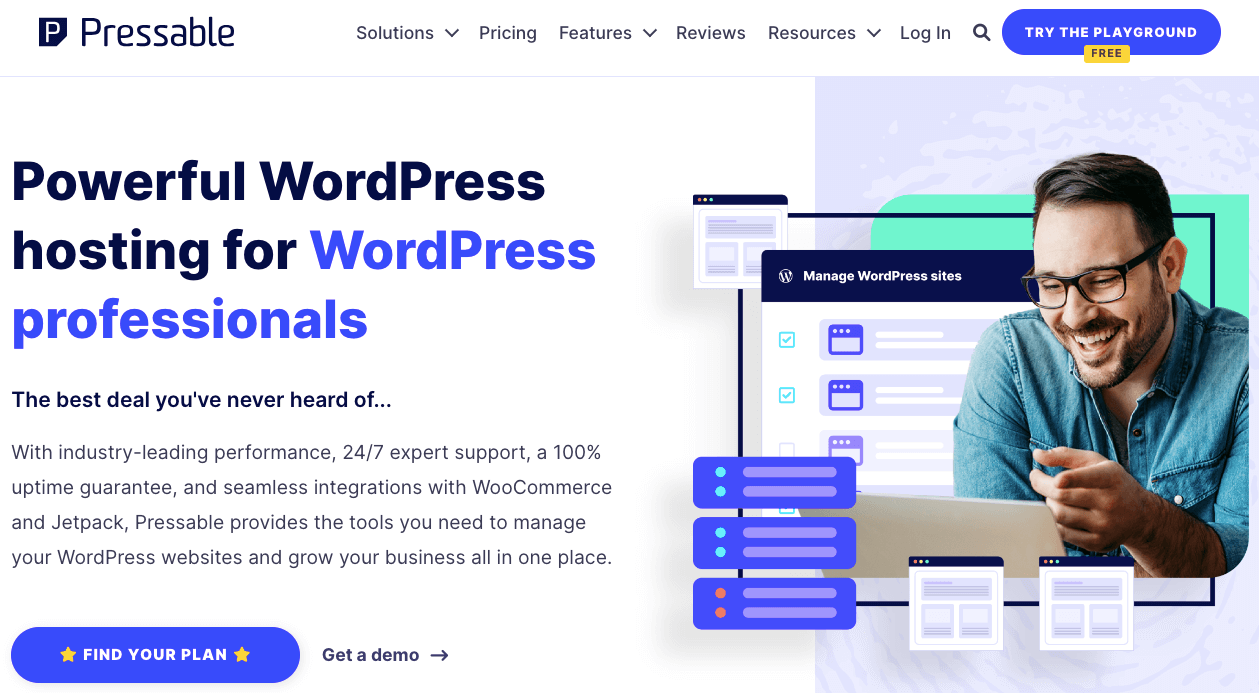
Pressable is a managed WordPress hosting provider that specializes in hosting WordPress websites. It is owned and operated by Automattic, the same company behind WordPress.com, WordPress.org, WooCommerce, and other popular WordPress-related products.
Its hosting services are designed specifically for WordPress websites. They provide a managed environment that takes care of the technical aspects of hosting, including updates, backups, security, and performance optimization.
The key features of Pressable hosting
Pressable strives to provide a highly reliable hosting environment. It maintains a robust infrastructure to minimize downtime and maximize uptime for WordPress websites. Some key features of Pressable hosting include:
- Managed WordPress: Pressable focuses on optimizing the performance, security, and overall management of WordPress sites, allowing website owners to focus on their content and business goals.
- Almost 100% uptime: It’s important to note that no hosting service can provide absolute uptime, but Pressable guarantees 100% uptime.
- Performance: It utilizes advanced caching techniques, content delivery networks (CDNs), and server optimizations to ensure fast loading times for WordPress sites.
- Scalability: Pressable’s hosting infrastructure is built to handle high traffic and spikes in demand, allowing your site to scale seamlessly as your audience grows.
- Security: Pressable implements robust security measures, including firewalls, malware scanning, and regular security audits, to protect your WordPress sites from threats.
- Staging environments: You’ll also get staging environments where you can safely test changes and updates to your WordPress site before deploying them to the live site.
- Developer-friendly: Pressable offers developer-friendly features such as SSH/SFTP access, Git integration, and support for popular development tools.
- Daily backups: Pressable takes regular backups of your WordPress site, allowing you to restore your website to a previous state if needed.
- Free migrations: If you have an existing WordPress site hosted elsewhere, Pressable offers free migration assistance to help you seamlessly transfer your site to its hosting platform.
- Customer support: Pressable has a team of WordPress experts available to assist you 24/7 with any technical issues or questions you may have.
Pressable hosting review: Let’s explore the Pressable dashboard and tools

The Pressable dashboard serves as a centralized control panel where you can manage various aspects of your hosting account and WordPress websites. You’ll find the required tools to handle website management, WordPress updates, staging environments, backups and restores, security features, performance optimization, accessing support resources, and more.
1. Set up your WordPress website
You can check the functionality of Pressable with their free trial option. We’re going to show you the overview of this hosting provider’s interface by creating a demo site.
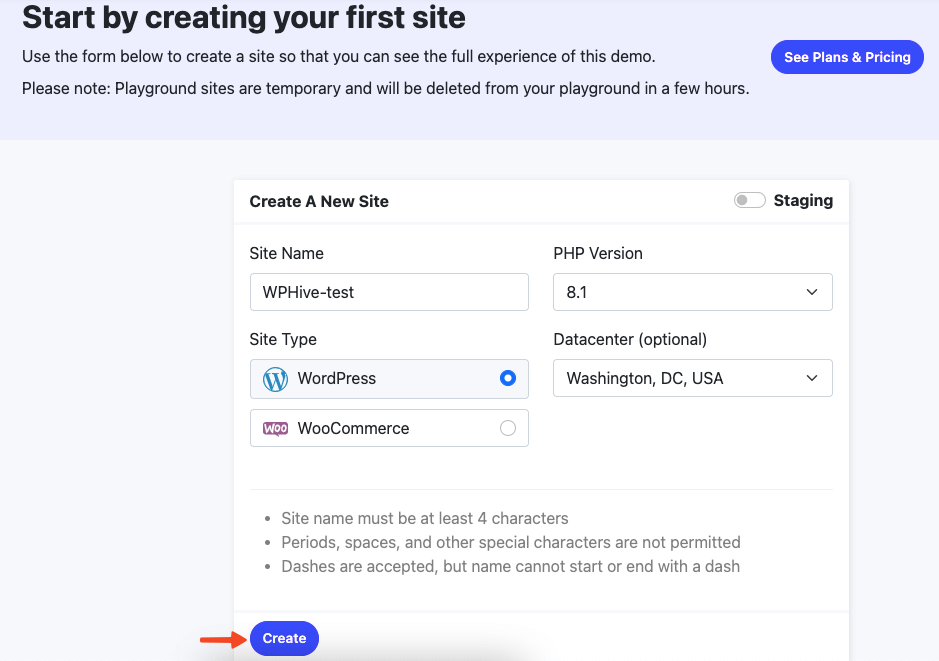
Pressable will take you to the setup wizard once you sign up with your account. The process is very straightforward. All you need to add is the site name, and PHP versions, and choose a data center and the site type- WordPress or WooCommerce site type. Then hit the create button to add your website to the hosting plan.
You can start with a temporary domain name. Pressable lets you connect the final domain name to the site when you will go live.
You already have a live domain that you want to host on Pressable. Don’t worry. Pressable offers free migration and will help you along the setup process.
2. Explore the site dashboard
You’ll see all your website on the Sites section of the Pressable dashboard. You can also filter your website based on environments, PHP versions, and tags. This filter option is useful when you have multiple websites.
Click on the Settings button right beside your site’s name to see the available option Pressable has.
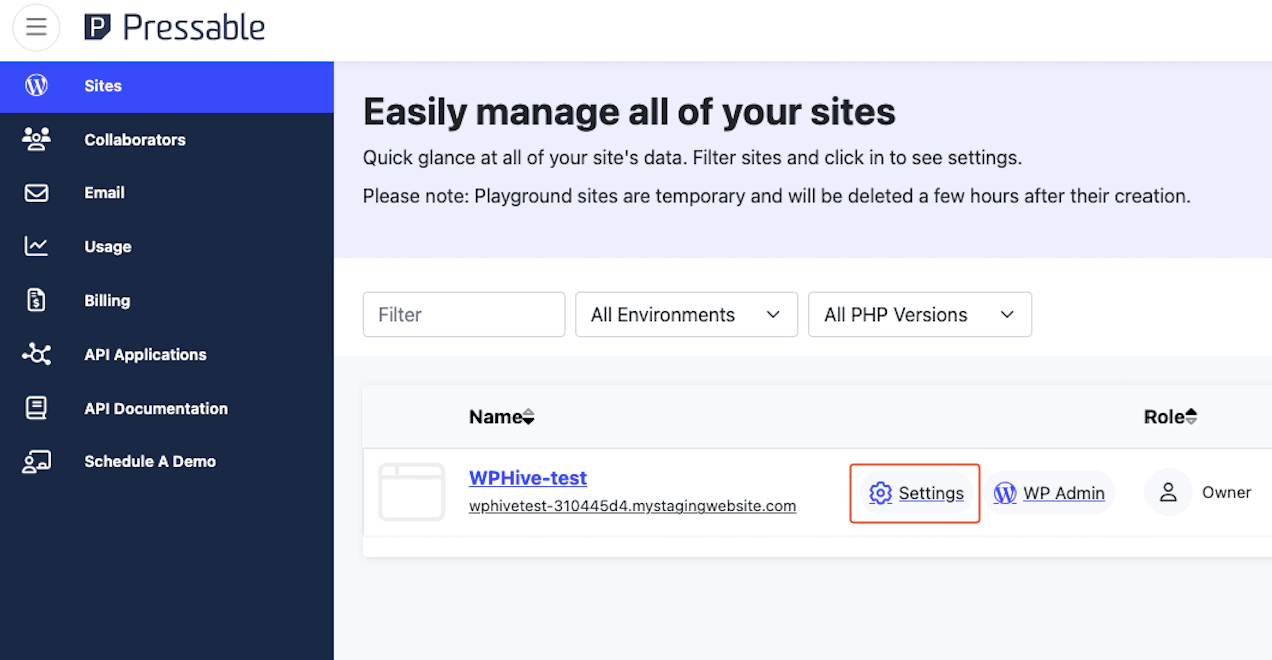
It has Overview, Domains, Performance, Users, Backups & Restores, Git, and Logs(not available for the demo website) options to help you control the website from a single point of operations. All these options come with the required functionalities to maintain a website efficiently.
a. Overview
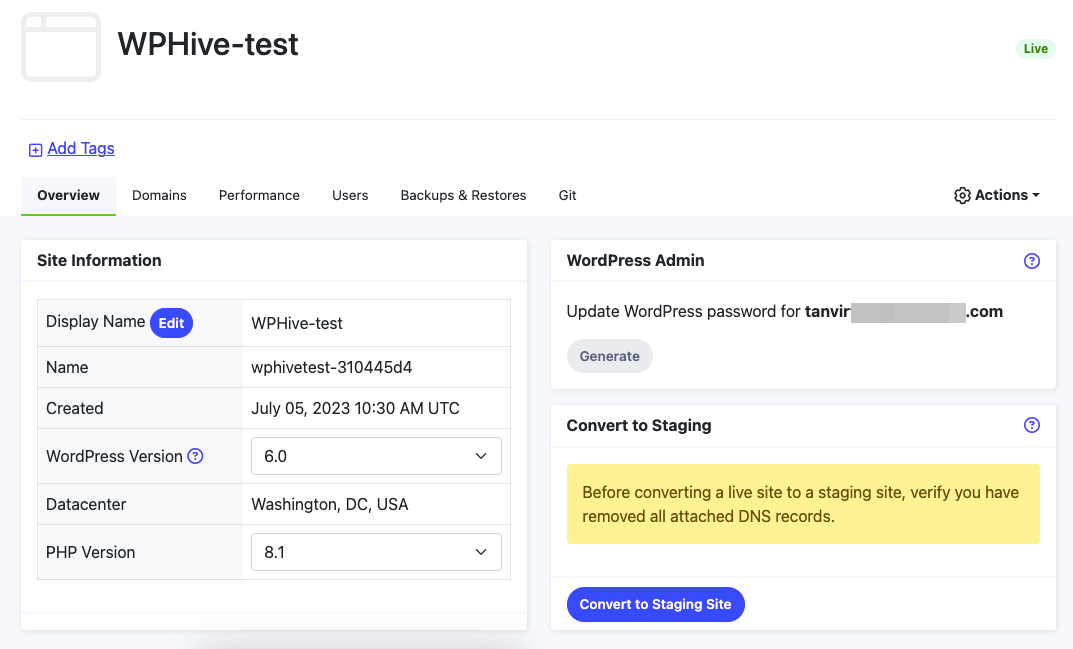
The Overview tab lets you see all information regarding the site’s environment. You can adjust the configurations from here if you need. It also has a section that lets a user change their WordPress admin’s password.
All the tabs have a top bar with multiple options namely WP Dashboard, phpMyAdmin, View Site, and more. You can quickly access any of these links from anywhere across the dashboard.
b. Domains
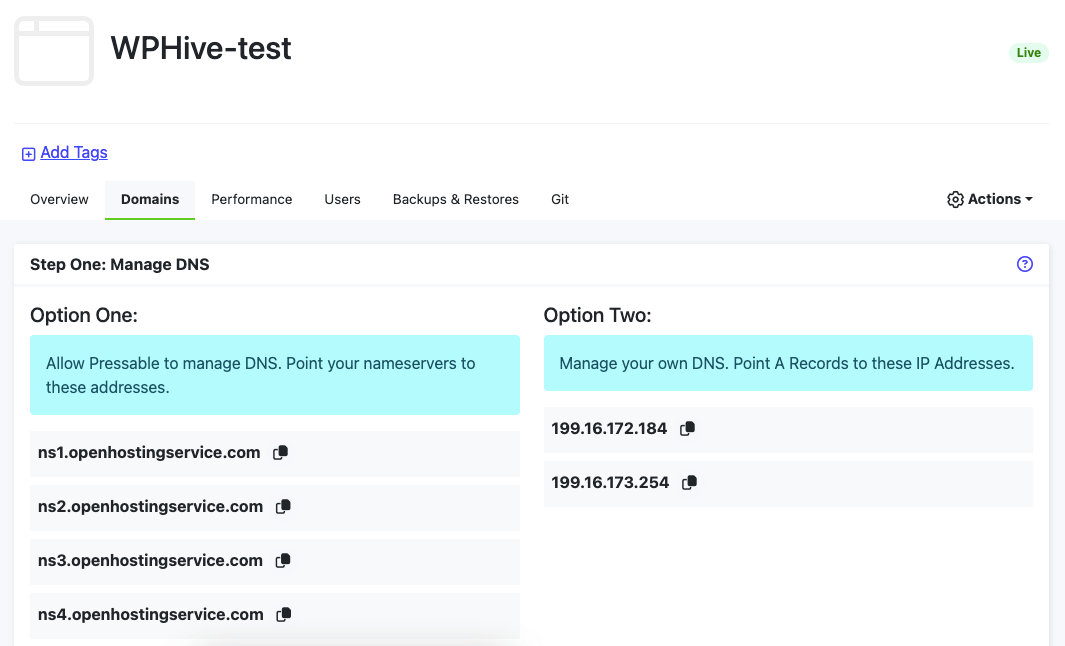
From the Domains tab, you can manage your website’s nameservers. Pressable automatically adds SSL certificates to its users’ websites. So, you need not worry about it. Simply type the exact DNS credentials in the respective field of your domain provider’s form.
Also read: How to Buy a Domain Name Forever (Incredibly Easy)
c. Performance
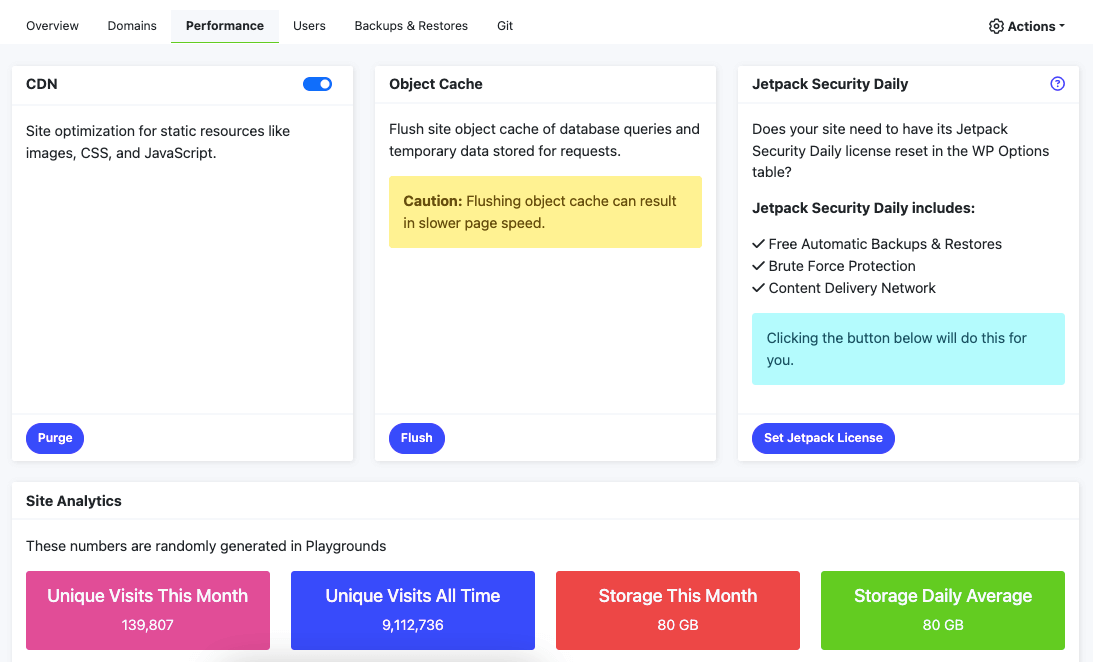
You can see unique visits of a month, unique visits of all time, storage used in a month, and average storage used in a day from the Performance tab. You can also activate CDN, object caching, and set JetPack licenses from here.
d. Users
The Users tab is useful if you want to give someone access to your WordPress site within Pressable. You can also control user access minutely by checking the boxes beside the permission names. It is quite similar to the Collaborators tab of the main Pressable dashboard. We’ll show it in a later part of this article.
e. Backup & Restores
You can download the backup files and restore them when needed from this section. Pressable stores daily backups for a week, followed by weekly backups for a month. Keep in mind that your site will be set in maintenance mode during the restoration process.
Also read: 10 Best WordPress Backup Plugins Compared in 2023
f. Git
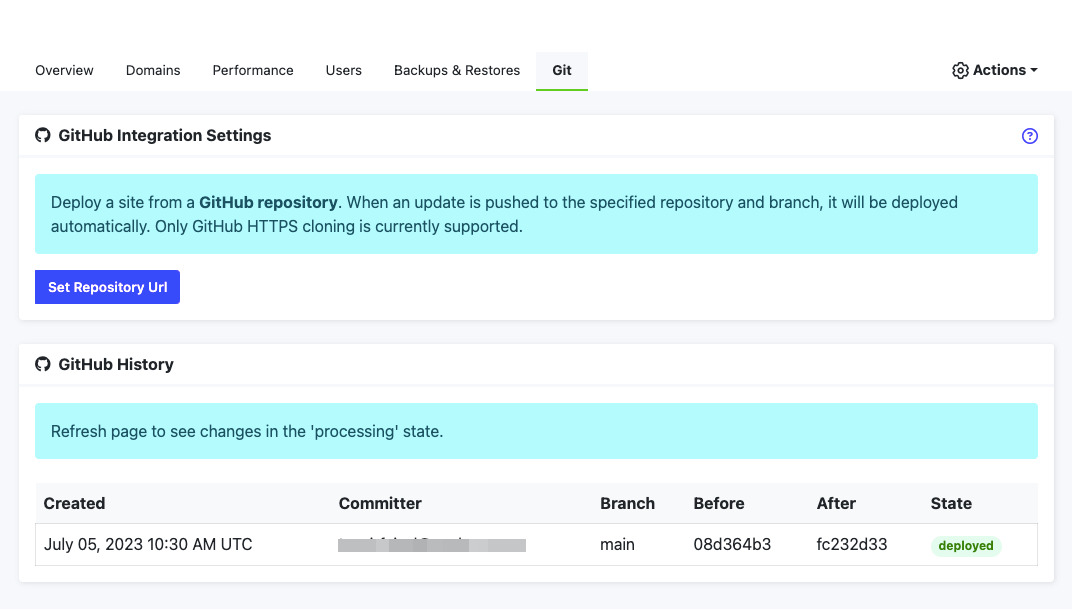
Pressable supports in-built GitHub integration. You can deploy an update to the specific repository and branch automatically using this feature. This makes the site deployment process using the GitHub repository easier. Also, you’ll get the GitHub history here where you can see changes made by you.
You’ll also see the Logs tab for the paid plan. It lets you view Webserver logs and PHP logs.
3. Create a staging site if needed
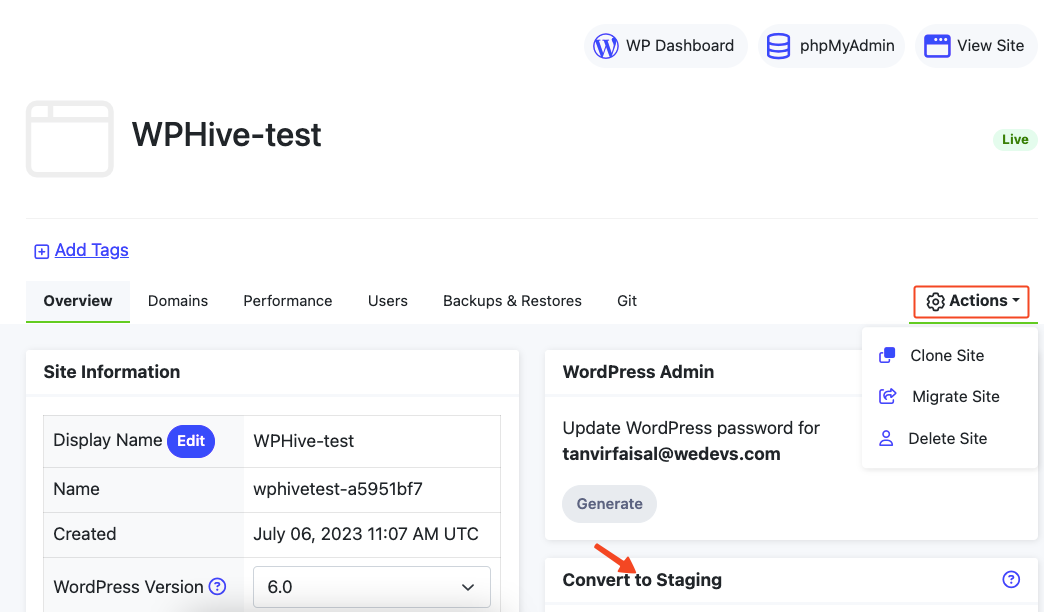
You can convert your live site to a staging site with a few clicks from the dashboard. Click on the Actions menu from the top right corner and choose your desired option from the drop-down menu. You can clone, migrate or delete a site from here. The cloning functionality will let you create a staging website. Also, you can navigate to the “Convert to Staging” part from the Overview tab. It will also let you turn your live site into a staging website.
4. Choose permissions for the collaborators
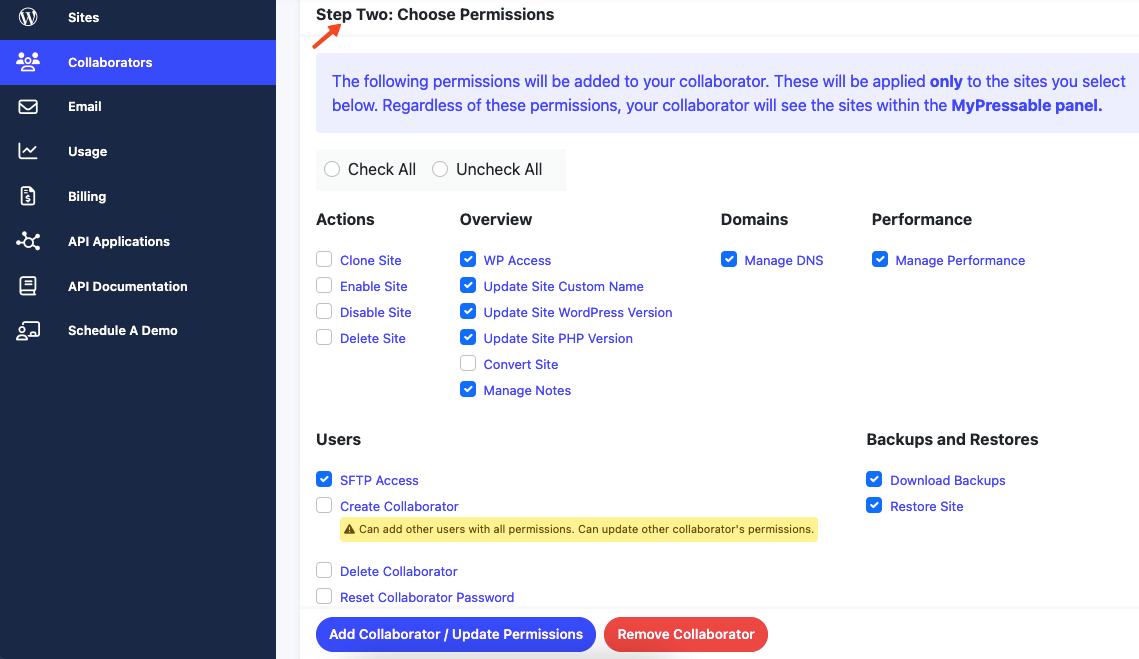
Navigate to the Collaborators menu from the main Pressable dashboard’s left sidebar. You can add a collaborator for a specific site. Pressable lets you control the collaborator’s ability to control your site within the MyPressable panel. You can choose custom permissions for him and select or deselect all checkboxes from this section.
5. Manage professional email hosting
Since email communication is the most professional medium of communication for a company, you should subscribe to an email service provider. Pressable uses Tian to ensure more reliability, easy email creation, less spam, better deliverability, and more.
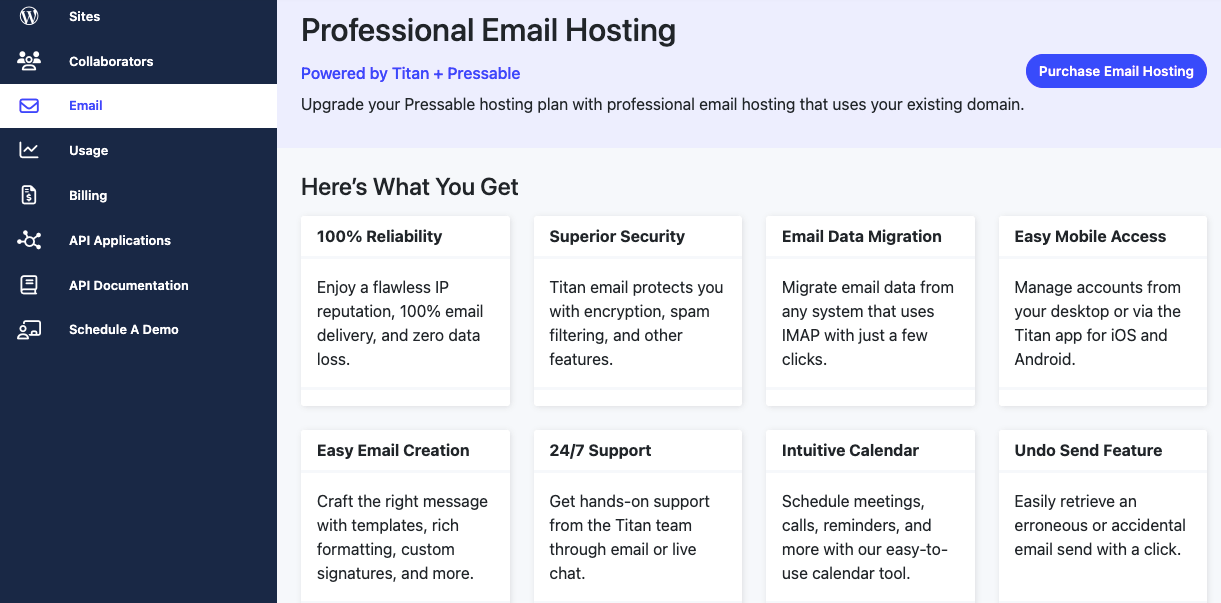
Other options of the dashboard include Usage, Billing, Reports, API Applications, and more. All of these are helpful for site owners. He can see the usage of his storage, reports, billing information, and API applications from these menus.
Pressable pricing – from Entry plan to Business 100 plan
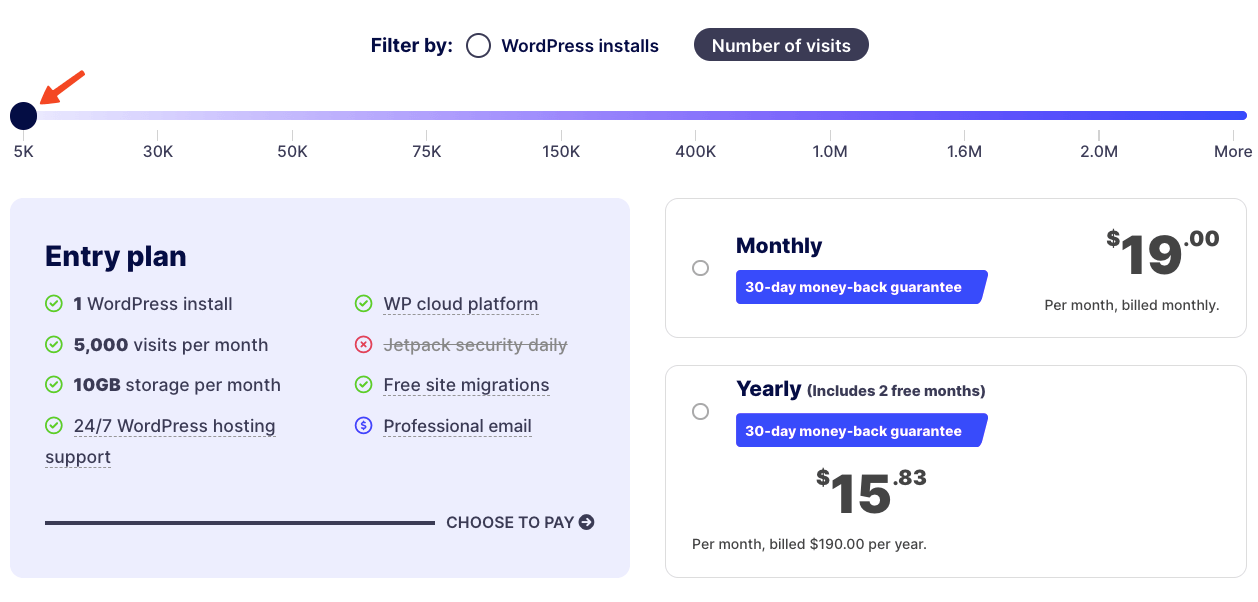
It’s important to remember that pricing and plan details can vary, and additional features may be available depending on the specific plan you choose with Pressable. It currently offers nine well-defined hosting plans. You can also go for a customized plan if your monthly traffic exceeds 2M or you need more than 100 WordPress installs.
We’ll show you the first and last plans here to give you an idea of the overall pricing system. The first plan is named the Entry plan. It comes with 1 WordPress install, 5000 monthly traffic capacity, and 10GB disk space. But Pressable doesn’t offer Jetpack security features for this plan.
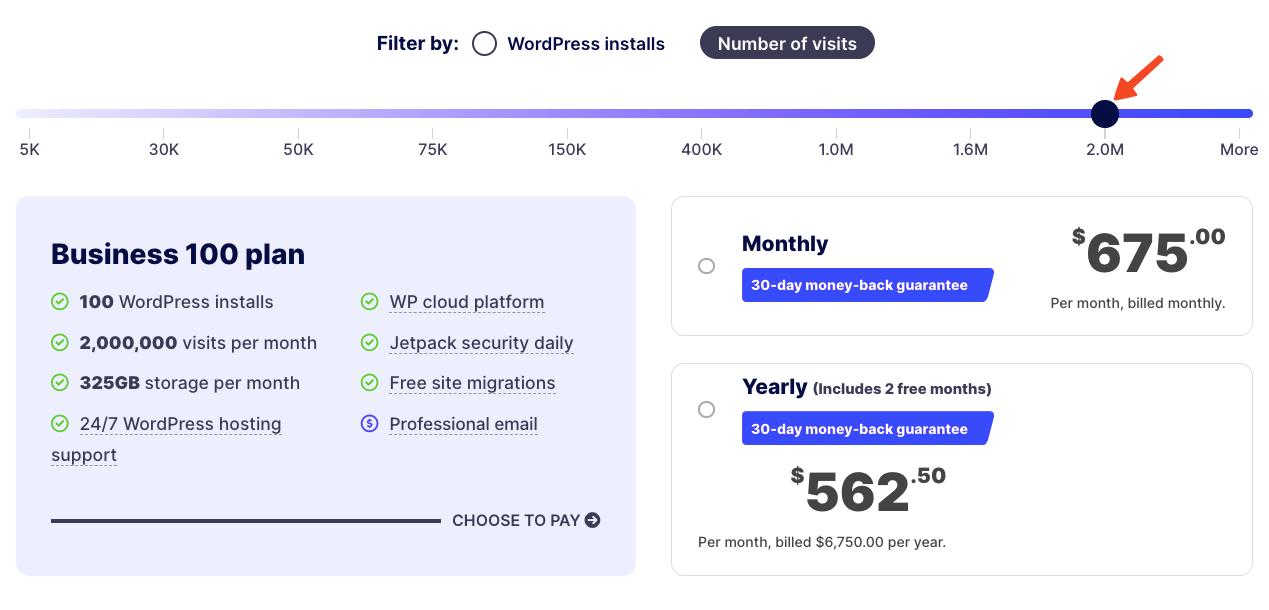
The last plan is named the Business 100 plan. It is suitable for those who manage a large number of WordPress websites or have websites with high traffic volumes. It offers 100 WordPress installs, 2000000 traffic capacity, and 325GB storage.
The Business 100 plan also includes Jetpack security features, providing daily security scans. It ensures protection against brute force attacks, malware scanning, and other security measures to help safeguard your WordPress websites.
You can contact Pressable representatives through chat or schedule a consultation to create a custom plan for your needs. Check all the pricing plans below.
It’s your turn to choose the right Pressable plan
You need to assess your website needs and consider factors such as the number of WordPress installations you require, expected monthly visits, and storage requirements. Understanding these needs will help you determine the appropriate plan.
If you anticipate significant growth in website traffic or plan to add more WordPress sites in the future, it will be wise to choose a plan that offers scalability and accommodates your future expansion.
Evaluate your budget and determine what you are comfortable spending on managed WordPress hosting services. Compare the features and pricing of different Pressable plans to find the one that aligns with your budgetary constraints.
Take into account any specific features you may need, such as staging environments, additional security measures, or developer-friendly tools. Ensure that the chosen plan includes the features that are essential for your website requirements. By considering these factors, you can make an informed decision about which hosting plan best suits your needs.
Disclosure: WP Hive earns a commission when you buy through partner links. It does not influence the unbiased opinions of our writers. Learn more →
https://wphive.com/reviews/pressable-hosting-review/
Tanvir Faisal
Md. Tanvir Faisal is a Content Writer at WP Hive with over 7 years of experience in Content Writing, Copywriting, Proofreading, and Editing. He specializes in creating helpful content that engages readers, drives social media shares, and improves SEO ranking. In his free time, Tanvir enjoys exploring new cuisines, traveling to unknown places, and spending quality time with his family.

