
Security is a big shot. Everyone is concerned about security. From Mark Zuckerberg to a common website owner, everyone is trying to make their online presence more secure. That is why Two Factor Authentication has been introduced and is yet another powerful method to secure our websites.
Two Factor Authentication is so popular that big companies like Google and Facebook are using it to verify users before logging in to their accounts.
As a WordPress site owner, now, you can enable Two Factor Authentication as well to your site. If you don’t know how to do that, don’t worry. Today we are going to show you the step-by-step tutorial on how to add WordPress Two Factor Authentication to your site. So, let’s get started.
Why You Need to Add WordPress Two Factor Authentication in Your Site

Every day a significant number of websites are getting hacked due to security lackings. Hackers use various ways to hack a site. Among them, brute force attack is the most popular and widely used technique.
In a brute force attack, attackers use bots to repeatedly guess login credentials until they find the right combination. The username and password are the only things standing between the WordPress admin area and a potential attacker.
Once they enter your site, they can do anything they like. That means you’ll lose control over your site. So, to protect yourself, your customers, and your business, take some measures for security purposes before hackers take your site down.
Two Factor Authentication is a highly secure method that can help you to protect from brute force attacks. It delivers a one-time password to a physical device, for example, a smartphone, to verify the WordPress user’s identity before they can log in. That means even if someone stole your password, they will need to enter a security code from your phone to gain access.
Now we believe, you can understand the urgency to set up WordPress two factor authentication on your site.
How to Set up WordPress Two Factor Authentication Using a Plugin
There is a number of free WordPress plugins to set up WordPress two factor authentication on your site. However, here we are going to use the miniOrange 2-Factor Authentication plugin to make this tutorial.
Reasons Behind Choosing miniOrange 2-Factor WordPress Plugin:
- Two-factor using SMS, OTP over email, soft token, QR code, push notification
- Support for miniOrange Authenticator as well as Google Authenticator
- Shortcodes are available for customizing front-end login pages
- Device identification avoids repeated prompts on the same device
- Free version offers enough features to get our job done.
Now let’s show you the process to set up WordPress Two Factor Authentication using this plugin.
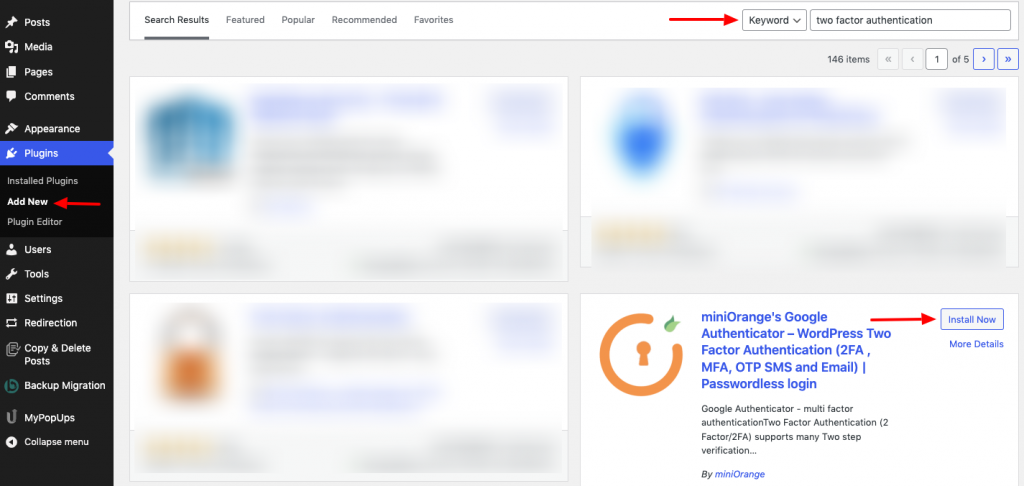
Step 01: Install and Activate miniOrange 2-Factor WordPress Plugin
- Go to your WordPress dashboard > Plugins > Add New and then type the plugin name on the search box.
- Click the Install button and then activate the plugin.
After activating the plugin, you’ll be redirected to the following page.
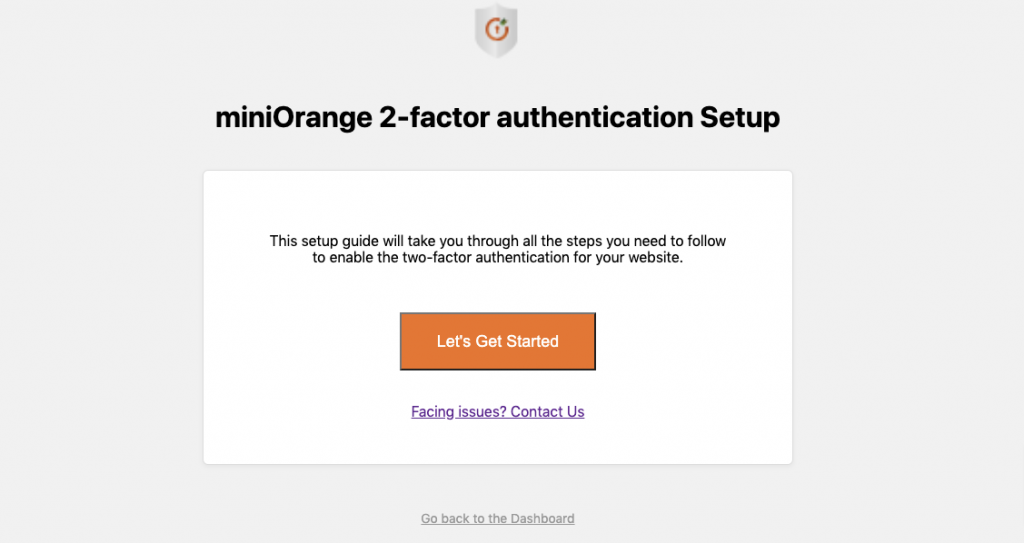
- Click on the “Let’s Get Started” button to configure the plugin.
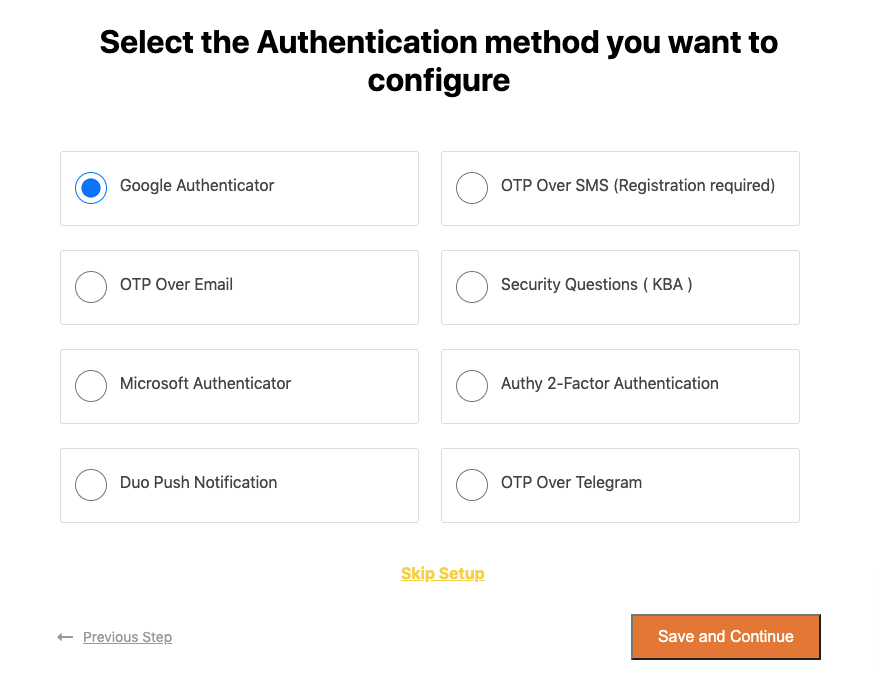
Step 02: Configure the Google Authenticator
- Choose any of the available two factor authentication methods for your site. Here, we are going to choose the first one- Google Authenticator.
- Then press “Save and Continue” button.
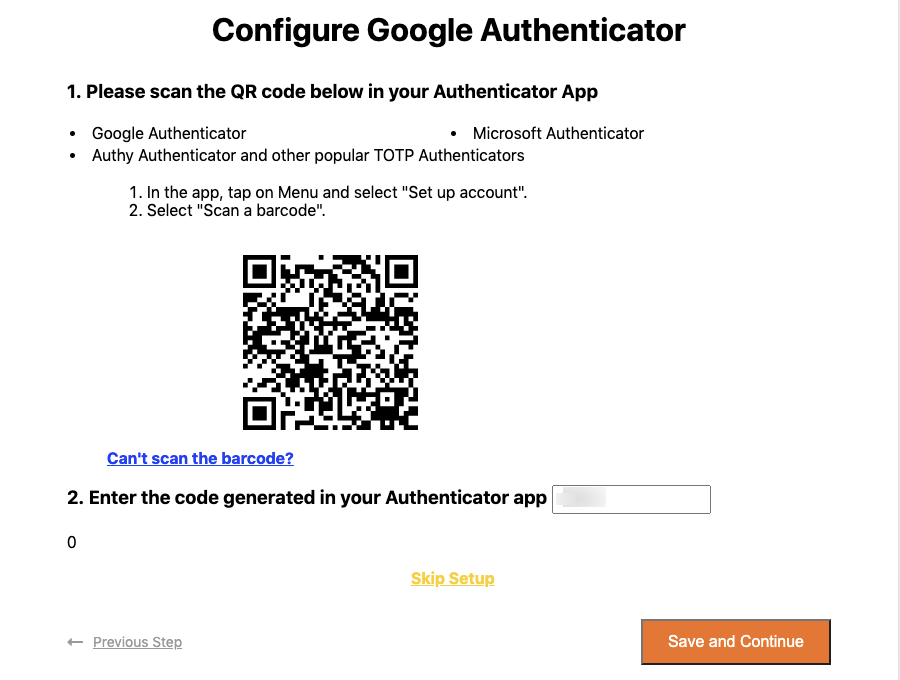
On the next screen, you’ll get a code to scan.
- To scan the code, you need to install an app on your smartphone. Go to Google Play Store or Apple App Store to install the app. Search “Google Authenticator” and you’ll get the app to install.
- After installing the app, scan the barcode and you’ll get a six digit OTP.
- Enter the OTP and click the “Save and Continue” button.
Congratulations! You have successfully completed the Google Authenticator configuration process.
Step 03: Enable Two Factor Authentication
- Now go to miniOrange 2-Factor > Two Factor and there you’ll find a toggle button. Turn it on to enable two factor authentication option.
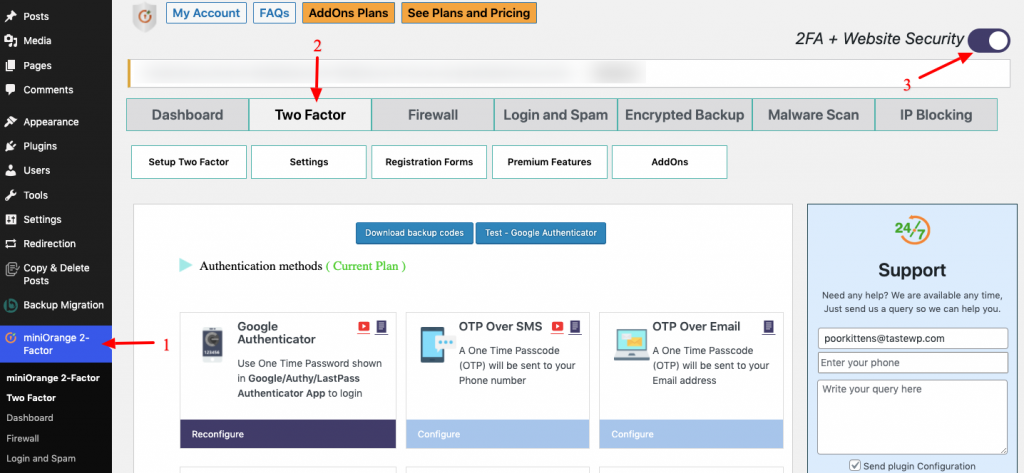
- In addition to the Google Authenticator method, you can opt for any of the additional methods of 2FA, such as security questions, OTP over SMS, OTP over eMail, OTP over Whatsapp, many many more.
Step 04: Set up WordPress Two Factor Authentication Using OTP Over SMS
- Now we will set up WordPress two factor authentication using OTP Over SMS option. To do so, click on the “Configure” button.

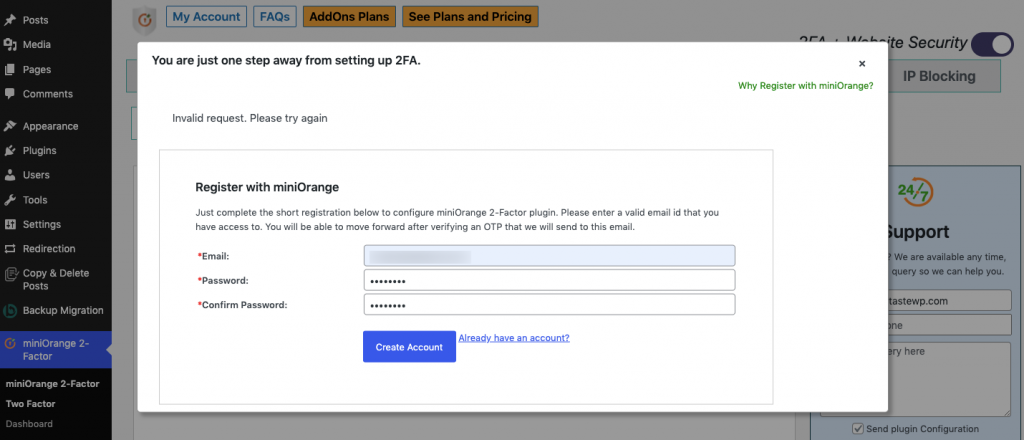
- For first-time users, you’ll have to register for an account with miniOrange before proceeding.
- Once you’ve registered, you’ll get to see the number of remaining email and SMS transactions that you are allowed.
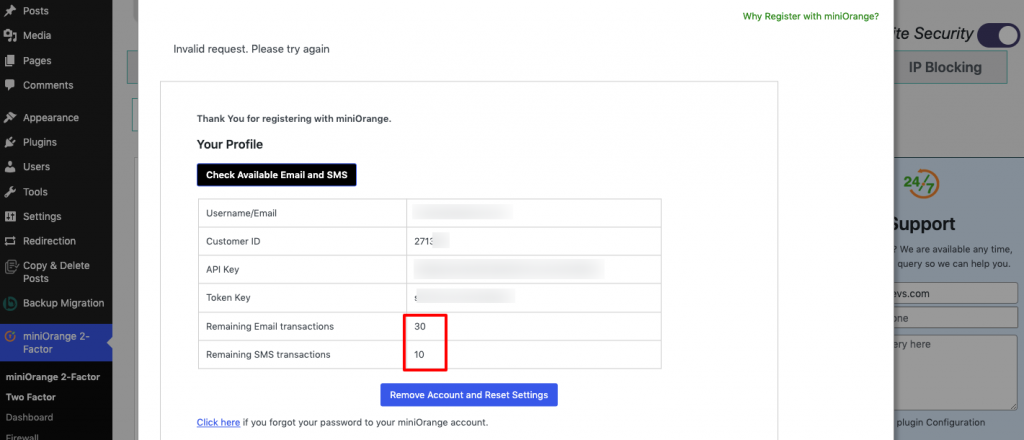
To obtain more credits, you’ll have to purchase them.
Once you’ve created an account, it’s time to configure the OTP over the SMS method.
- Now click on the Configure button of the OTP Over SMS and enter your valid phone number to verify yourself.
- Enter the OTP you’ve just received on your mobile number and click on Validate OTP.
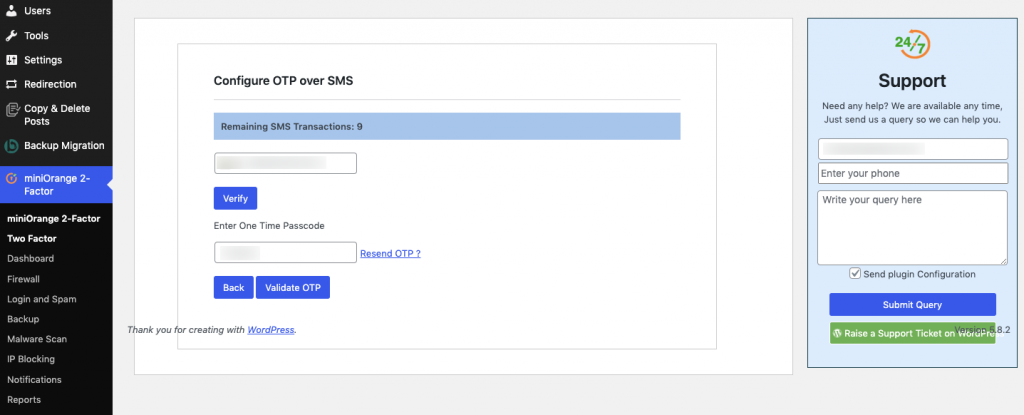
That’s it, you have successfully set up 2FA using OTP!
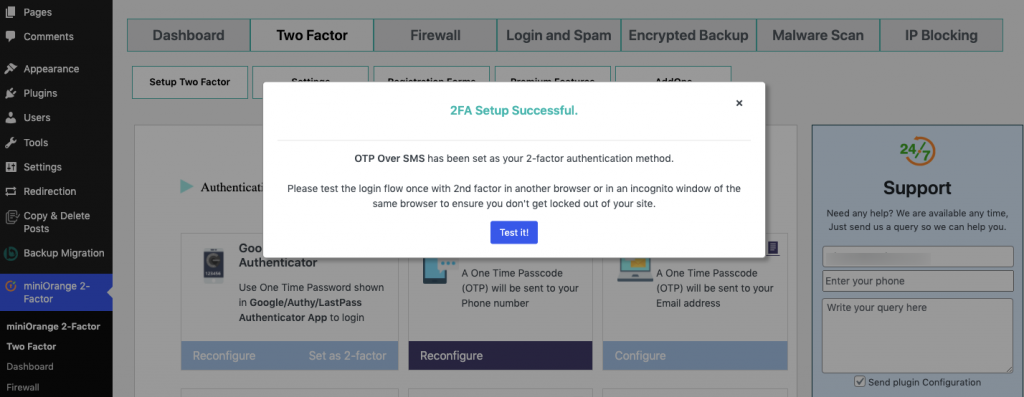
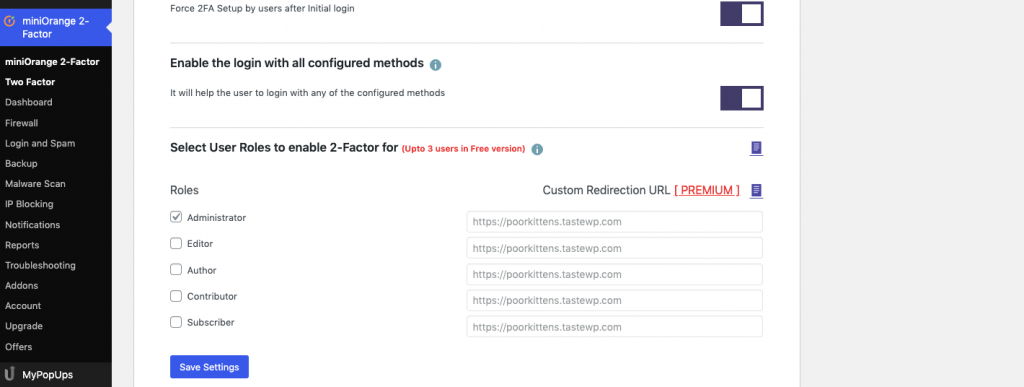
Step 05: Choose Login Settings
On the Login Settings tab, you can choose a few important details. In the free version, you can enable two-factor authentication for specific user roles (up to 3 users).
- Go to miniOrange 2-Factor > Two Factor > Settings.
- Scroll down to specify which user roles to enable 2 factor authentication for.
- Then click the Save Settings button to save all the changes.
How Two Factor Authentication Looks Like
Once you’ve chosen your method when learning how to add two-factor authentication to WordPress, you can test it by trying to log into your site.
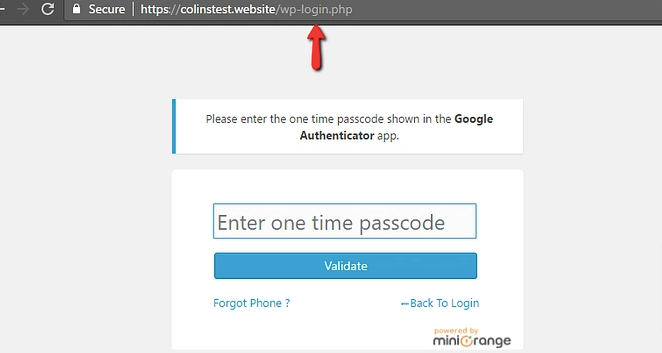
At first, you should see your normal WordPress login screen. But once you enter your username and password, you should see a second prompt asking for your two-factor code.
This is how your front end should look like.
Other Security Steps That You Should Be Aware of to Protect Your Site
The miniOrange 2-Factor plugin offers some other beneficial features to protect your site from hackers. Now we will discuss those features.
Brute Force Protection
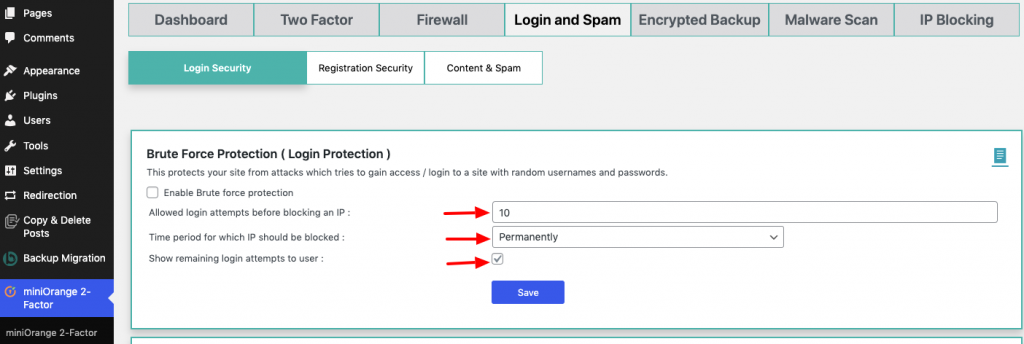
You can enable brute force protection to protect your site from attacks that try to gain access/login to a site with random usernames and passwords.
- To do so, go to miniOrange 2-Factor > Login and Spam and then configure the Brute Force Protection settings.
- Tick mark the box to enable brute force protection settings.
- Specify the number of login attempts before blocking an IP. E.g., 10 that means after 10 wrong attempts from the same IP it will automatically block that IP.
- Specify the time period for which IP should be blocked. E.g: permanent. You can also choose from Months, Days, and Hours.
- You can also show the remaining login attempts to user by ticking the checkbox.
- Then click the Save button to save all these changes.
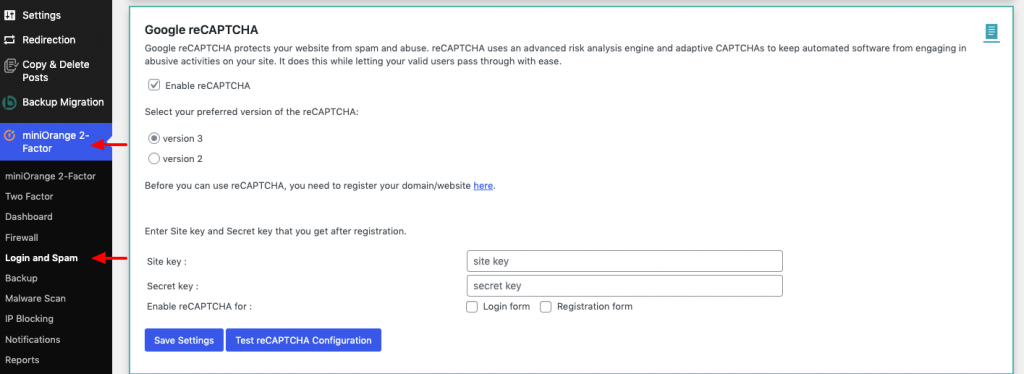
Google reCAPTCHA
Google reCAPTCHA protects your website from spam and abuse. reCAPTCHA uses an advanced risk analysis engine and adaptive CAPTCHAs to keep automated software from engaging in abusive activities on your site. It does this while letting your valid users pass through with ease.
To enable reCaptcha on your site, you need to register your website first. There you’ll get the site key and secret key. Enter these keys to enable reCaptcha on your site.
Bonus: How to Disable Two Factor Authentication
If you want to disable two factor authentication on your WordPress site, you can do it easily within moments.
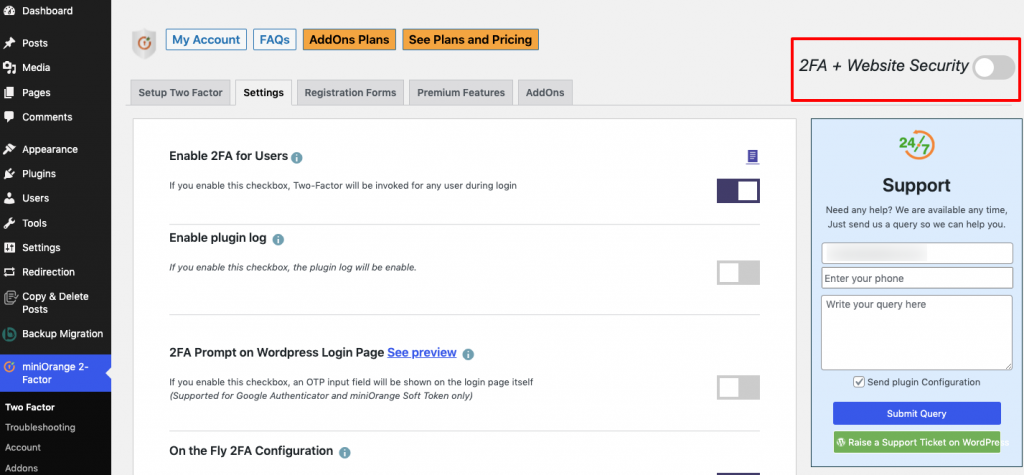
- Navigate to your WordPress dashboard and then click on the miniOrange 2-Factor.
- Now turn off the toggle button of the “2FA + Website Security”.
Test it by logging out and re-logging in, and you won’t be asked to key in an OTP.
That’s it!
WordPress Two Factor Authentication – FAQ
We often get asked about different aspects of 2 factor authentication, and here are our try to answer some of the basic questions that may come to your mind.
What is 2 factor authentication and how does it work?
Two factor authentication adds an additional layer of security to your online presence. That means you can’t log in using only the username and password, you’ll also need an OTP number (delivered to your smartphone) to log in if 2-factor authentication is enabled.
Does WordPress have two factor authentication?
Yes, you can use two factor authentication on your WordPress site. By default, WordPress doesn’t come with 2-Factor authentication feature. However, there are dedicated plugins for 2 Factor authentication to use with your site.
How do I enable two factor authentication?
To enable two factor authentication to your WordPress site, follow the below steps:
1. Go to your WordPress dashboard > Plugins > Add New
2. Search for the miniOrange two factor plugin and install that plugin on your site.
3. Configure the Google Authenticator
4. Enable two factor authentication
5. Set up WordPress Two Factor Authentication Using OTP Over SMS
That’s it!
How do I turn off two factor authentication in WordPress?
Turning off two factor authentication in WordPress is super easy. If you are using the miniOrange two factor authentication plugin, follow the below step to turn it off:
1. Navigate to your WordPress dashboard and then click on the miniOrange 2-Factor.
2. Now turn off the toggle button of the “2FA + Website Security”.
That’s it!
What are the best plugins for WordPress two factor authentication?
These are the best WordPress two factor plugins:
1. WP 2FA – Two-factor authentication for WordPress
2. Two Factor Authentication
3. miniOrange’s Google Authenticator – WordPress Two Factor Authentication
4. Duo Two-Factor Authentication
5. 2FAS Prime — Two Factor Authentication
Are You Going to Set up WordPress Two Factor Authentication to Your Site
To protect your site from unwanted attacks, setting up WordPress two factor authentication is crucial. You can’t control the hackers which site they should attack, however, you can keep your site safe from them by enabling two factor authentication.
That is why we have prepared this step by step tutorial about how to add two factor authentication to a WordPress website. Now it’s your turn to implement it on your site.
If you face any difficulties while implementing it on your site, you can let us know through the comment box below. We would love to help you out. Good luck!
You can also follow us on Twitter and Facebook to get fresh content regularly and other exciting updates.


Add your first comment to this post