
The reach of the internet has become widespread in the last decade. This impacts almost every aspect of our life. However, the eLearning industry has been perhaps one of the most beneficiaries of widespread internet access.
Since 2000, the revenues from the eLearning industry have grown by more than 900%. This industry has grown so rapidly in the last few years that the boost of Covid-19 in the eLearning industry did not even seem that significant. The ease of learning and the sheer amount of courses out there makes it a popular choice for the students to get educated on a certain topic. And this number is only increasing.
49% of students worldwide stated they had taken an online course in the preceding 12 months.
Statista
There have been lots of ways to earn money online, but selling online courses has remained one of the best ways to do so. If you want to educate people on a topic that you are an expert on, we are here to help.
In his article, we will show you a step-by-step tutorial to sell online courses on WordPress site easily.
Quick Navigation
Why Use WordPress to Sell Online Courses
WordPress is the most popular CMS (Content Management System) in the world. Not only that, more than 40% of the website over the world are built using WordPress. This was possible because of the diverse range of websites people can build using WordPress.
Because of the endless scope for customization, thousands of developers are also building extensions (Called Plugins in WordPress) to extend the features and capabilities of WordPress. With the help of the core features of WordPress and using the plugin, you can easily create a website for selling courses. Below are some key reasons you would want to use WordPress for selling courses.
- WordPress is free and open-source.
- It requires no coding skills to build an online course website, which is a complex task if you do it manually.
- There are a lot of plugins available that has all the required features to sell courses.
- Designing your WordPress website for selling courses takes minutes with readymade themes.
Today we will show you the process of selling courses using your WordPress site. Let’s get started with our step-by-step tutorial.
Step By Step Guide to Create and Sell Online Courses on WordPress
This will be a hands-on guide to creating and selling online courses. So we suggest you follow the process with us. You can either try it on your live site or localhost or even a staging site.
For our website, we will use LearnDash, a premium tool that lets anyone build an eLearning website to sell online courses on WordPress site effortlessly. It is a WordPress learning management system (LMS) plugin used by renowned companies, universities, training organizations, and entrepreneurs worldwide for creating and selling their online courses.
Reasons to Choose LearnDash LMS Plugin
- Award certificates to students once they complete a course.
- Allow your students to track their course progress, print certificates, and more using their frontend profiles.
- Offers tools for drip-feeding your content based on a schedule. You can also add lesson timers to ensure that everyone spends a certain amount of time on each lesson.
- Offers automated email notifications and detailed reporting.
- Supports most media types like videos, audio, images, Adobe Captivate files, and Google Docs.
Let’s start by installing the plugin followed by the rest of the process.
Step 01- Install and Setup LearnDash Plugin
LearnDash is a completely premium WordPress plugin. Thus, you will not find it on the WordPress.org repository. To install this plugin, first, you have to purchase the plugin.
The Basic plan is the most affordable at $159, however, we suggest you start with the Plus Package, which costs just $30 more. But for the small extra fee, you will get up to 10 sites license instead of just 1 and access to their pro panel.

Get LearnDash to Sell Courses on WordPress Website
After purchasing the plugin, you will get the installable archive file in zip format. You can then install the plugin from the WordPress admin panel.
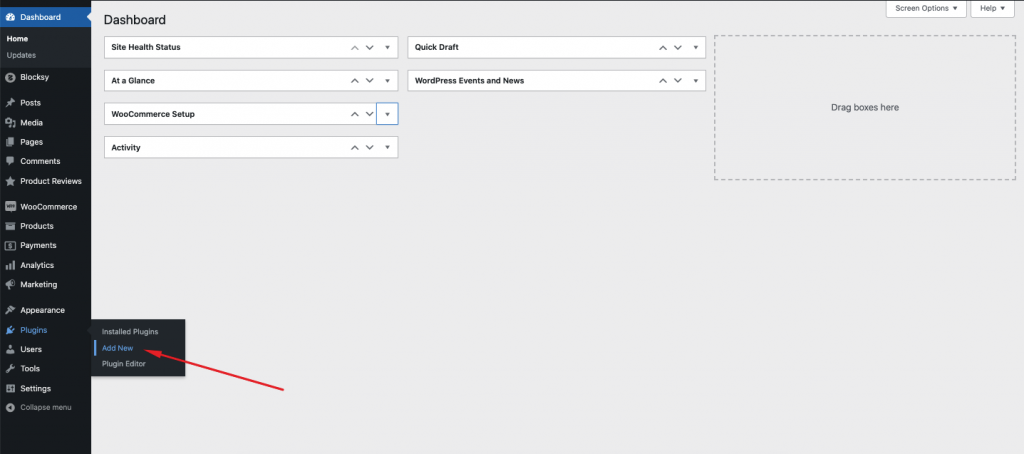
To do that, first, log in to your WordPress Admin Dashboard.
- Navigate to Plugins > Add New
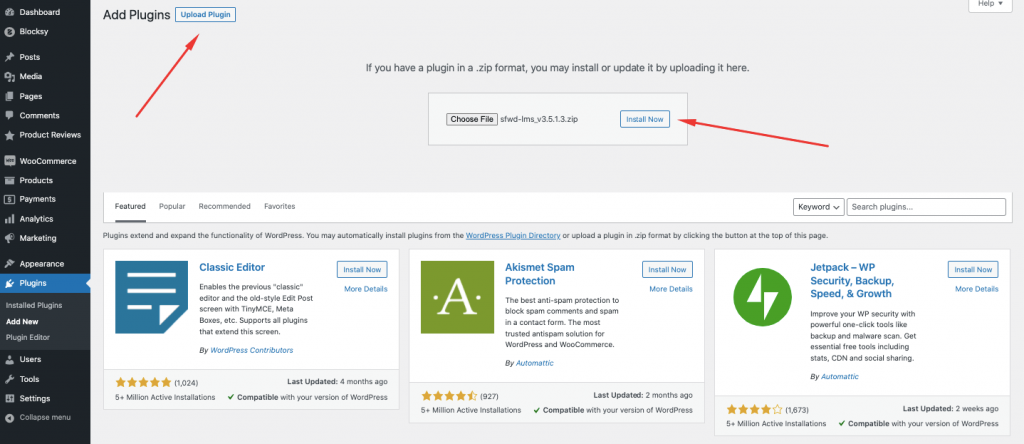
- Now click on Upload Plugin and choose the plugin that you have downloaded from the file explorer. After that, click on Install Now.
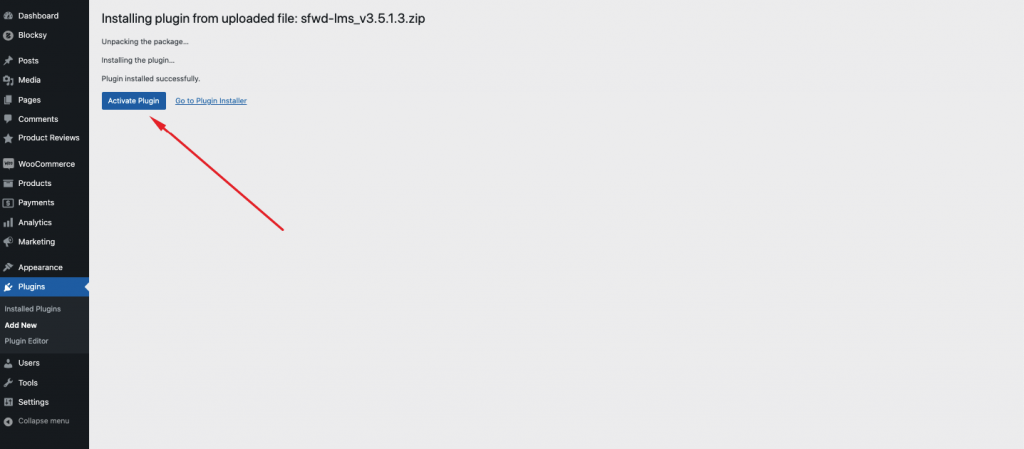
Now activate the plugin following the on-screen instruction.
Your website is now equipped with LearnDash. Now we will go ahead and show you how to create the first online course using LearnDash.
Also Read: 7+ Best LMS Plugins for Your WordPress Site
Step 02- Creating Your First Online Course
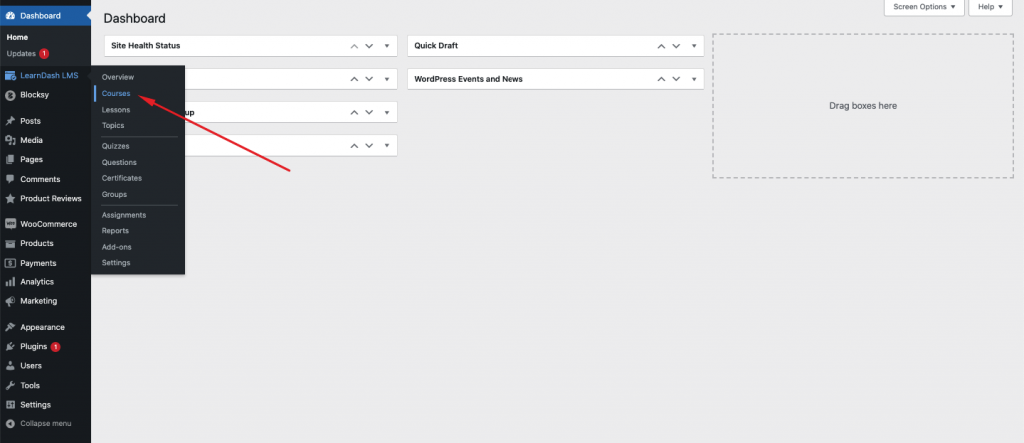
LearnDash makes it extremely easy to create and sell online courses on WordPress. The first thing you need to do to create an online course using LearnDash is to navigate to WP Admin Dashboard > LearnDash > Courses.
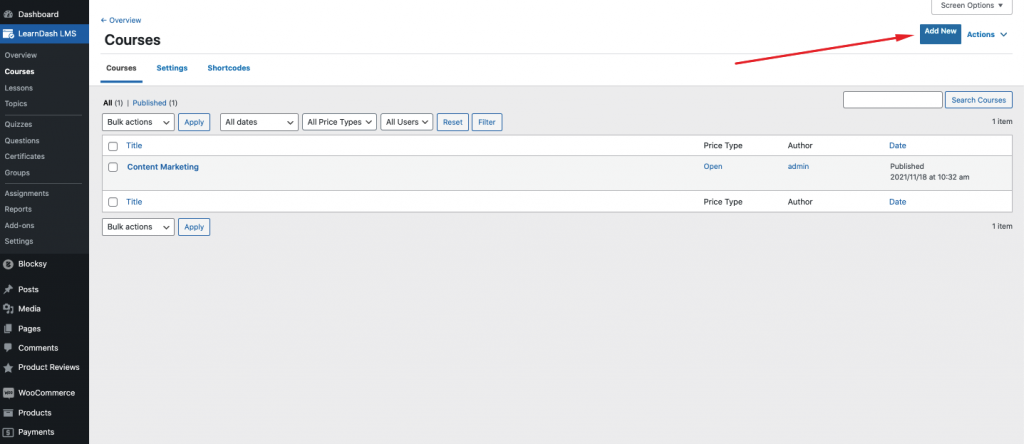
After that, click on Add your first Course if you are just creating your first course, or click on Add New if you have previously created a course. This will let you add a new course to offer your customers.
Step 03- Adding Sections, Lessons and Quizzes to your Online Course
After creating your first course, it’s time to add new sections, lessons, and quizzes under the course.
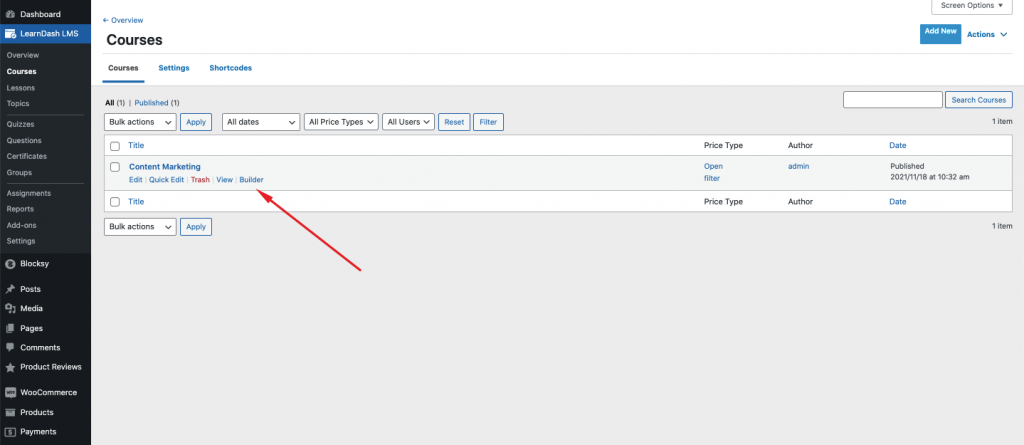
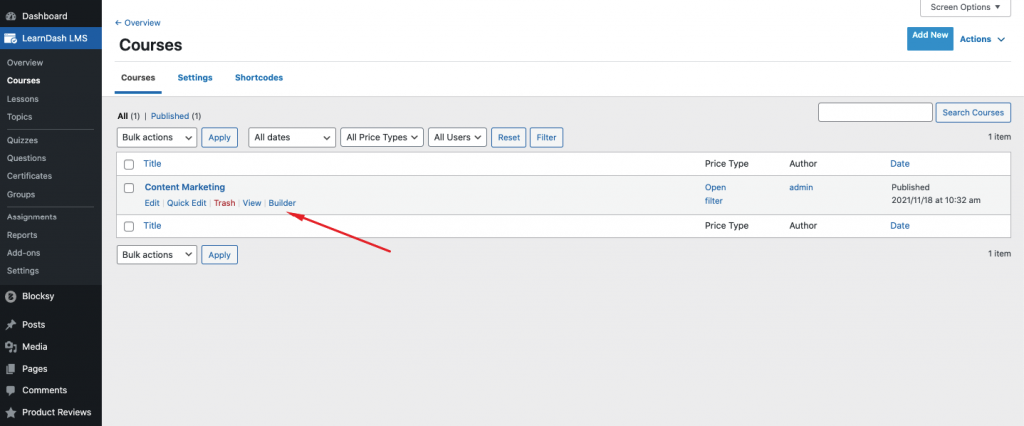
To do that, first, navigate to WP Admin Dashboard > LearnDash > Courses and then click on the Build option.
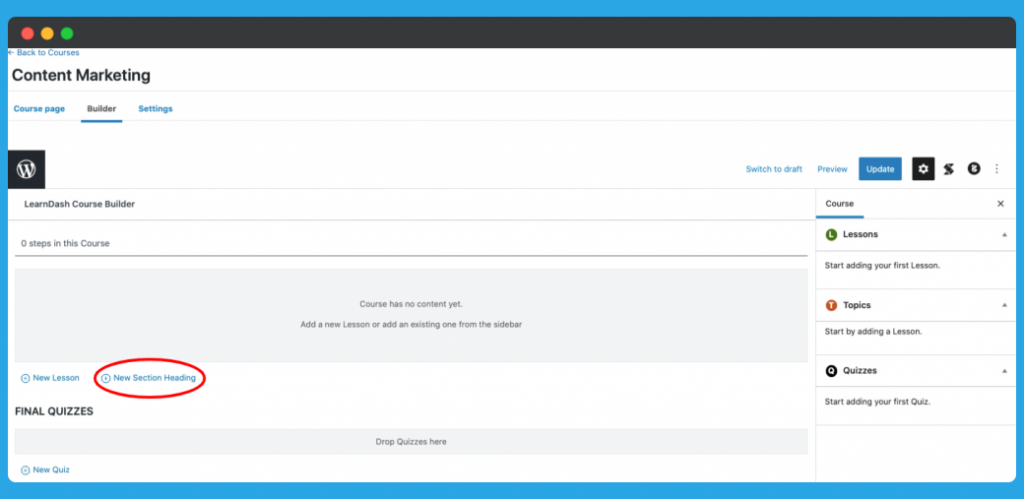
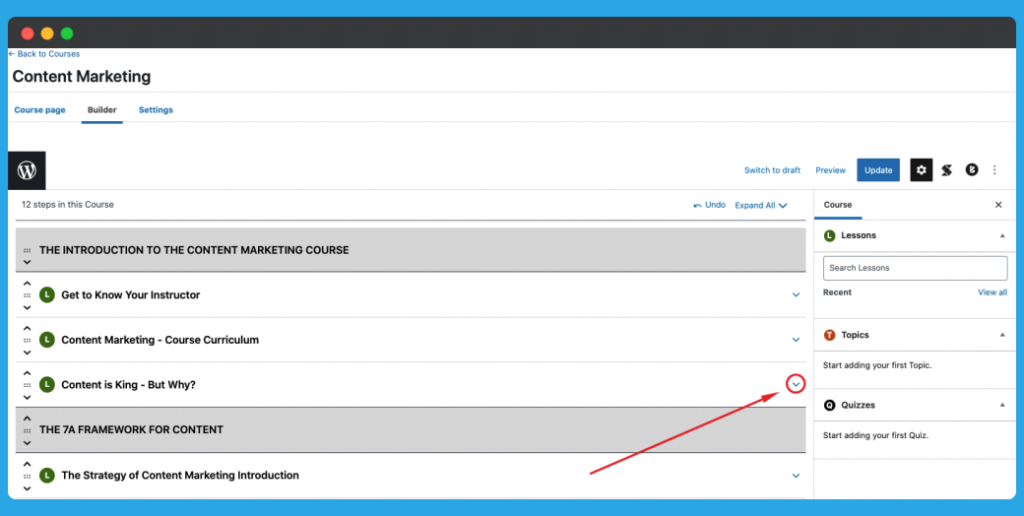
Now, you should see the course builder page just like the below one. The screen is self-explanatory and you should easily get a hold of how to create sections, lessons, and quizzes for the course.
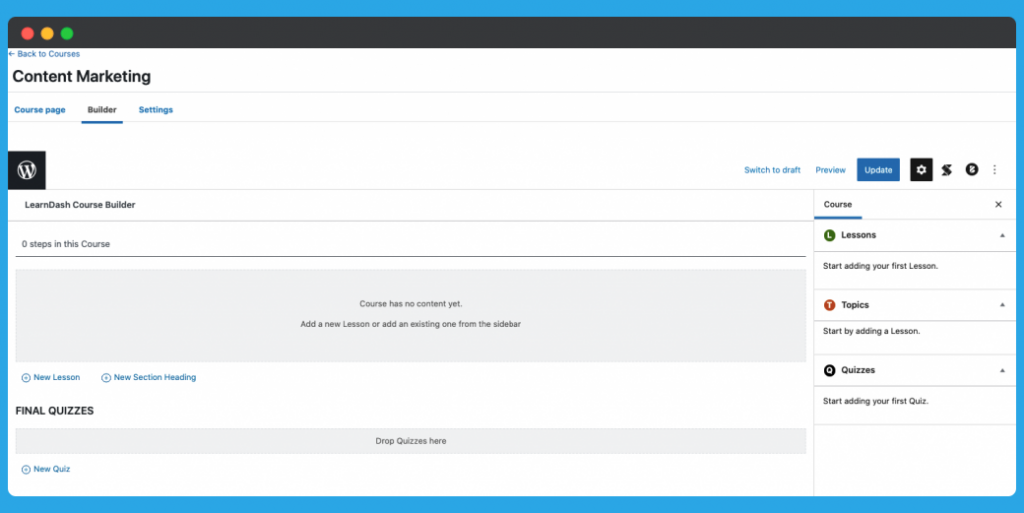
If you’re unfamiliar, each Section can have multiple Lesson‘s within itself. For each or multiple Lessons you can add quizzes to evaluate the student.
To add a section click on New Section Heading.
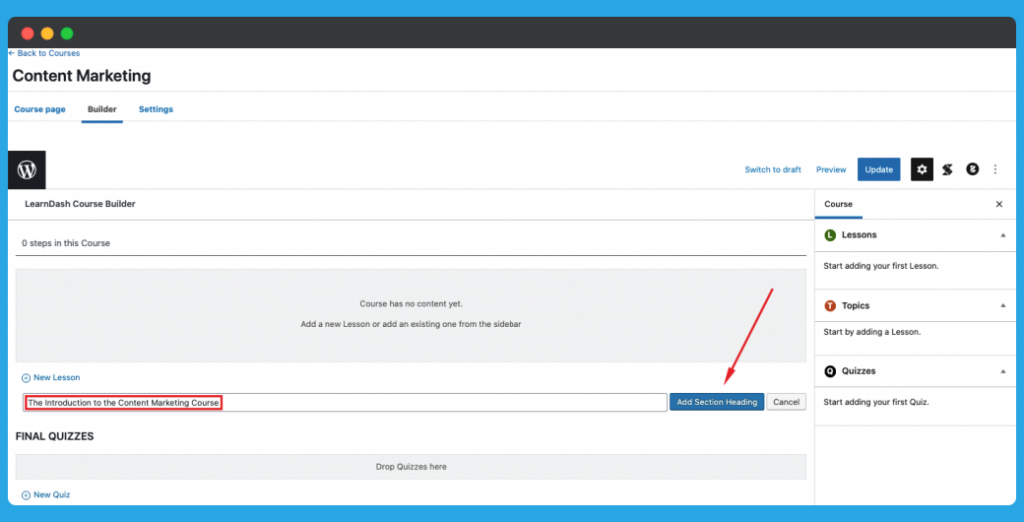
Now give the section a title and click on Add Section Heading.
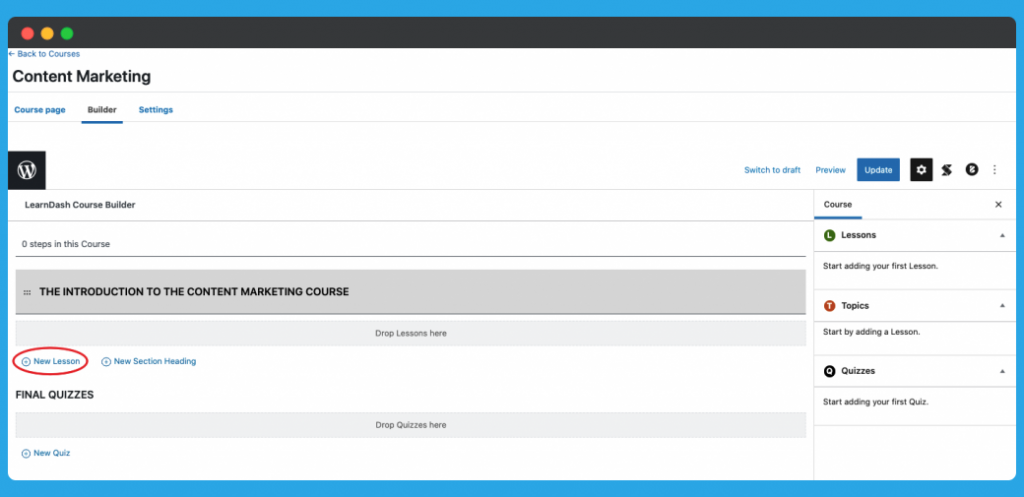
Now you can add multiple lessons after the newly created section. To add new lessons, click on New Lesson, in the same way as adding a new section.
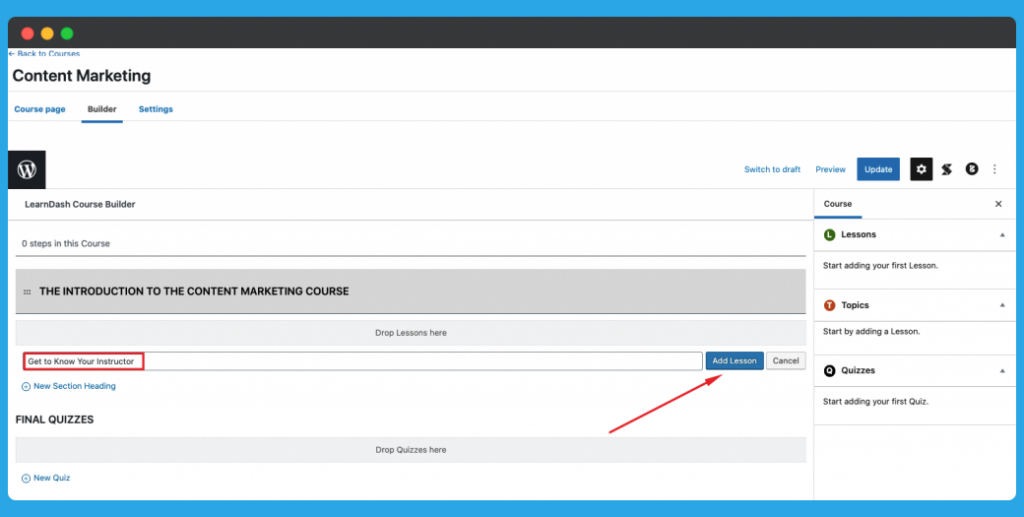
Now enter a title for the lesson and click on Add Lesson.
Now let’s add some topics and quizzes under each lesson. To do that, click on the dropdown button on a lesson just like the below image.
Now add as many topics and quizzes as you need in the same way we added sections and lessons.
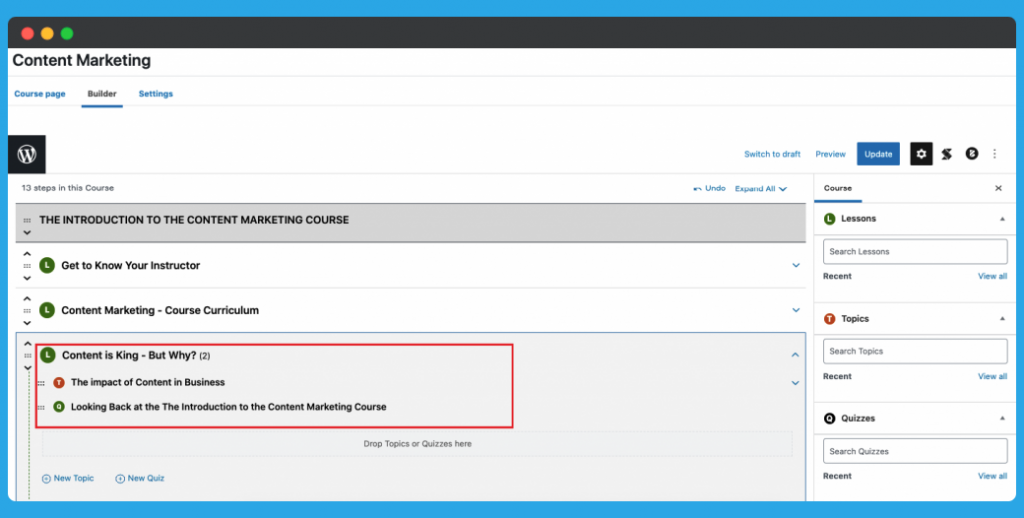
Now you may notice that we did not add any videos or any forms of content in our lessons. Well, that is because you can not add content from the course builder page itself.
Every lesson and quiz that we created here are automatically stored under WP Admin Dashboard > LearnDash > Lessons and WP Admin Dashboard > LearnDash > Quizzes respectively.
Now let’s show you how to add content to the lessons page and some quizzes to evaluate the students.
Restrict course access to membership plans
Step 04- Adding Content to Lessons
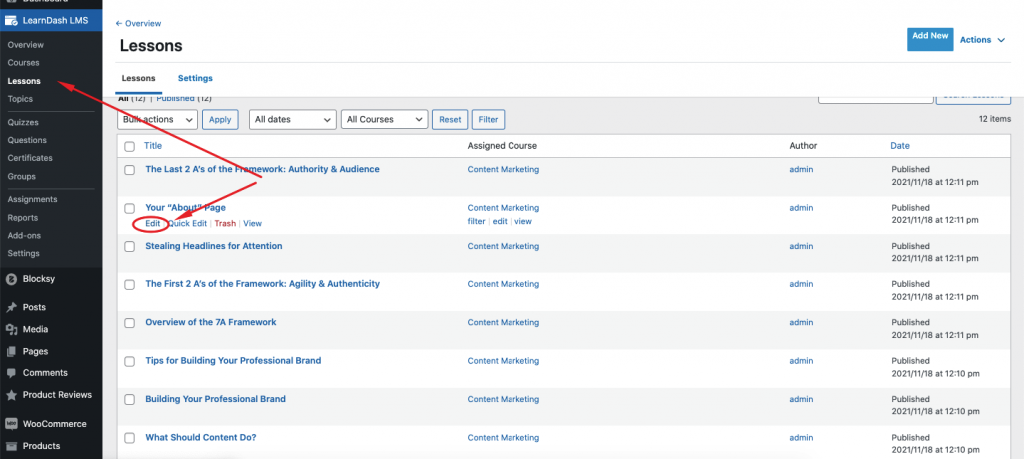
As we already stated above, the lessons that we created from Course Builder get stored in WordPress Admin Dashboard > LearnDash > Lessons. We need to visit this page in order to add content to each lesson.
After visiting the page, find the lesson you want to edit and click on Edit.
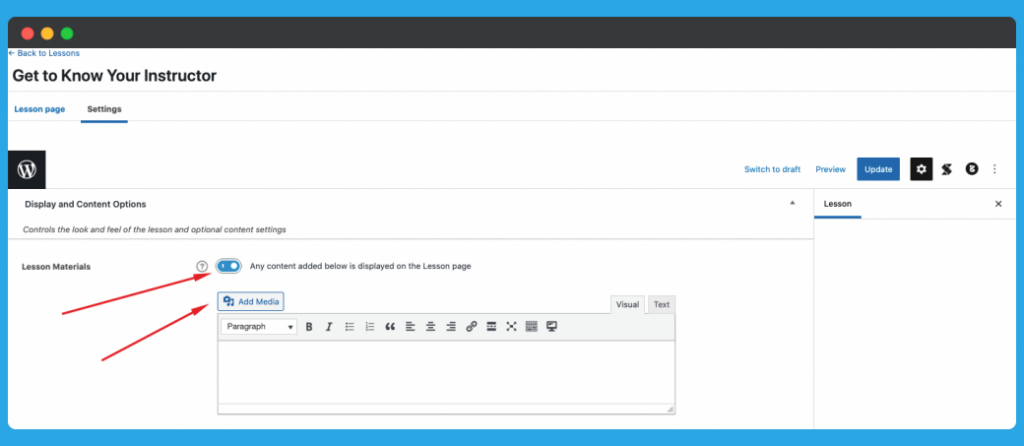
Uploading Lesson Materials
Now, to add lesson materials, move to the Settings tab on the page and click on the Lesson Materials. Here you can add or upload any types of text or media that you want to your lesson.
Adding External Videos as a Lesson
As most of the online courses rely on adding videos, LearnDash offers a feature to add external videos using any URL, iFrame, or shortcode. For that, scroll down and click on Video Progression.
Once you click on Video Progression, you will find some more options along with it. Below are the options.
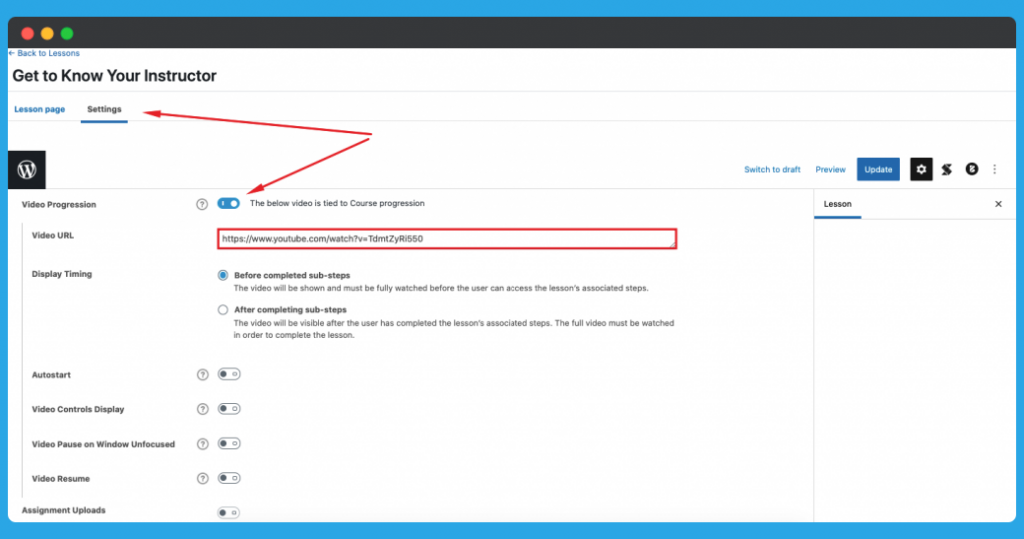
As you can see, we have clicked on Video Progression and it brought a range of options.
We added a Youtube video link on the Video URL box while selecting Before completed sub-steps in the Video Steps. This will allow us to show the video to be played first before any more topics or quizzes.
You can also tweak with other options such as –
Autostart: Autostart the video while the lesson is open.
Video Controls Display: Controlling the video using LearnDash video control settings.
Video Pause on Window Unfocused: Auto pause video when the user moves to a different window.
Video Resume: Video resume whenever the user comes back to the course/lesson window.
Also Read: Sell Digital Courses Online with Dokan & WooCommerce for Free
Restricting Lesson Access
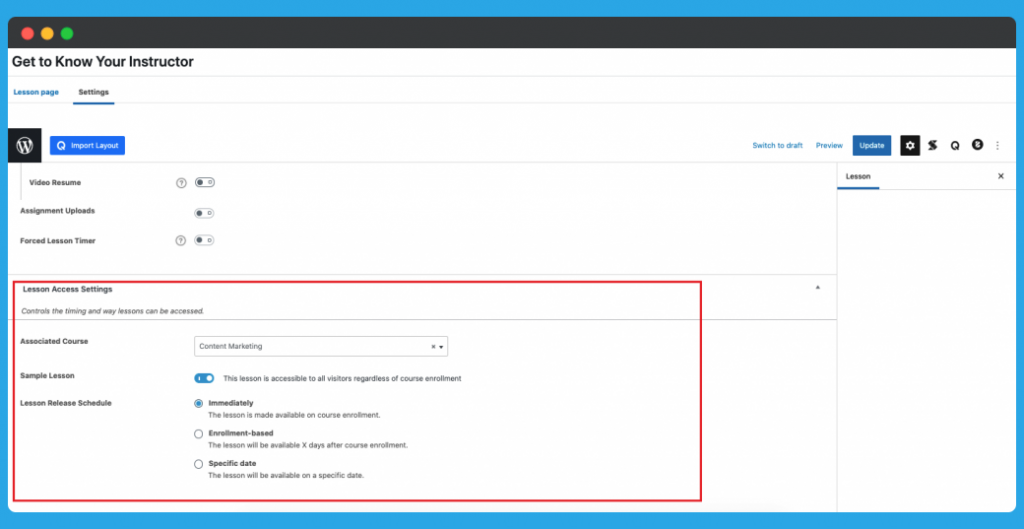
You can add the lesson accessible to all visitors regardless of course enrollment, or restrict them with the Sample Lesson option. Lesson Release Schedule will let you set when the lesson will be released, Immediately, upon course enrollment or on a specific date.
Once the change is done, click on Update.
We have successfully updated the lessons. Now let’s show you how to edit a quiz as well.
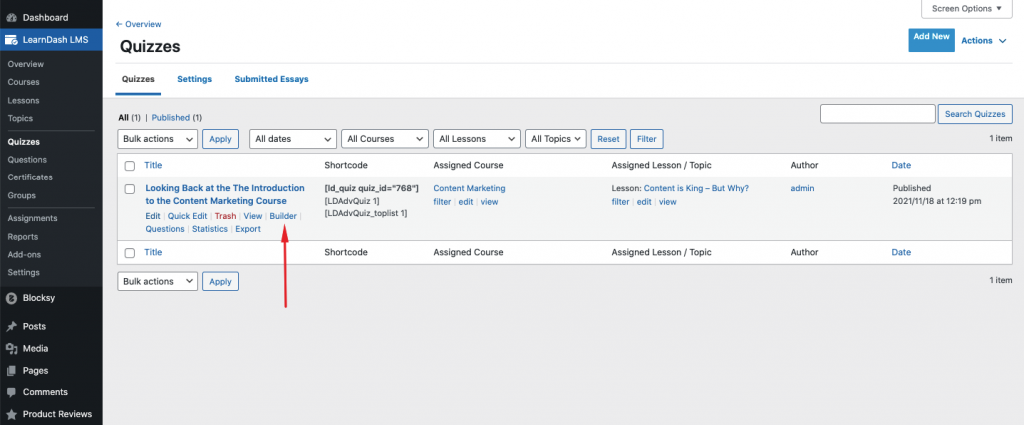
Step 05- Adding Quiz for the Lessons
Quizzes we created from the Course Builder can be found in WP Admin Dashboard > LearnDash > Quizzes. Navigate to the page and click Builder on the quiz you want to edit.
Now you should find yourself on the dedicated quiz builder page. Here you can set the question and the answer for the quiz.
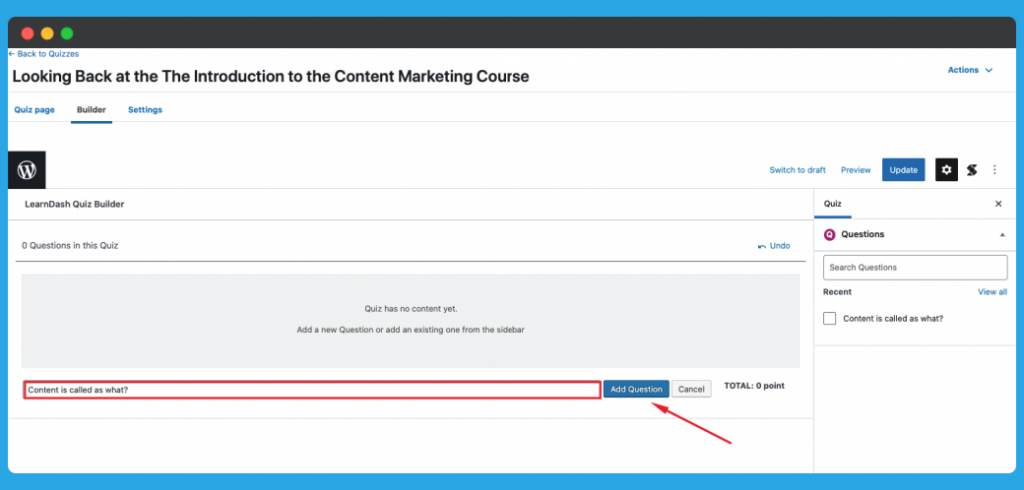
To add a question to the quiz, click on New Question.
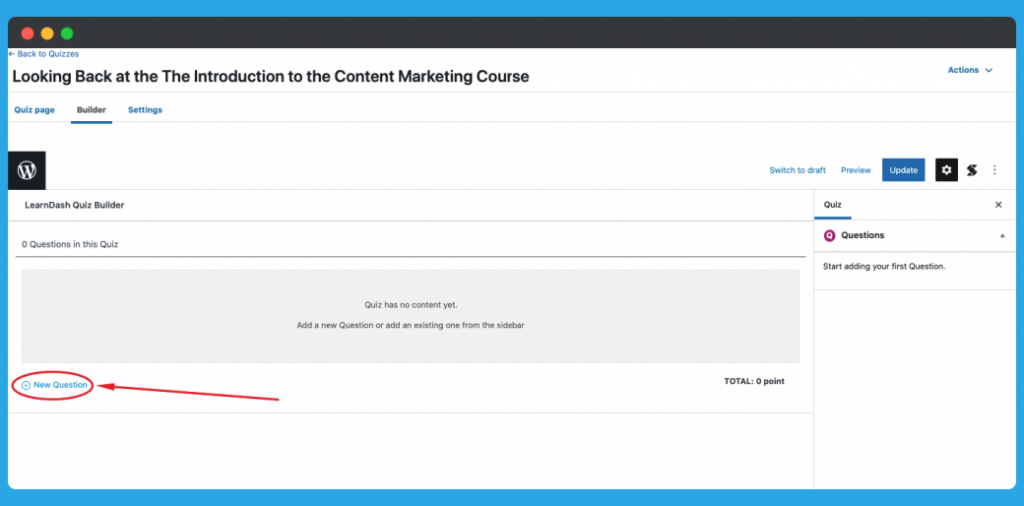
Now add the title for the quiz and click on Add Question.
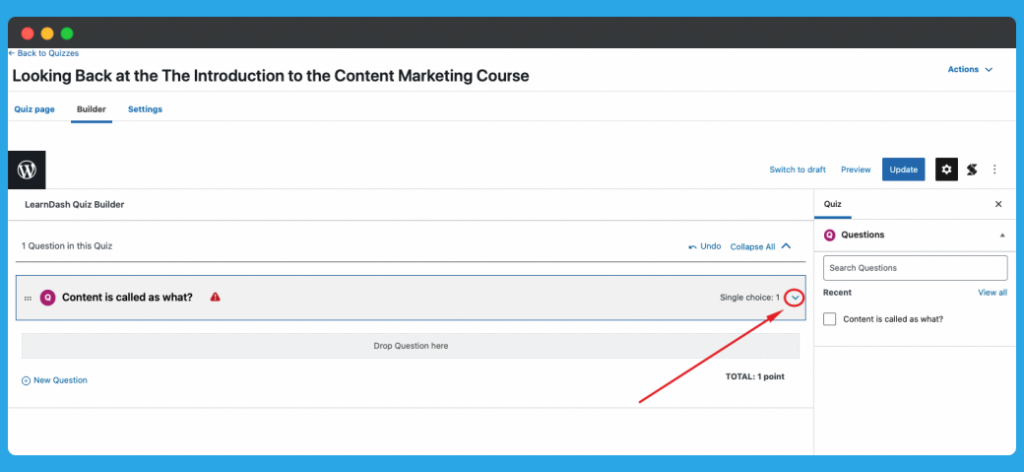
Now let’s set a sample question under this quiz. To do that, click on the edit icon and enter the question.

Now add the answer to the question by first clicking on the dropdown button.
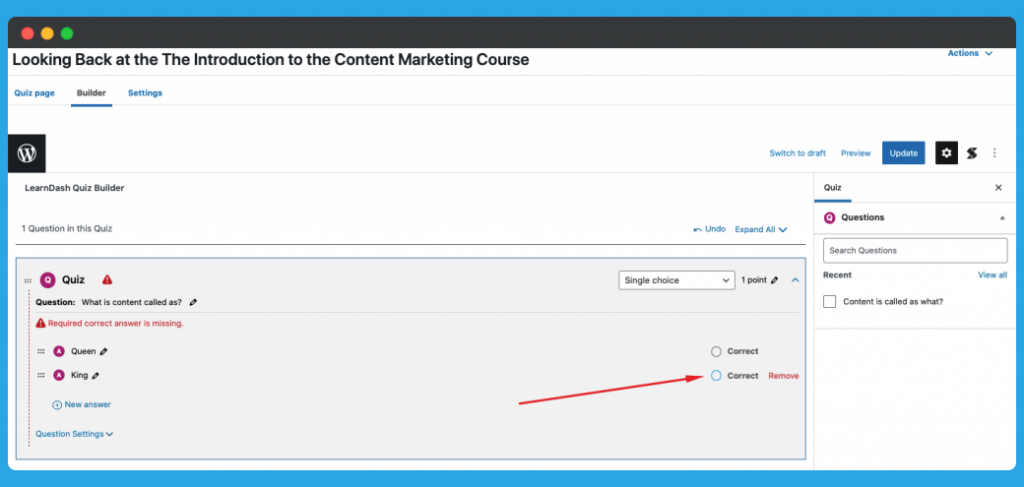
Now click on New Answer and write down the multiple answers for the question. You can mark a question (or multiple ones) correct by checking on Correct while adding the answer.
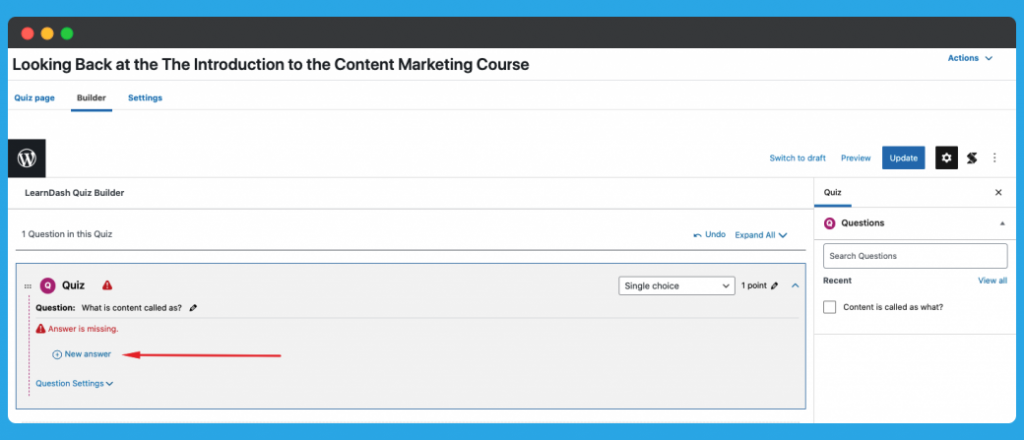
You can mark a question correct by checking on the Correct checkbox while adding the answers.
Click on Update, once you are done updating the quiz.
Step 06- Configuring the Course
Now, in order to configure the course, get back to the Course Builder page of the course you have created. To do that, navigate to WP Admin Dashboard > LearnDash > Courses.
After that click on the Builder option again.
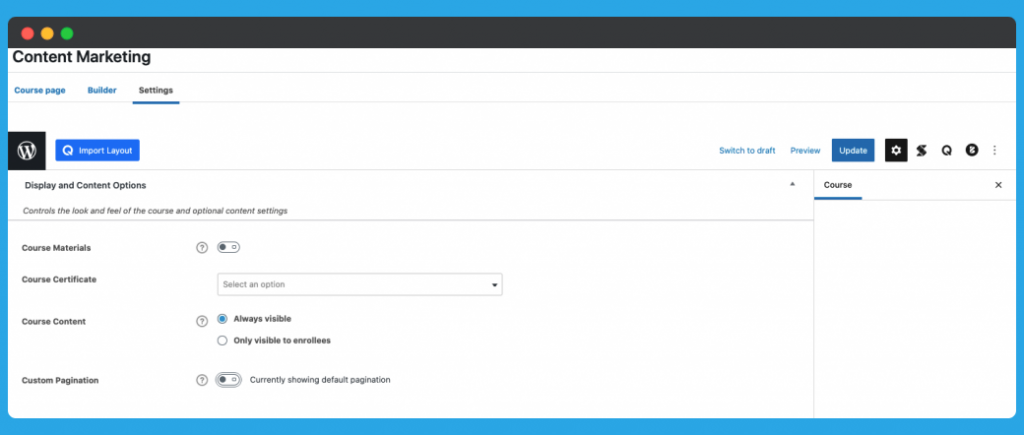
Now navigate to the Settings tab.
Here, you can Display and Content Options, Course Access Settings, Course Navigation Settings, and Course Users.
The Display and Content Option will let you add additional course materials, course certificates, course content visibility, and pagination of the lessons.
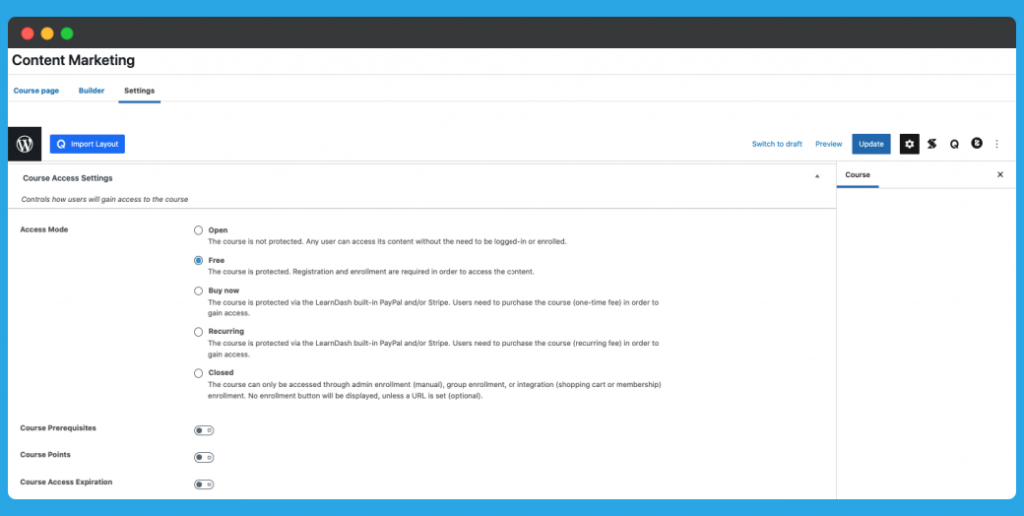
The course access settings will deal with who will get access to the content. You can set the course access to Open, Free, Buy Only, Recurring or Closed. We made the course Free, as you can see from the screenshot below. This will allow the course to be accessed by only the users who enrolled or registered to it (for free).
You can also set a mandatory prerequisite course, set course points and set a course expiration time.
You can also make the course linear, which will let the users go through the course in the given sequence, or freeform, which will let the users go through the course without following any designated steps.
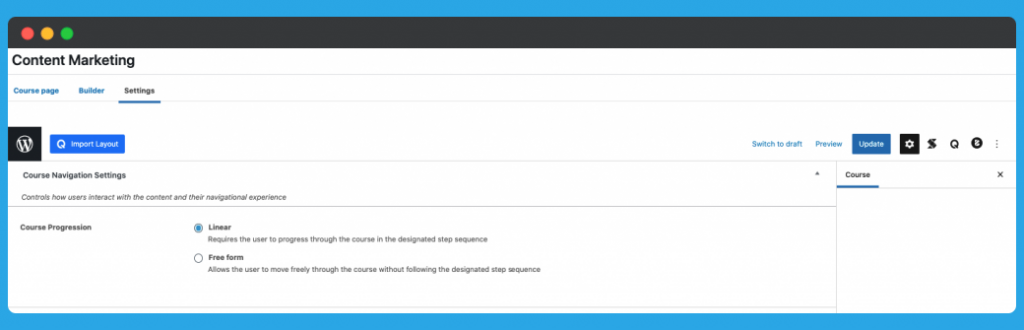
Finally, click on update to save the changes. And with that, the configuration of the course is done. You can create multiple courses in the same way.
Now let’s get to know how we can display the course on a page and let people enrol on it.
Step 07- Displaying the Courses on a Page
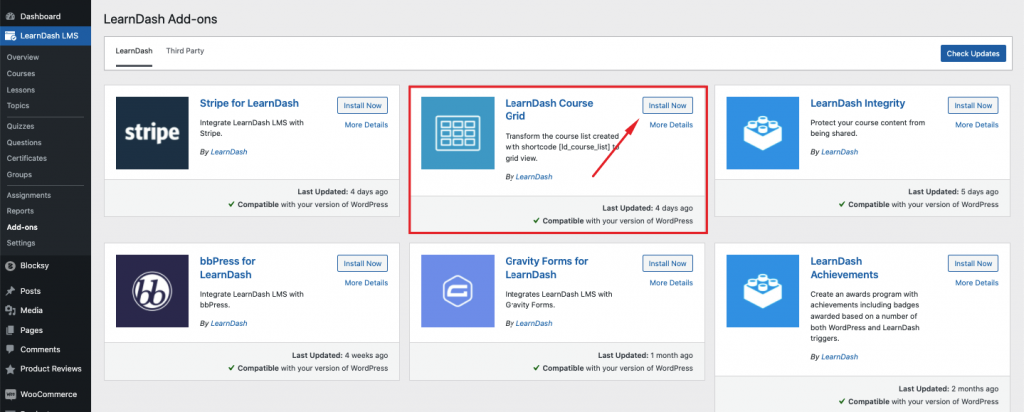
To display the courses created by LearnDash on a customized WordPress page, you need a free add-on provided by LearnDash. The add-on is called LearnDash Course Grid. And as the name suggests, this add-on will help you display the courses in a grid layout.
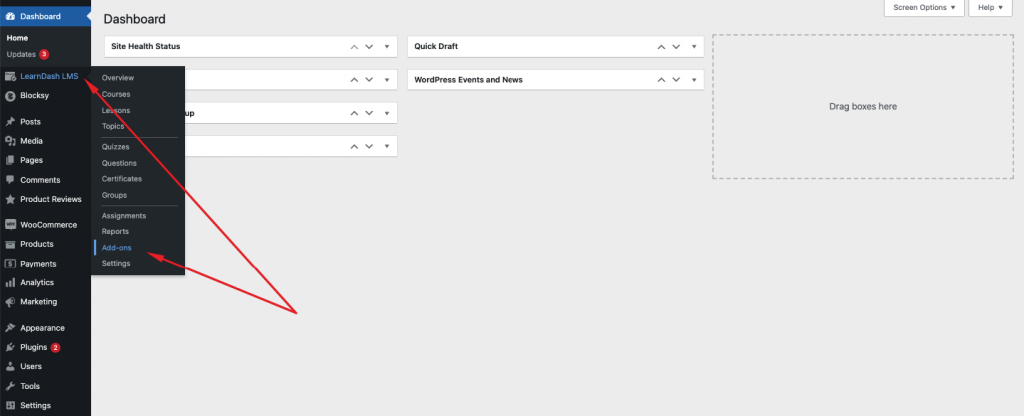
First install the add-on by navigating to WP Admin Dashboard > LearnDash > Add-ons.
Now find the add-on named LearnDash Course Grid, install and activate it.
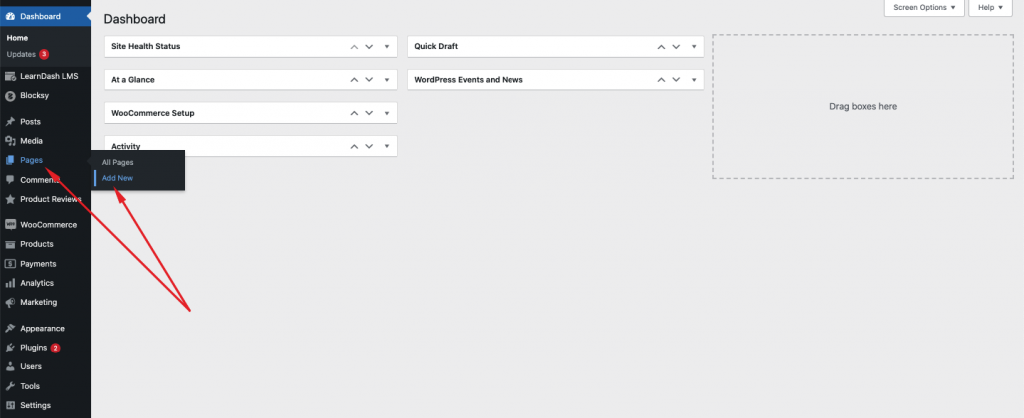
Now create a new page by navigating to Pages > Add New.
Now give the page a name. After that, click on the (+) plus icon to add a new block. Search for LearnDash Course List and add the block.
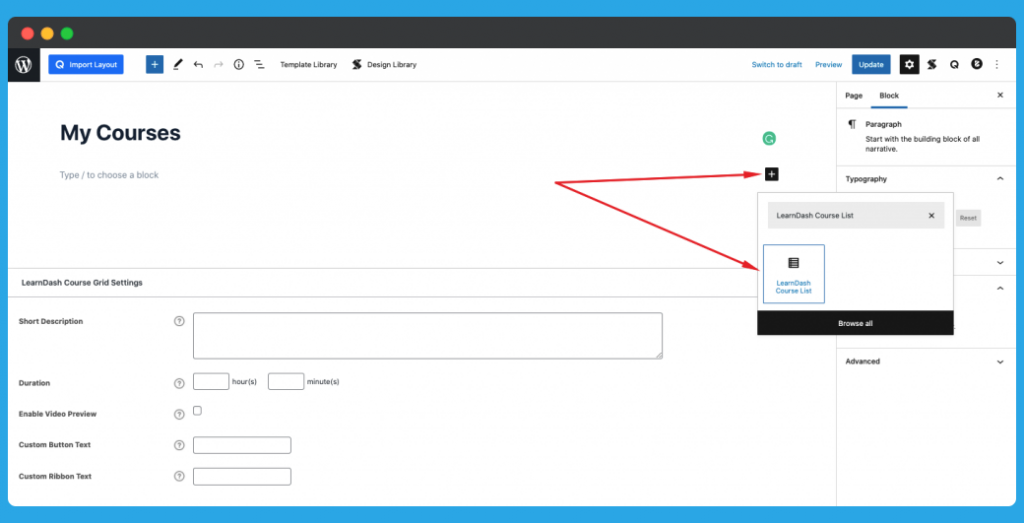
This will automatically add all the courses you have created on a beautiful grid layout as soon as you add the block.
Step 08- Creating Login/Registration Option for Your Website
If you want only the logged-in users to access the course, you need to have login and registration options in place for your website.
Luckily, LearnDash has a dedicated feature for that.
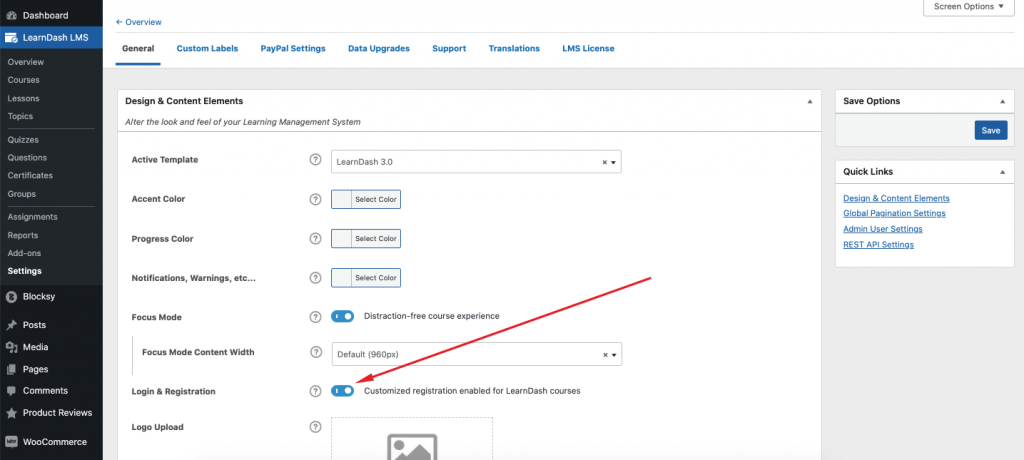
To enable it, first navigate LearnDash LMS> Settings.
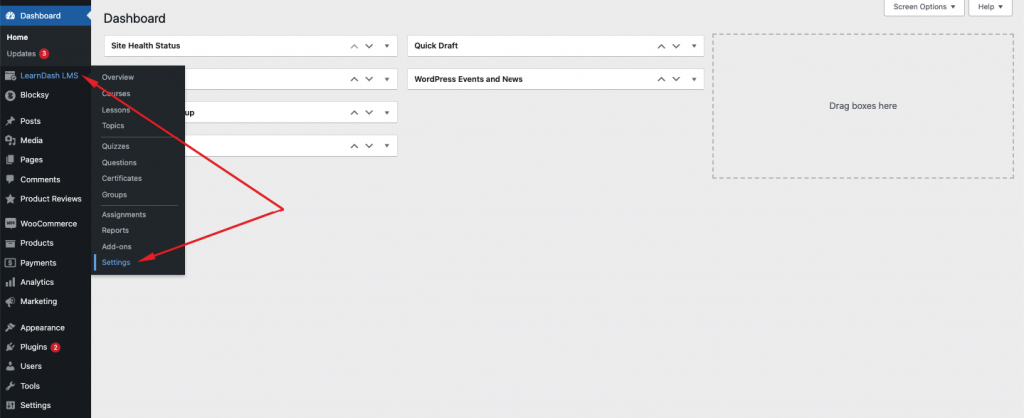
From the General settings, turn on the Login & Registration feature and click on save to finalize adding the feature.
Step 09- Taking Payments from the Students
LearnDash also has a dedicated payment system, powered by PayPal. To enable PayPal option, navigate to LearnDash LMS> Settings > PayPal Settings.
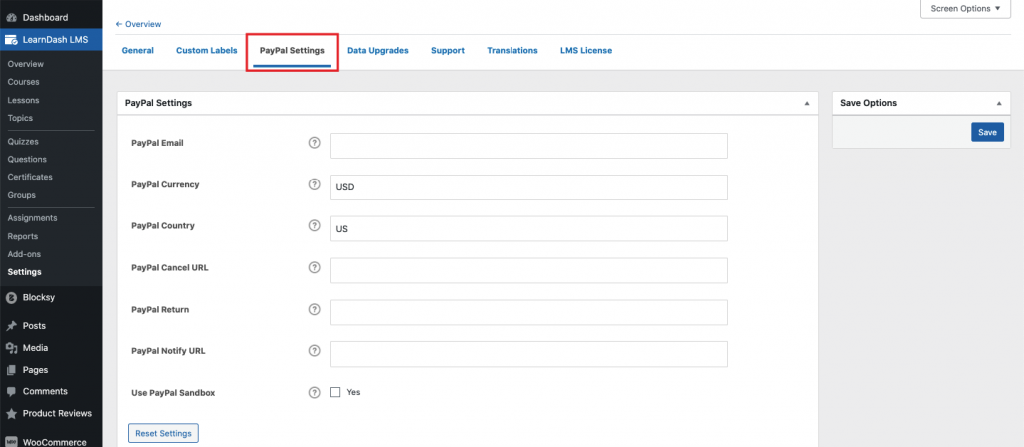
Now enter your PayPal email, Currency, Country, PayPal URL for Cancel, Return, and Notify.
Click on save, and with that, you will be done adding the PayPal payment option to your website.
Note: You can add even more payment methods other than PayPal if you integrate WooCommerce payment methods to your LearnDash plugin. You can do that by navigating to WP Admin Dashboard > Payments and following the on-screen instruction.
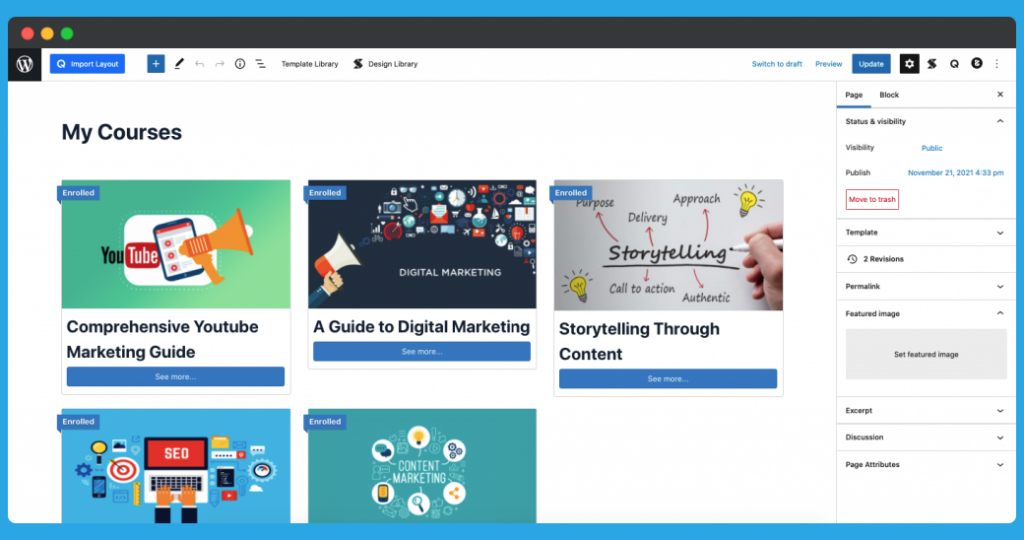
Final Frontend View of the Course
We have successfully created our first online course using LearnDash. Following the tutorial, you can add multiple courses to your website.
Below is how our creation turned out.
Bonus: Tips to Promote Your Online Course
If you have followed thus far, you already learned how to create and sell online courses on WordPress. Now we want to share some tips to promote your online courses so that it gets the exposure it deserves and be able to help the people in need of it.
- Do Content Marketing: Content marketing is one of the most effective ways to get people to know about your online course as people often search to learn certain topics that they need to. That is why running blog, video channels are must is a must for any online course seller for organic traffic and conversion.
- Create Regular Social Presence and Utilize that for Promote Online Courses: Being regular on social media and staying helpful can increase credibility for you and your brand. This will help you sell your courses to more people.
- Publish Books on Amazon: Publishing relevant books can also work as a good promotional method for your online courses as you’re reaching the prospective customers, albeit in a different platform.
- Offer Free Courses: Offering free mini courses can create an interest for the ultimate course you want to sell. If the free course contains quality content, then the chance of conversion to paid course is very high.
- Offer a Discount for Initial Students: Offering discounts are great for increasing sell of your courses. If you offer discounts to the initial students they can also spread positive word of mouth, which is an organic promotion.
- Partner Up with Influencers for Testimonial: Influencers nowadays has a lot of audiences who love to hear and follow from them. Influencers from your niche can help you promote your courses to a targeted audience in a more efficient way than any other methods.
- Start or Join Podcast to Hype Your Online Course: Podcast sector is becoming increasingly popular nowadays. You can attend a popular podcasts or create one of your own to promote your course in a subtle way.
- Run Paid Ads to Promote Your Course: PPC ads are as effective as ever. For a competitive price they can get your course some clicks in the targeted keywords. You have to manage the rest with proper content and perfect CTA.
Wrapping Up
Online course sites are getting popular day by day. While sites like Coursera & Udemy let you create online courses on their platform, they also charge a large fee. So we suggest you opt for a personal site that lets you sell without any commissions and build your personal brand.
Our tutorial for building a personal environment for selling online courses requires the use of just two plugins, LearnDash and WooCommerce (one of which is free) with the power of WordPress. So you can imagine, how easy it is to start selling online courses. It literally takes minutes to start up and running.
So when do you plan to start offering online courses and help potentially millions with your expertise? There was literally never a better time to do so!
N.B. We may be an affiliate of the products mentioned in the article. If you purchase any of the products using our link, we may/may not get a small commission per sale.


Add your first comment to this post