
Are you looking for a way how to integrate Shopify with WordPress?
In this article, we will show you the easiest step-by-step process to help you integrate your Shopify store with your WordPress site within 5 minutes.
At the first glance, you might wonder whether is it possible to connect Shopify with WordPress. Yes, it is absolutely possible and much easier than you think.
After reading this article, you will have a sound understanding of the Shopify WordPress integration process. You will also learn about the benefits of such integration and how you can open a Shopify store very quickly. So, stay with us till the very end.
Quick Navigation
Benefits of Shopify WordPress Integration

Shopify is the world’s leading eCommerce builder. And, as the most popular website management system (or website builder), with almost half of the world’s websites being powered by WordPress.
Integrating such two great platforms can help you a lot to make your eCommerce initiative thrive. The top benefits of Shopify WordPress integration are:
- Enjoy the greatness of two best platforms: through integration of Shopify and WordPress you can take the benefits and enjoy some great features of both the platform.
- Add value to your online store: if you already have an online store built on Shopify and a WordPress-based website, integrating them will do some value additon to your store by doubling the way of promoting your products.
- Operate your store and website effortlessly: building and operating an online store on Shopify is very easy and robust. If you want to run an online store along with your WordPress site, such integration will help you a lot.
- Enjoy the best-in-class security: Shopify provides world’s leading eCommerce security (e.g. Level 1 PCI compliance and 256-bit SSL certificate) for the stores built on it. So, you won’t have to worry about the security anymore.
- Experience the versatility of WordPress: the most special thing of WordPress is its versatilty. Through integrating Shopify with it, you can make your store versatile as well.
Without the integration, you, however, could build an online store entirely on WordPress by just installing a plugin like – WooCommerce, and Dokan (to open a multivendor marketplace).
Nevertheless, people choose Shopify because of its ease of use and excellent dedicated eCommerce features.
Prerequisites for WordPress Shopify Integration

You will need a Shopify store, a WordPress site, and some time (of course) to integrate Shopify with WordPress.
Since you are planning for integration, we assume you fulfill all the prerequisites – particularly a WordPress site and a Shopify store. No worries if you don’t fulfill them. We are here to help you.
Read this article if you don’t know how to build a website on WordPress. Even if you haven’t already built your online store on Shopify, we are still here to help you.
Previously, you could integrate Shopify with WordPress by installing the Shopify plugin on your WordPress site. But the plugin is not available anymore.
That’s why, you will have to build your Shopify store first, then integrate it with your WordPress site. So, let’s get started.
How to Set Up a Shopify Store Step-by-Step
You can set up a Shopify store within just a few clicks. Primarily, you need to follow 3 steps to finish the basic setup of your Shopify store. They are:
Now, we are going to demonstrate the steps one by one in specific points with the necessary visuals. You can skip this part and jump to Shopify WordPress integration if you know the process or already have a Shopify store. Otherwise, let’s get started.
1. Create Your Shopify Store
As a first-time user, you need to start a 14-day trial to create a store on Shopify. If you like it during the trial, then you can buy a plan at any time based on your need. But, by default, you will have to start the trial to enroll in Shopify.
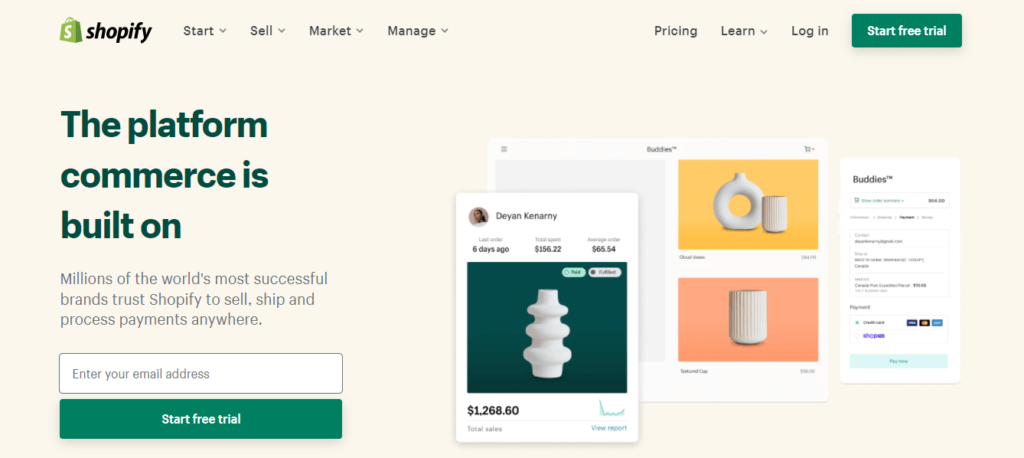
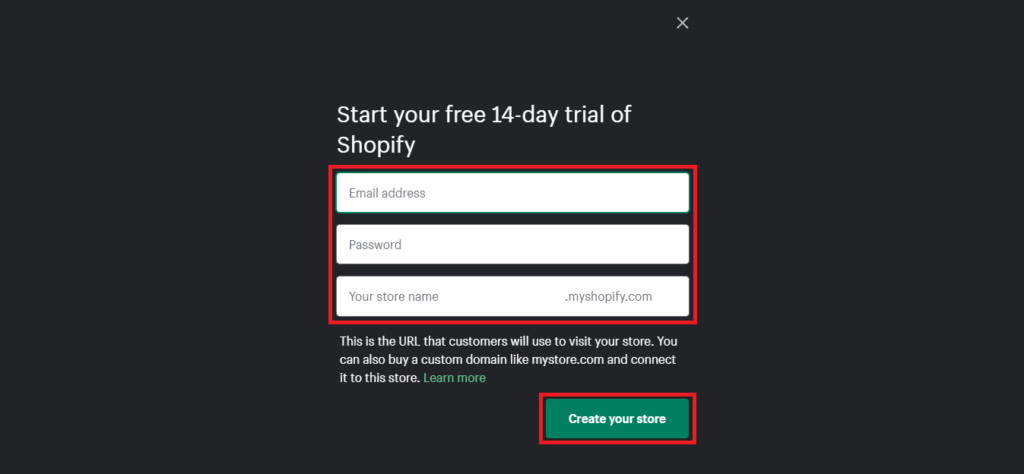
First, you will have to click the “Start free trial” button on the Shopify homepage (check the previous image). Now, a form will appear. Here, you will have to fill it up, then press the “Create your store” button.
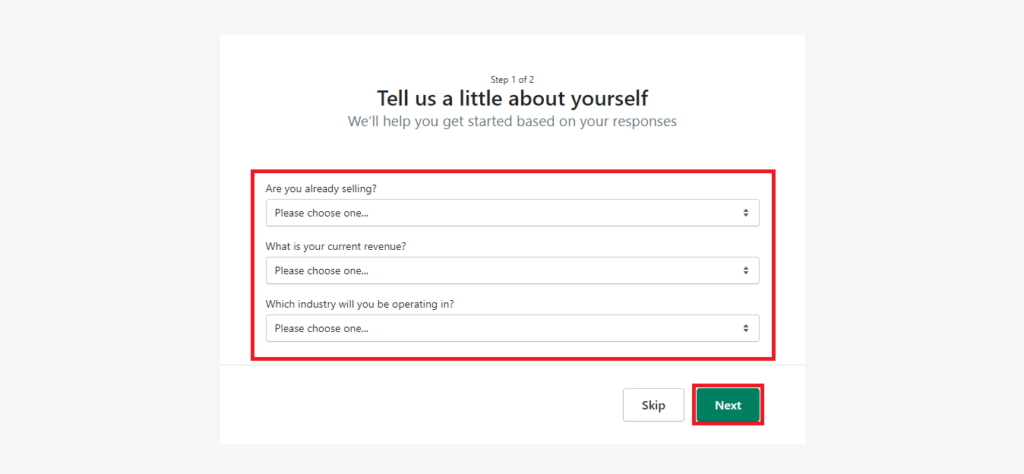
After hitting the “Create your store” button, Shopify will ask you to fill up a few more forms regarding information about you and your store. Just share the information (or skip if you don’t want to), then press the “Next” button.
Right after filling these forms, your Shopify store will be created. Then, your store home will look like the following image:
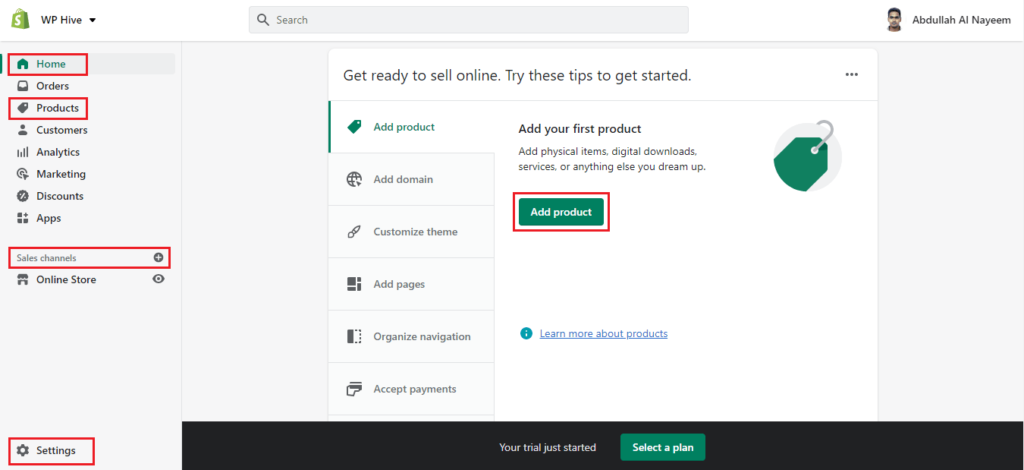
We will recommend you to look carefully at some icons and menus in the picture above (marked red). You will need them later on.
2. Add a Payment Method
After creating your first Shopify store, you need to finish some basic setup of it to make your eCommerce operational. First, you need to add a payment method. Just follow the steps below to do so:
- Click “Settings” from your store Home (a settings panel will open)
- Now, click “Payments” from the settings panel
- Click the “Choose a provider” button
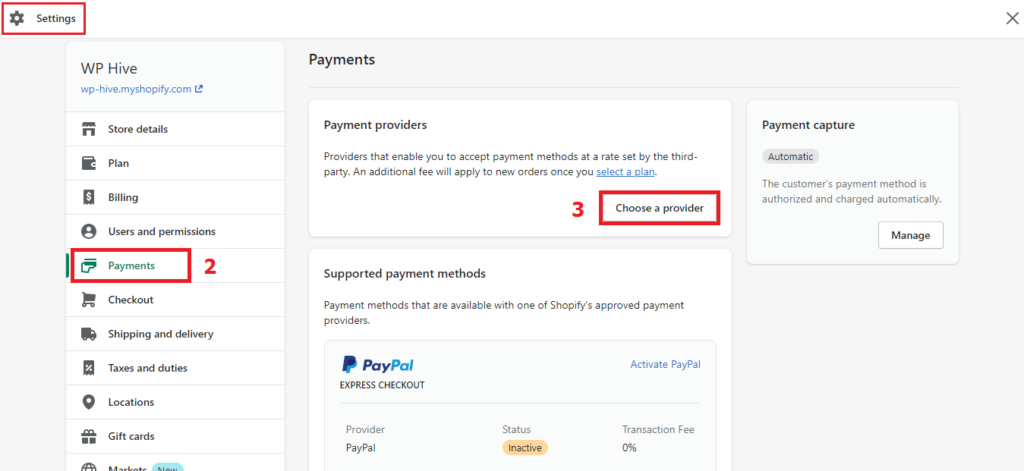
You can also scroll down to select your preferred payment methods, like activating PayPal or adding a manual payment method.
3. Set Up Shipping and Delivery Options
The address you have given during the store setup will be used as your shipping and delivery location by default. To change these, you need to click “Shipping and delivery” from your store settings menu. Then, set the location you prefer.
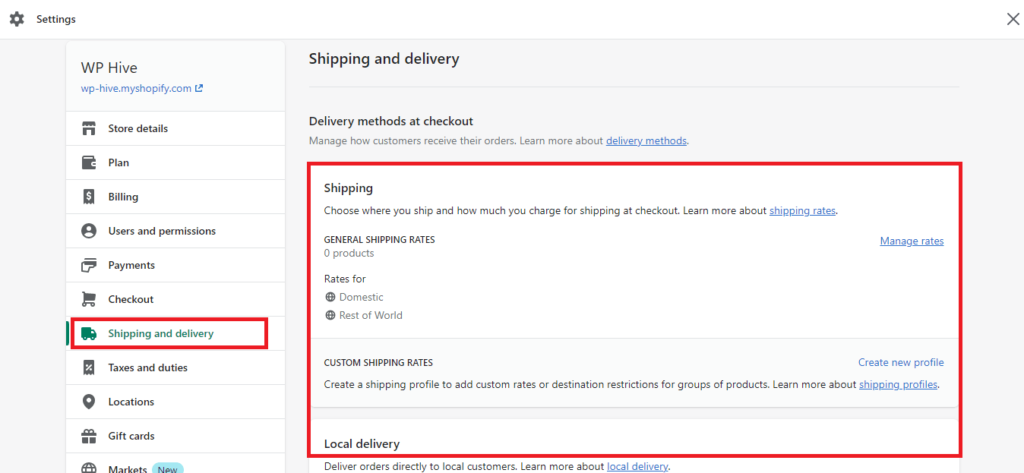
You can also customize other shipping options – like setting shipping rates, or adding third-party shipping services, here.
All done! You have successfully created a Shopify store and finished some basic settings. Now, it’s time to integrate it with your WordPress site.
How to Integrate Shopify with WordPress in 5 Minutes

You can integrate Shopify with WordPress by adding the “Buy Button” under the “Sales channels” section. To create a “Buy Button” for your desired product, you will only have to copy the code of the Button and paste it on your WordPress site.
We are going to show you the entire process in 4 simple steps. The steps on how to integrate Shopify with WordPress are:
- Add Products to Your Shopify Store
- Add Shopify Buy Button Under Sales Channels
- Create a Shopify Buy Button for Your Product
- Add Shopify Buy Button to Your WordPress Site
Now, we will demonstrate the steps by breaking them down one by one. We have added the necessary visuals to help you understand quickly.
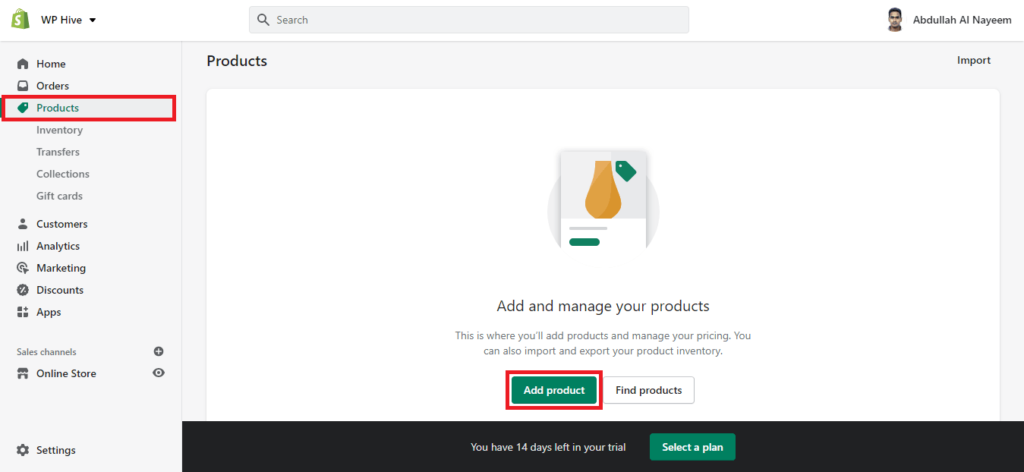
Step 1: Add Products to Your Shopify Store
The Shopify “Buy Button” works on products or a specific page. If you don’t have products uploaded to your Shopify store, your “Buy Button” won’t work.
You can start your process to integrate Shopify with WordPress from Step 2 if you already have products uploaded to your store.
To add products to your Shopify store, first, you need to press the “Add product” button from your Products or Home page.
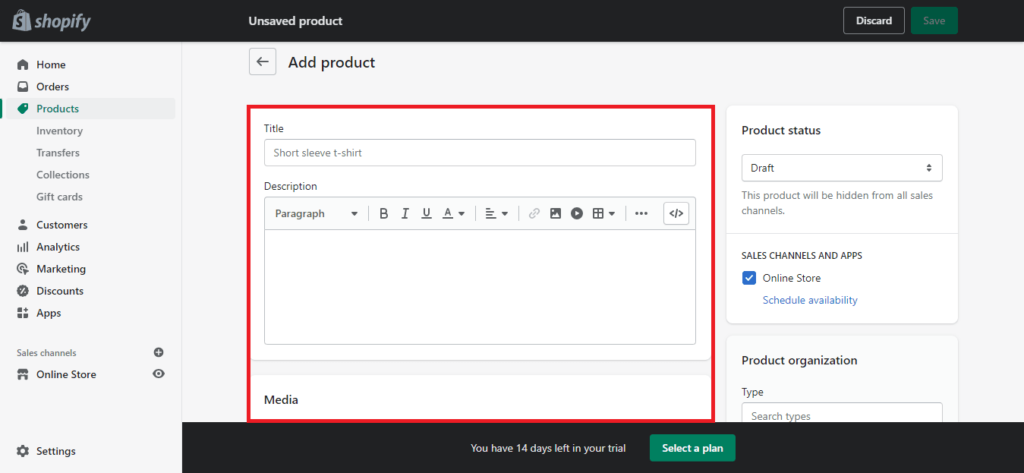
Now, a product upload page will open. Here, you will have to give the necessary information to finish uploading your product.
The interface looks somewhat similar to WordPress Classic Editor, so it won’t be difficult for you to use. Besides, it’s so easy. Just check the screenshot below.
As your product is uploaded to your store, now you can start Shopify WordPress integration by creating a “Buy Button” and adding it to your WordPress site.
Step 2: Add Shopify Buy Button Under Sales Channels
Before creating the “Buy Button”, first, you will have to activate it by adding it to the “Sales channels” section. Just follow these steps to do so:
- Click the “+” icon next to the “Sales channels”
- Find out the “Buy Button” from the popup menu and press its “+” icon
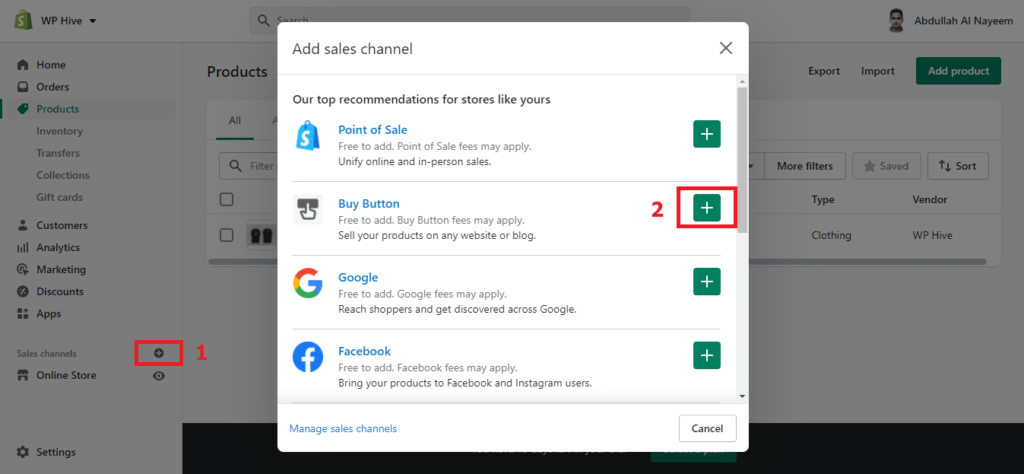
With just two clicks, your “Buy Button” will be activated and added to the “Sales channels” section.
Step 3: Create a Shopify Buy Button for Your Product
After adding the “Buy Button”, you need to create the Button for specific products or a page. It’s much easier than it sounds.
First, you need to press the button called “Create a Buy Button” under the Buy Button menu.
Then, select your product or page, customize the button if you want and click next.
Finally, press the “Copy code” button to copy the code for your WordPress site. Check this video to follow the steps properly:
The code you have just copied is the key to Shopify WordPress integration. So, make sure that you have copied it right before going to the next step.
Step 4: Add Shopify Buy Button to Your WordPress Site
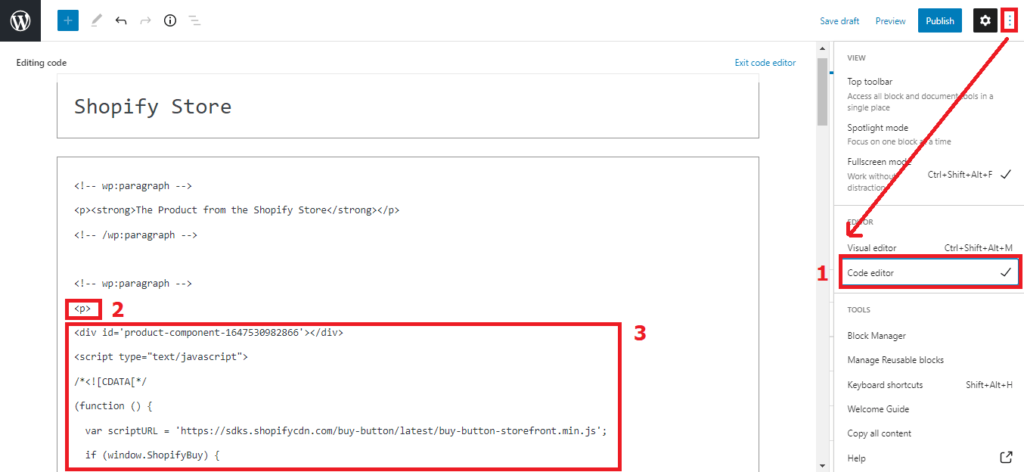
Now, you can add the copied code to any page or post of your WordPress site to finish the integration. To do so, you need to follow these steps carefully:
- Open your page or post on WordPress Code editor
- Add a paragraph tag “<p></p>” inside the page or post
- Paste the Buy Button code you copied earlier inside the paragraph tag
Now, save or update your page or post as usual. Then, check the preview. Your Shopify store product will appear on your WordPress site like the image below:
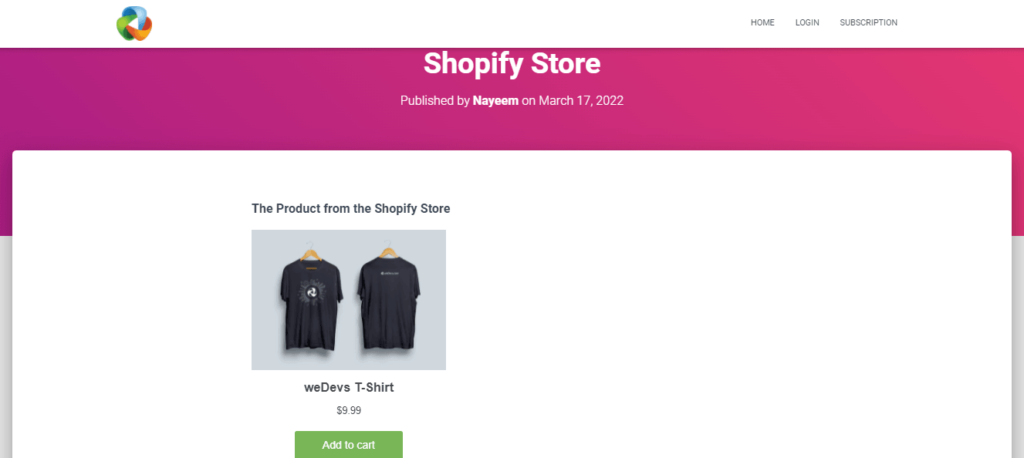
You are done! You have finished integrating your Shopify store with your WordPress site.
Note: The “Buy Button” offers only some basic features for online selling. Therefore, you will eventually lack some key tools to make your store competitive.
However, it is still worth having such an integration option. And, it will be an added benefit if you already have an online store built on Shopify.
Also Read: Shopify vs WordPress – Which One is Better and Why?
FAQ on Shopify WordPress Integration

We have included some frequently asked questions on Shopify WordPress integration here, some of which you may find useful.
Can I integrate Shopify with WordPress?
Yes, you definitely can. Just follow the steps below:
1. Add the “Buy Button” under the “Sales channels” section.
2. Create a “Buy Button” for your desired product
3. Copy the code of the Button and paste it on your WordPress site
Does Shopify have a plugin on WordPress
How is Shopify different from WordPress?
Shopify is the platform where you can build eCommerce websites only, while you can create any type of site on WordPress including eCommerce.
Besides, you will have to pay for Shopify to use it after the trial period, while WordPress is always free.
Integrate Your Shopify Store with WordPress Now
We hope you have learned how to integrate Shopify with WordPress properly after going through the article. Now, it’s time you start integrating your store and site on your own.
Let us know in the comment section if you face any difficulty or if any questions arise in your mind during the process.
We, however, will recommend you to do the integration if you already have an online store built on Shopify or your expectations are aligned with the benefits of the integration.
Otherwise, build an eCommerce site entirely either on Shopify or WordPress. Read the article below to know how to build an eCommerce site on WordPress for free:
How to Build a Website Like Amazon for Free with WordPress
You can also be connected with us via our Twitter and Facebook pages.


Add your first comment to this post