Have you ever been in a situation that you tried to update your live WordPress site or plugin and faced a number of risks like site breaking or crashing? If so, then you know the sufferings to fix it back to the stable position.
Having said that we are bound to test WordPress plugins continuously to keep our site updated. Then how can we overcome this fear of crashing our live site while testing new changes?
No worries! Using a WordPress staging site can rescue us from this situation.
How?
Well, we are going to redeem the ways to use a WordPress staging site in this article. So, stay with us!
What Is a WordPress Staging Site and How Does It Work

A WordPress staging site is nothing but a clone of your live site. Or, it can be a WordPress demo site with a clean dashboard just like another WordPress site where you can test your WordPress themes and plugins.
The changes that you make on your staging site don’t affect your live website, so it’s a safe environment to develop and test your products.
So, how does a staging site work?
Staging environments are usually created on a subdomain of your live domain, for example, we can create a staging site on staging.wphive.com.
The staging environment would be an exact duplicate of the live website, but its files and database would be installed and store under the staging.wphive.com sub-domain folder, and would not impact the live website which lives under wphive.com.
That’s it!
Do You Really Need to Use WordPress Staging Site

We can use a WordPress staging site mainly for testing purposes. That is why sometimes we call it WordPress testing site as well. Here are a few scenarios where we can use a staging site.
- Plugin and Theme Update: Updating plugins and themes can break your site due to conflicts between code, incompatibility issues, or undetected bugs in the code. In some cases, your entire site can be made inaccessible. So, before applying it to your live site, run a test case on your staging site.
- Functionality Enhancement: New functionality requires introducing new code to your website. Whether this is custom code or code from a plugin, there is a possibility that it may mess your site. So, if you want to add functionality to your site, first, test it on your staging site.
- Design Change: New designs should be pushed live once they have been tested across a staging site.
- HTTPS Switching: Switching from HTTP to HTTPS can break your live site if you’re not an expert in this field. So, apply it to your test site to know how it works then finally do it on your live site.
Now, you might be thinking you can use a localhost rather than a staging site to get all of these tasks done. Okay, let’s see how the staging site can help you more in case of saving time and getting more flexibility in comparison with localhost.
Localhost vs Staging Site
| Localhost | Staging Site | |
|---|---|---|
| WordPress Installation | Need to install WordPress manually to test your site | No need to install WordPress manually |
| Configuration | Need to configure your site to make it ready | Always ready to go |
| Time Consumption | Takes more time rather than staging site | Takes less time |
| Replica Site | Need to install everything that you have on your live site to get its replica site | Needs one click to get a replica site |
So, if you want to get a real WordPress live site vibe while testing new plugins and features in the shortest possible time, a WordPress staging site is undoubtedly the winner.
How to Create a WordPress Staging Site – Step by Step Guide

Creating a staging site can be done in several ways. We are going to show you three ways to do that job.
- Setup WordPress Staging Site Using Your Web Host
- Setup WordPress Staging Site Using WordPress Plugin
- Manually Setup WordPress Staging Site Using cPanel
No more chit-chat. Let’s dive into our main tutorial on how to set up a WordPress staging site in no time.
01: Setup WordPress Staging Site Using Your Web Host
You can create a WordPress staging site using your web hosts like Bluehost, SiteGround, WP Engine, and so on. Among all these web hosts, here we are going to show you how to create a WordPress staging site using the Bluehost web service.
- Login to your WordPress site’s admin area and go to Bluehost > Staging page.
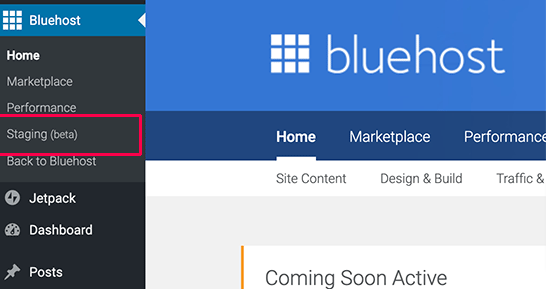
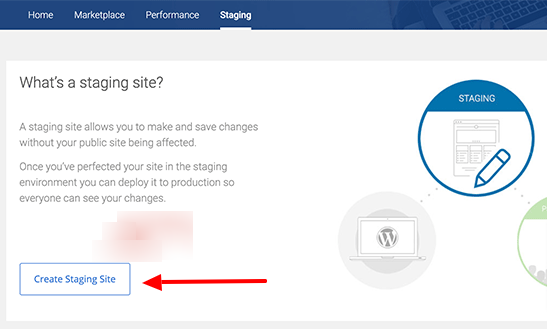
- It will redirect you to the Bluehost’s staging site wizard. Now click on the ‘Create Staging Site’ button to continue.
Bluehost will now prepare the staging environment for your website. When it finishes, you will get a success message with a link to visit your staging site.
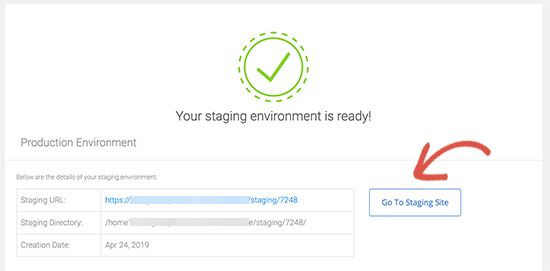
Finally, click on the ‘Go to staging site’ button to continue.
It will get you to the admin area of your staging WordPress site. You will see a red button on top of the admin bar to indicate that you are working in the staging environment.
You can go ahead and work on your website without worrying about it affecting your live site.
02: Setup WordPress Staging Site Using WordPress Plugin
Probably this is the easiest way to create a staging site using a WordPress plugin. As you know it takes a few clicks to install and active a WordPress plugin on a WordPress site.
And, yes, definitely, we will tell you which plugin to use. Not to worry!
For creating a WordPress staging site, the WP Staging plugin would be your top-pick. Since it easy to use and quite popular for its flexibility to let you create a staging site in moments.
Now let me show you how it works!
Step 01 – Install and Activate WP Staging Plugin
- Go to the WP Dashboard > Plugins > Add New
- Type WP Staging in the “Search box“
- Click on the install and after getting installed don’t forget to activate it.
Step 02 – Clone Your Existing Site
- After activating the plugin, Go to WP Dashboard > WP Staging
- Click on the “CREATE NEW STAGING SITE“
- Then give your staging site a name.
- Finally, click on the “START CLONING“
The process might take a few minutes depending on how large your site is. Once it’s finished, you can access your staging site with your username. Afterward, you’re all set to test your site as you like to.
03: Manually Setup WordPress Staging Site Using cPanel
Now let’s get to know how we can manually set up a WordPress Staging Site using the cPanel.
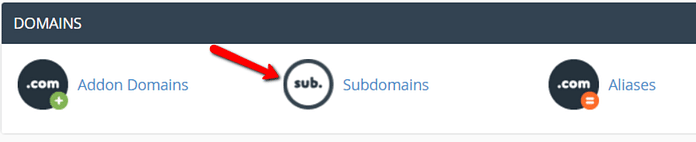
Step 01 – Create a Sub-domain
- Login to your cPanel
- Then find the Subdomains option. Your cPanel might look different but these options should be the same.
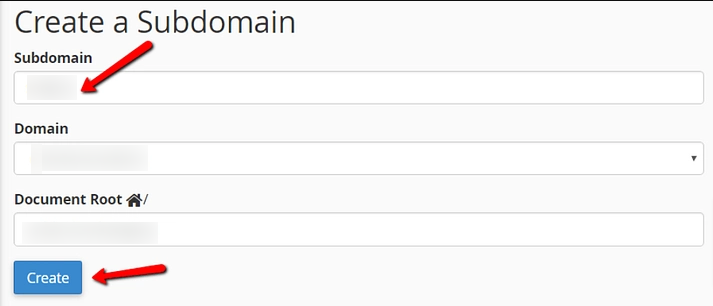
- Create a subdomain by filling up these fields
You can put a subdomain name as you want, e.g.
- Subdomain: staging
- Domain: wphive
- Document Root: public_html/staging
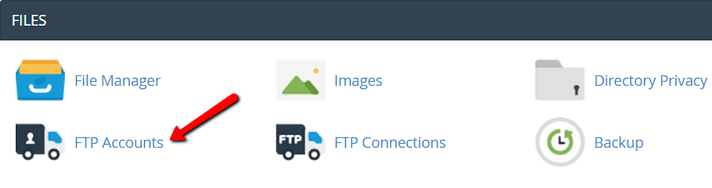
Step 02 – Create an FTP Account
This FTP account will keep all files associated with your staging site separated.
- Find the FTP Accounts option from your cPanel to create your separate FTP account
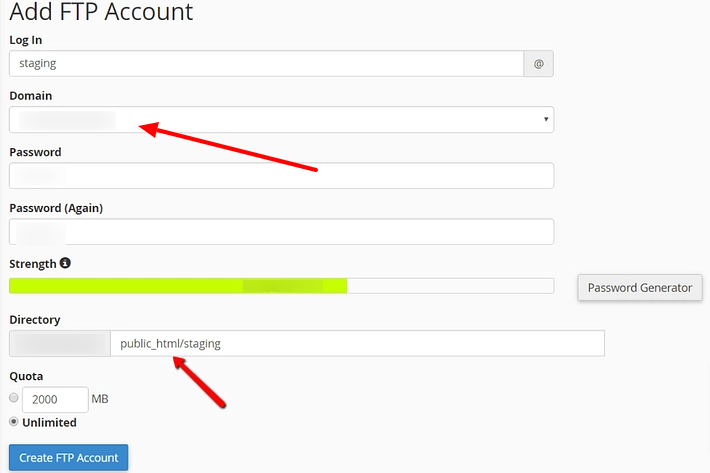
- Now fill up the below information to create your FTP account
Note: Make sure the Directory matches the directory (Document Root) for your subdomain.
Step 03 – Upload Files to WordPress Site
Now, you need to upload your WordPress site files to FTP account.
- Download the latest version of WordPress and upload it to your FTP account.
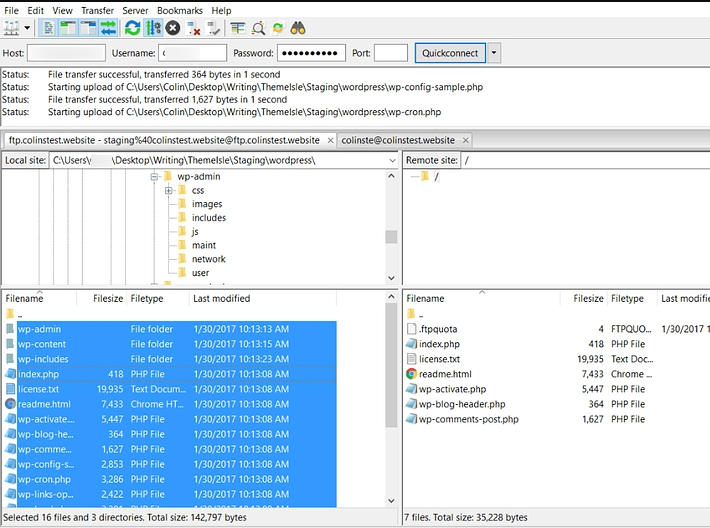
Then, you need to also copy over these three folders from your existing WordPress site:
.../wp-content/uploads.../wp-content/themes.../wp-content/plugins
Upload those to your staging site as well.
Step 04 – Export and Import Your Database
It’s time to export your database and upload it to your staging site. For doing that we are going to use WP Migrate DB. Install and activate it, then run it by going to Tools > Migrate DB.
Note: Don’t forget to enter the same directory path and URL that you used when you created your subdomain.
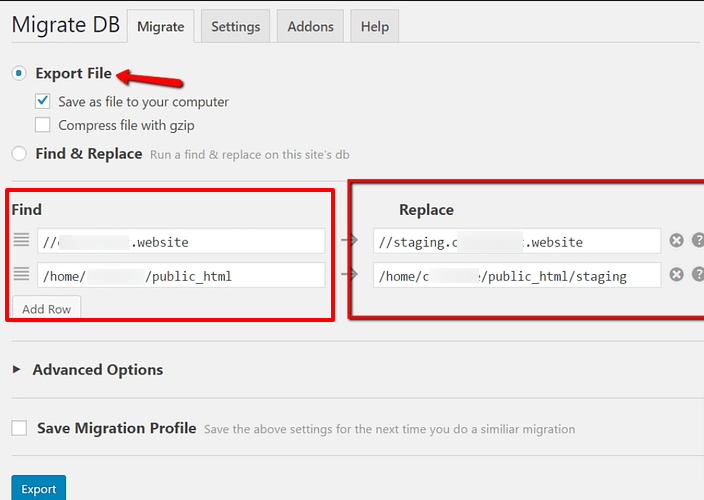
Then export the database.
Next, you need to create a new database for your staging site and import all of the data. Head back to cPanel and find the MySQL Databases option.
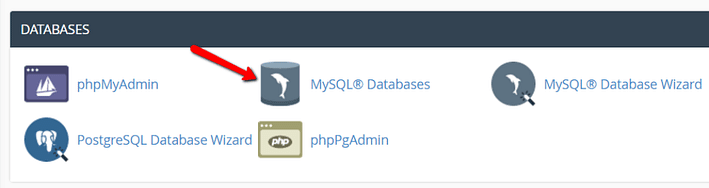
- Click it to create a new database.
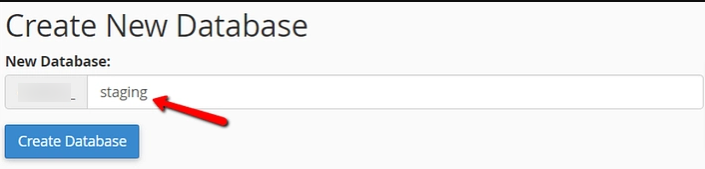
- Give a database name.
- You’ll also need to create a new database user.
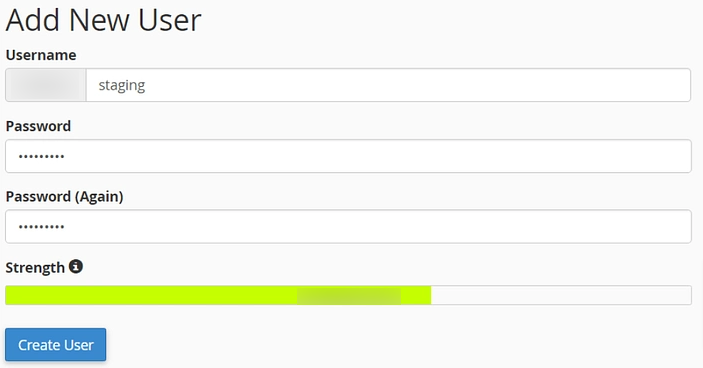
- Click the “Create User” to complete the user creation task.
- Now, add that user to your new database.
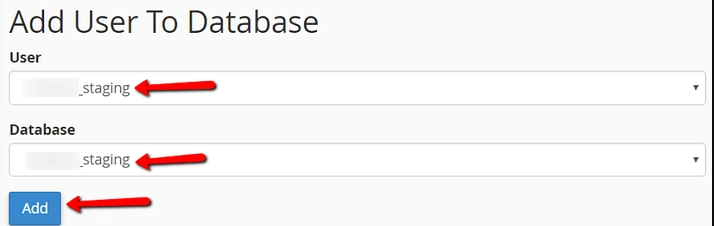
Click “Add” to complete the task.
- Then, go to PHPMyAdmin. Find the database you just created, click Import, and choose the file that WP Migrate DB exported.
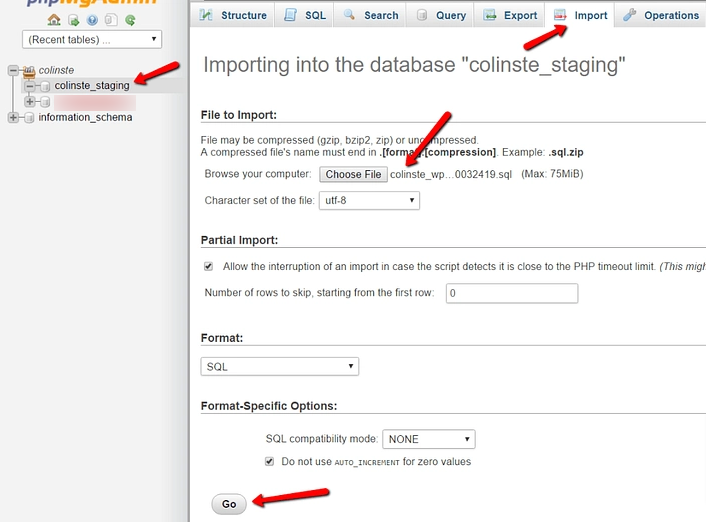
Click “Go” to import the data.
Step 05 – Configure wp-config.php
You need to edit the wp-config.php file on your staging site to use your new database details and username. Also, make sure the database prefix matches the one used on your live site. You probably won’t need to change anything here, but it’s possible depending on what prefix your live WordPress site uses.
If you’re editing the “wp-config-sample.php” file, make sure to rename it to just “wp-config.php”. Then upload it back to your server over FTP.
Step 06 – Log in & restrict access to your staging site
Now, login to your staging site using the exact same username/password as your live site. Then restrict Google to index your staging site.
Go to Settings > Reading and choose the Discourage search engines from indexing this site box. That will at least stop Google from indexing your site.
Bonus: Free WordPress Staging Sites to Test Your Plugins

Suppose, you want to test a plugin before finally using it on your site, or, you want to run a minor test-case of your own plugin before finally launching it on the market. Definitely, you can do it by cloning your site.
But if you want to get even faster and hassle-free service, you can do it using an online free and ready-to-go testing site service. Below we are going to discuss such three services for our betterment.
- TasteWP
- WPSandbox
- qSandbox
TasteWP – Get a Taste of WordPress

You may have heard the name TasteWP, but if you did not, it’s quite normal, as it has been launched on the market not long ago. Though it’s a newbie, it allows users to spin up a new WordPress instance in a matter of seconds.
TasteWP’s temporary testing sites are hosted for 48 hours for non-logged-in users and 7 days for those who are logged in. The one-click setup gives you a random site URL and login credentials.
Want to test it now?
- Well, go to the TateWP homepage
- Click on the “I agree with the Terms“
- Then click on the “Set it up“

That’s it! You will get a full fresh WordPress dashboard after a while then it will allow you to run any test-case of your WordPress plugins using this staging site.
WPSandbox – Free WordPress Test Site
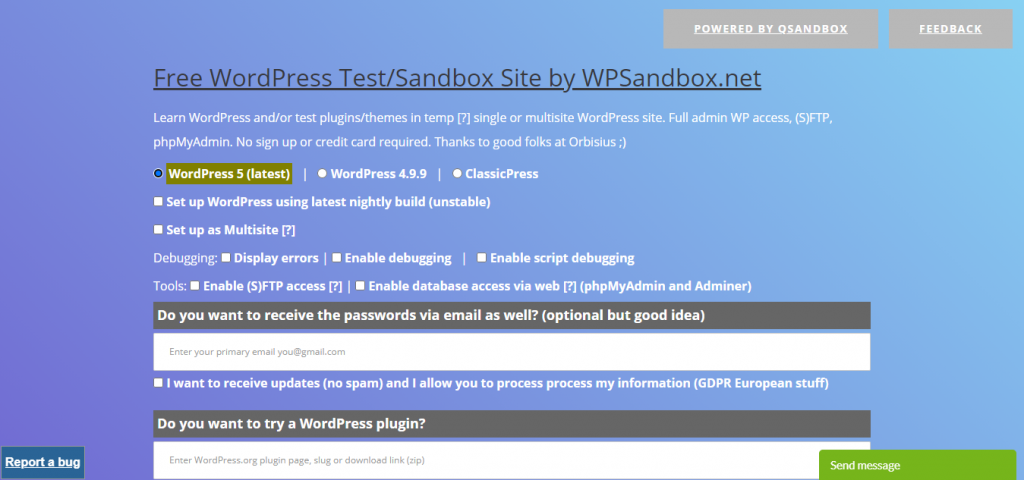
WPSandbox is another online free WordPress staging site provider. It allows you to create a ready-to-go testing site within a few clicks. For doing that you don’t need to signup or give them your credit card credential.
If you want to get a full idea of WPSandbox, then you should give it a try.
- Go to WPSandbox homepage
- Scroll down and click on the “Create Test Site“
And, you will get your test site in moments.
qSandbox
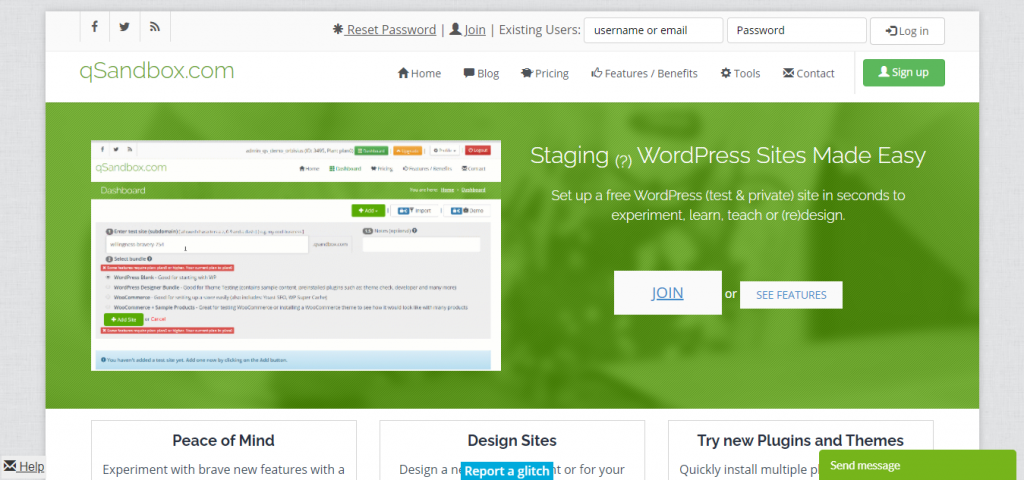
Our last but not least pick from free WordPress staging site is qSandbox. With the qSandbox, you can create a free test WordPress site with full admin access in seconds. That way you can start learning right away. No need to buy domains or web hosting just yet.
If you need to upload custom designs (themes) or extend the site via paid plugins you can upgrade to a paid plan at any time.
Frequently Asked Questions (FAQ) about WordPress Staging Site

-
What is Staging Site on WordPress?
A staging site on WordPress is a test site where you can test your plugins and other changes before making it live. In a word, it’s a safe environment to develop and test your products that won’t affect your live site.
-
How Does a Staging Site Work?
A staging site would be an exact duplicate of the live website, but its files and database would be installed and store under the subdomain folder, and would not impact the live website.
-
Does Hostgator Has Staging?
Yes, Hostgator has staging, which means it lets you create staging site.
-
How Do I Test WordPress?
You can test WordPress using a staging site. For creating a staging site, you can use the WP Staging plugin.
Go to the WP Dashboard > Plugins > Add New
Type WP Staging in the “Search box“
Click on the install and after getting installed don’t forget to activate it.After activating the plugin,
Go to WP Dashboard > WP Staging
Click on the “CREATE NEW STAGING SITE“Then give your staging site a name.
Finally, click on the “START CLONING“ -
What Are the Top Staging Site WordPress Plugins?
These are the top Staging Site WordPress Plugins.
1, BlogVault Staging
2. WP Staging
3. WP Time Capsule
4. BoldGrid
5. Duplicator
6. All-in-One WP Migration -
Does Bluehost Has Staging?
Yes, Bluehost has staging which means you can create a staging site using your Bluehost web hosting service.
Setup a WordPress Staging Site Now and Test Your Changes Whenever You Like

As you see creating a WordPress staging site is as easy as a pie. So, never hesitate to create one whenever you need to test any changes on your site. You can do it following any of the ways;
You can either set up a WordPress staging site using your web host, using a WordPress plugin or manually setup using cPanel.
And you can do it for;
- Updating your plugins and themes
- Enhancing functionalities
- Changing designs
- Switching HTTPS
Whether you are an user, designer, or developer.
Do let us know if you face any difficulties while trying to create a staging site through the comment box below. Good luck!


Add your first comment to this post