Serving scaled images is one of the great way to improve website’s performance, but often it is overlooked. If you are looking for the solution how to properly re-size and served scaled images with WordPress, then you are in the right place. In this article, we will go over what are scaled images, the benefits of serving scaled images, and how to serve them in WordPress.

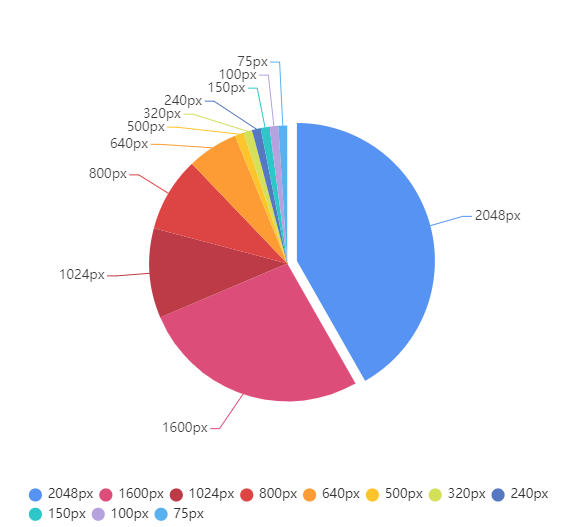
The selection of image sizes has grown semi-organically over the years. Here we have given a data of eleven different resizes per photo which, in sum, use nearly as much storage as the original photo. Almost 90% of this storage is held in the handful of resizes 640px and larger.
Quick Navigation
What Exactly Scaled Images are?
A scaled image is an image whose size matches exactly with the size defined in CSS or HTML code. Let’s say a user uploads a 600 x 600 dimension picture and uses it as a thumbnail of 60 x 60 using HTML/CSS. This means that the browser will have to download the large file first and scale it down before display. A more efficient method would be resizing the image to 60 x 60 so that the browser would not have to inefficiently download and scale down the image.
An image that is too large hurts you and your visitors in several ways.
Firstly, it divert the browser forcing it to perform additional server requests. Instead of delivering a webpage as fast as possible, it needs to stop and resize the image before uploading.
Secondly, if you’re uploading a full size image from your phone, but you’re displaying it as a small Gravatar, then you’re just wasting time and data downloading an image that is excessively large.
A scaled image is an image that has been sized to fit the exact dimensions. Unlike cropping, which may ultimately alter the proportions of an image, scaling preserves the original dimensions.
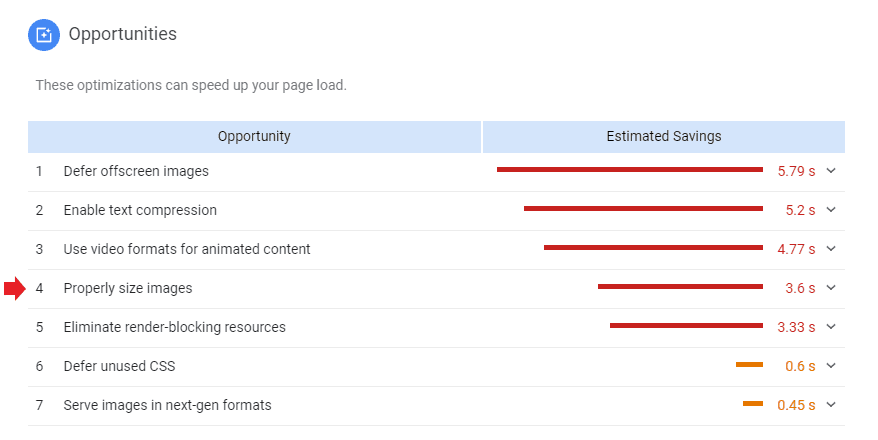
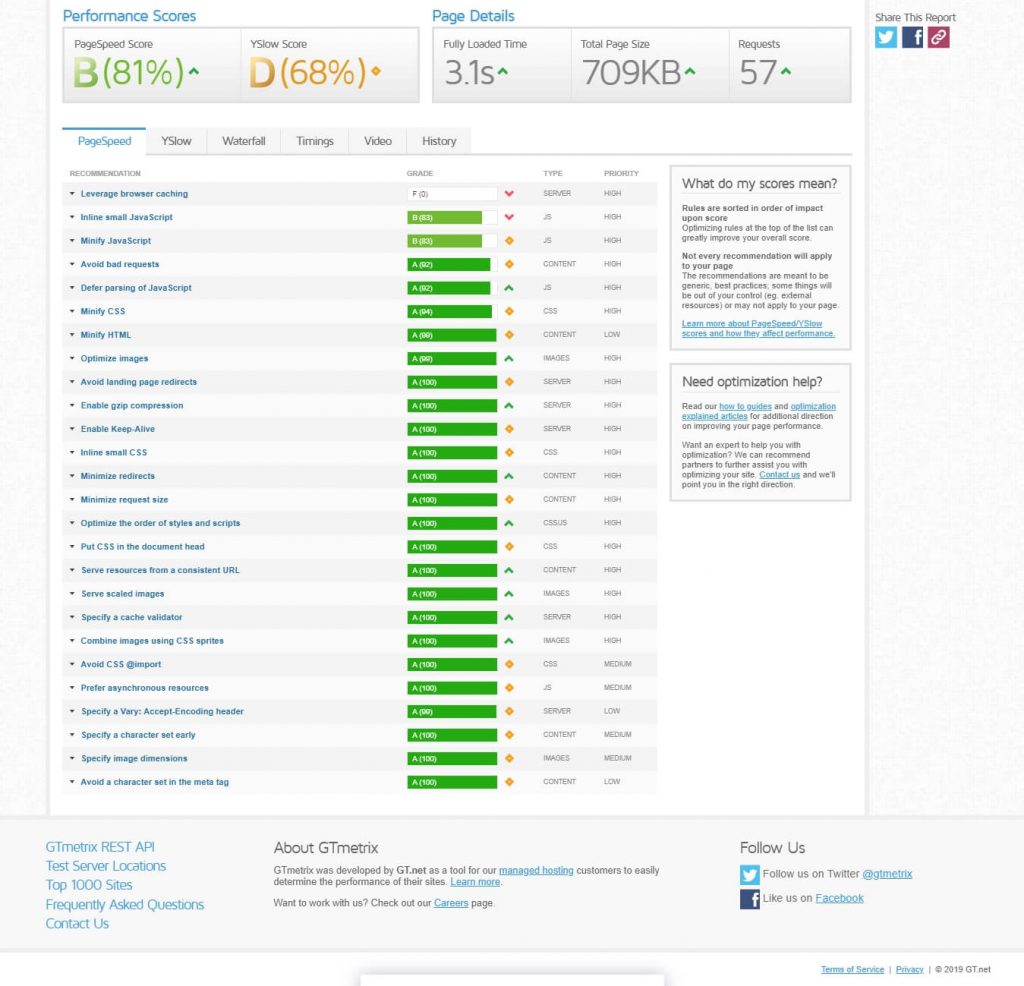
Site speed optimizers such as GTmetrix will recommend scaling images to improve performance.
Benefits of Serving Scaled Images
When an image is properly scaled, it can save many bytes of data and improve the performance of your site, especially on mobile devices or tablets. A scaled images take up less space, they will load a lot faster and reduce the amount of resources used.
Serving scaled images is also one of the recommendations for website optimization tools. The better your score is, the better your SEO, and the higher chance your website’s ranking on Google will be.
How to Serve Scale Images in WordPress?
Serve scale images are very important for image optimization. There are many ways to serve scale images.
- Manually crop image through WordPress.
- Resize image through software like Paint tools, Adobe Photoshop.
- Resize Through Online Image Services like Tinypng.
- Automatic image resizing through WordPress plugins.
Let’s explore all the options.
1. Manually Crop Image Through WordPress
If you want to serve scale images you can manually crop an image with WordPress. To do so, first login to WordPress dashboard
1. Go to Media > Library
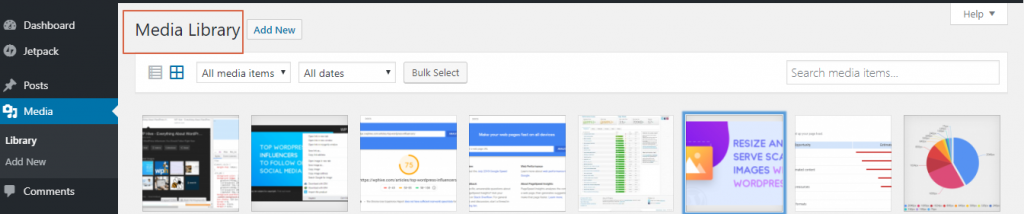
2. Click on the image you want to crop
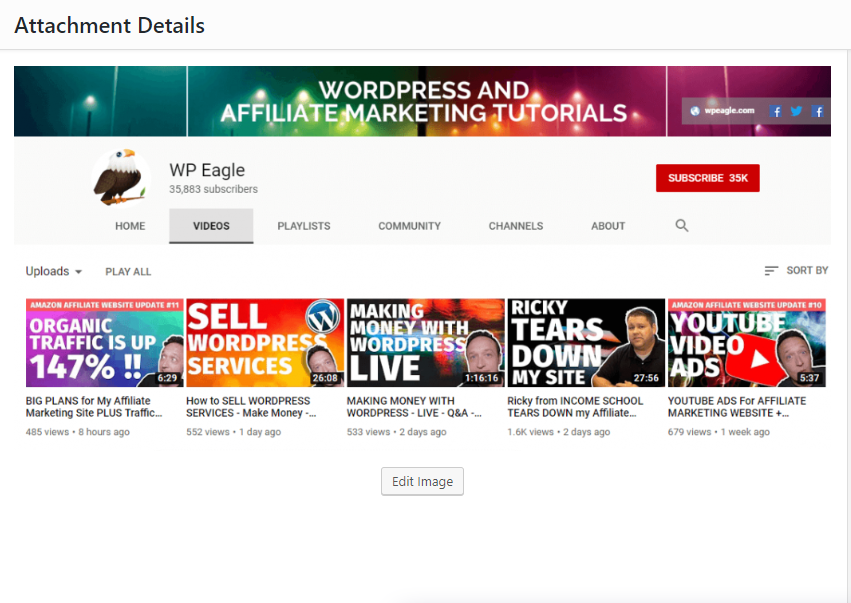
3. Click on Edit Image to open the editing interface
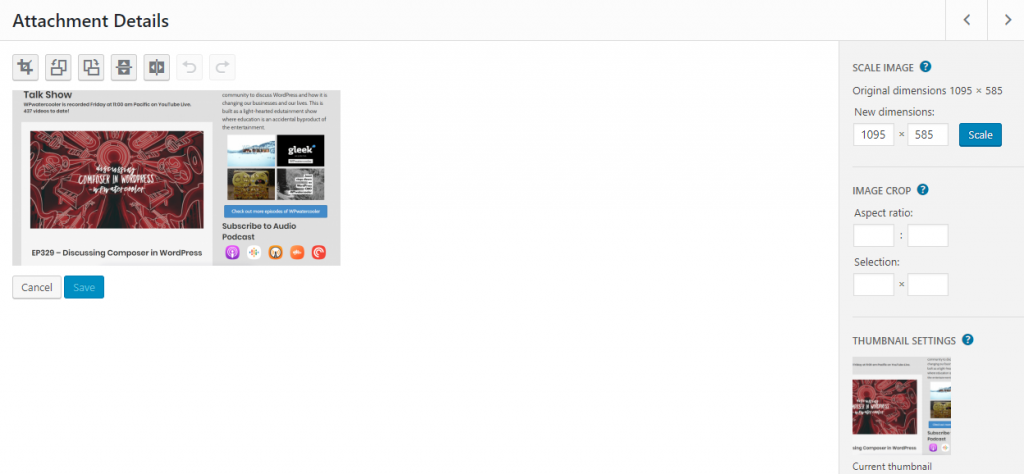
4. Now scale or crop the image as needed using the corresponding options on the right.
Keep in mind that depending on the original image’s dimensions if you scale the image to match the width you need, the height may be shorter or longer than what is specified in your theme depending on the dimensions of the original image.
If you want to scale your image, it will retain the proper proportions relative to the original image.
On the other hand, if you want to crop your image, it may not necessarily end up being proportionate depending on the dimensions chosen.
You can either scale your image by typing your desired width and height, then click on the Scale button or if you choose to crop your image, you can do so by clicking and dragging your mouse over the image and selecting the area you want to crop or enter the desired aspect ratio. If you want to keep the aspect ratio, you can do so by holding down the shift key while resizing your selection. Release your mouse click to reveal your selection. Click on the crop icon above it when you’re done.
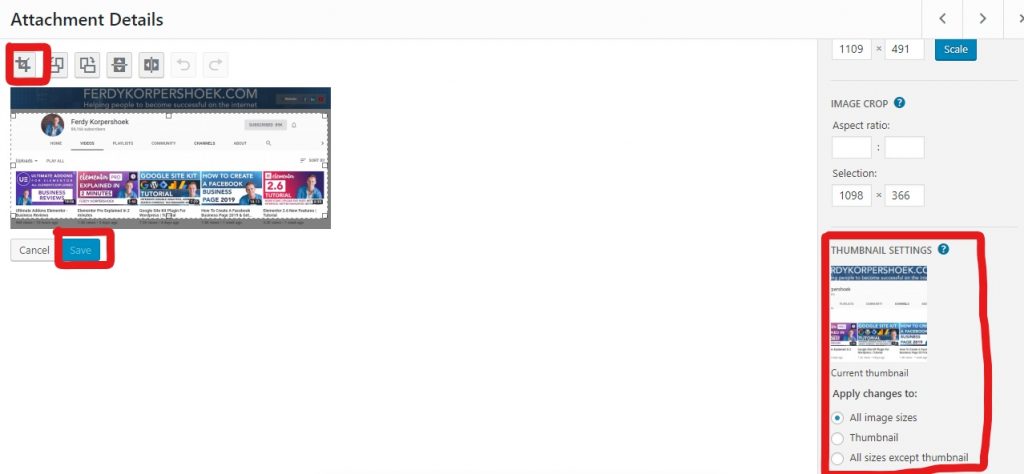
After that, under Thumbnail Settings, choose what you’d like your changes to apply to. When you’re done making all changes, click on the Save button.
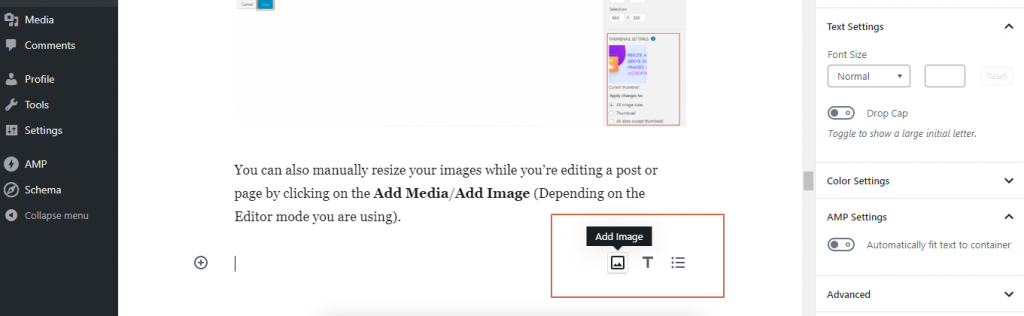
You can also manually resize your images while you’re editing a post or page by clicking on the Add Media/Add Image (Depending on the Editor mode you are using).
Click on the Upload(if you want to upload a new image) or Media Library (from your library) tab and choose from the listed images.
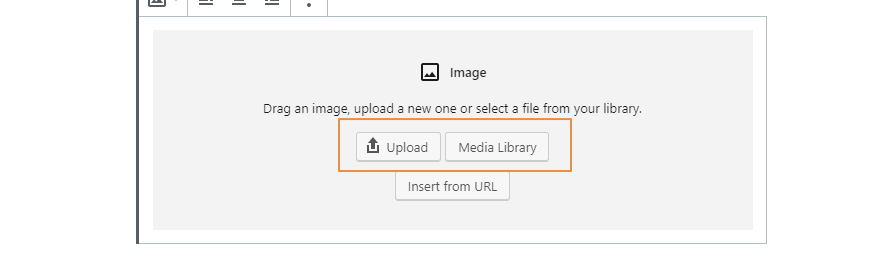
Click on the Edit Image to access the same editing interface as seen above.
Change Media Settings in WordPress to Automatically Resize
If you want to manually resize the default sizes images that WordPress creates, then you can edit them via your admin dashboard’s Media Settings.
The default WordPress image sizes are thumbnail, small, medium, large, and full-size. However, full-size refers to the original dimensions of the uploaded images and cannot be changed in the Media Settings.
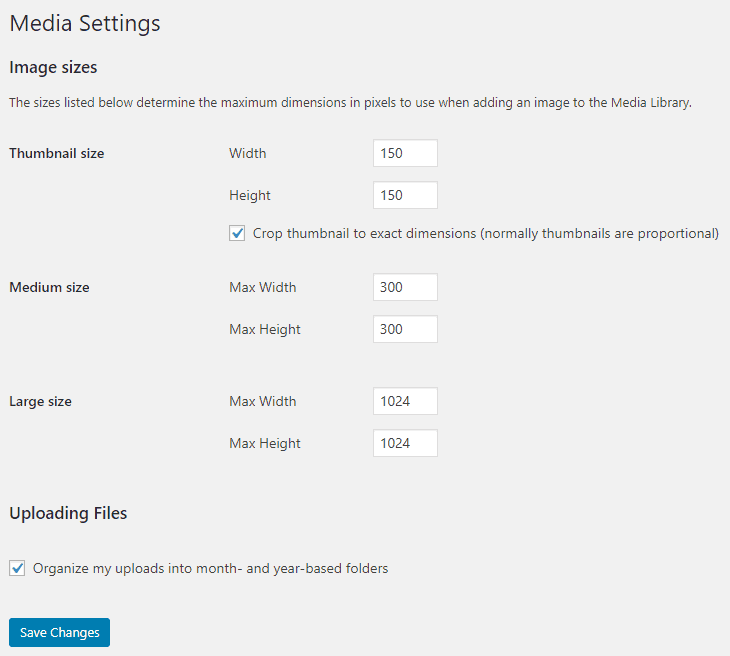
To resize the default image sizes manually, go to Settings > Media and enter the max width and height you want to change in the corresponding fields.
If you want to change the thumbnail size, you can also optionally keep the check box selected to crop the thumbnail to the exact dimensions that you specify. Normally, thumbnails images are proportionally edited automatically.
To resize the default sizes of image, go to Settings > Media and enter the width and height for the image you want to change. When you’re done, click on Save Changes.
Please keep in mind that these sizes can be used in multiple places in your theme, so you may end up editing some images that you don’t want resized. You can also add custom sizes image to WordPress.

2. Resize Image Through Software
There are different software available to resize image and serve scale images. In this tutorial, we used Paint tool (Windows built-in Tool to edit image) and Adobe.
Edit Images with Microsoft Paint
Once you’ve opened an image in Paint, click on Resize under the Home tab.
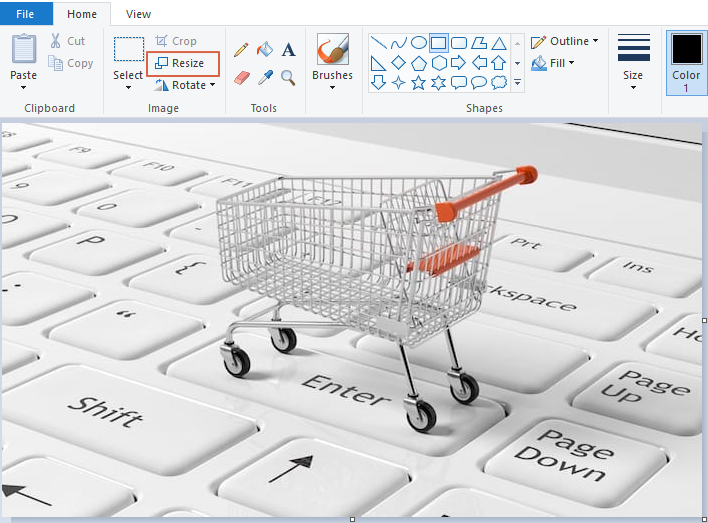
2. A popup box will allow you to enter in the new desired dimensions
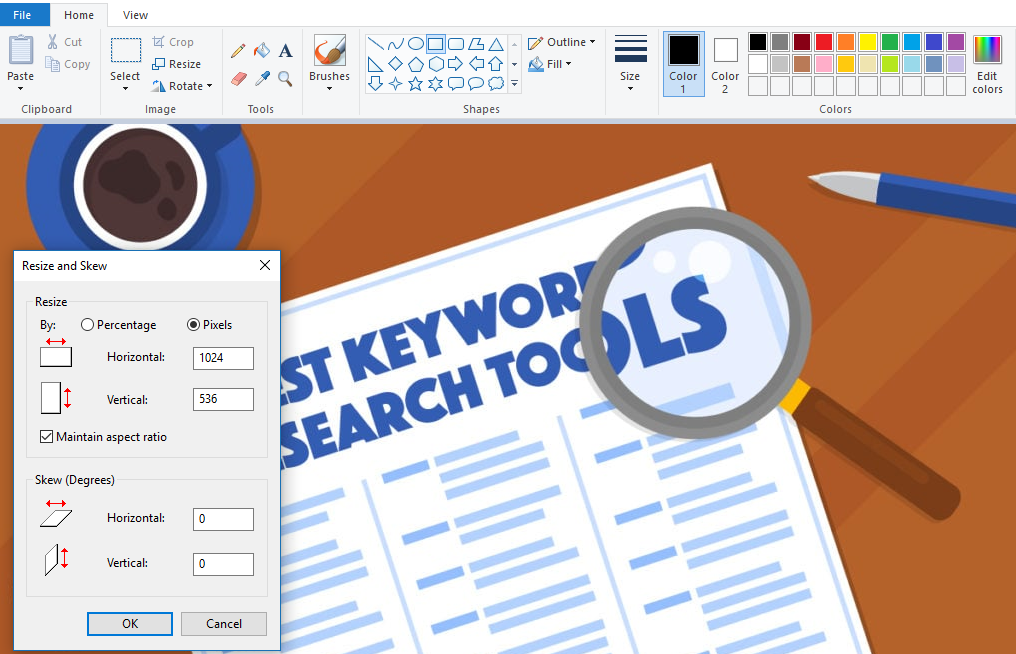
3. Select the Pixels ratio button and edit the horizontal dimensions value. The vertical dimensions will be resized automatically if the Maintain aspect ratio box is checked.
4. When you’re done adjusting the dimensions, click ok button.
5. Now, Save the file in Paint.
6. Upload the new image to WordPress and replace the old one with the new one.
Edit Images with Adobe Photoshop
To edit any image with Photoshop is very easy. With Adobe Photoshop open an image like the following screenshot.

From the menu click on Image and go to Image size, a new window will appear like the following.
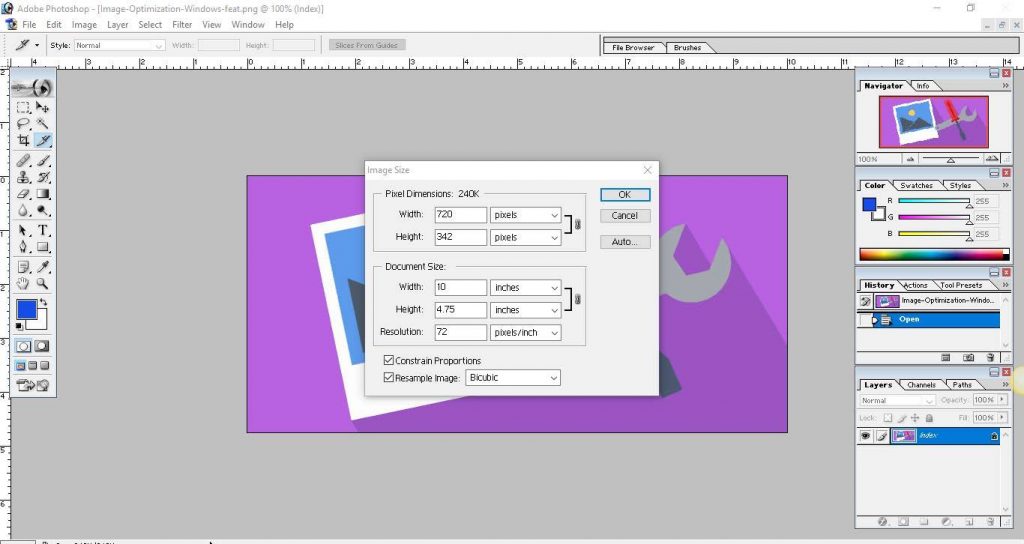
Now change the image dimension that is Width and Height and Save the new one.
Upload the new image to WordPress and replace the old one to serve scale images.
3. Resize Image Through Online Image Services
To resize image and serve scale images there are many online image services available. For tutorial purposes we used Tinypng and Bamboo services.
TINYPNG
Open your web browser and visit tinypng.com

Click on Drop your .png or .jpg files here to upload image just like the above screenshot. Once upload complete, it will automatically resize and reduce the file size. Download the file and reupload the new image to WordPress and replace the old one.
bamboo
It is an open source tool that optimize your images with smart lossy compression. The software uses tinypng to do the compression but makes the whole workflow easier. After dropping image into the window, it will automatically upload the image to tinypng.org, replace the original file with optimized one.
How to Use
It is very simple to use. First, download the tool from this link.
Unzip the zip file, double click on bamboo.exe file. After successful installation, the program will be opened like the below screenshot.
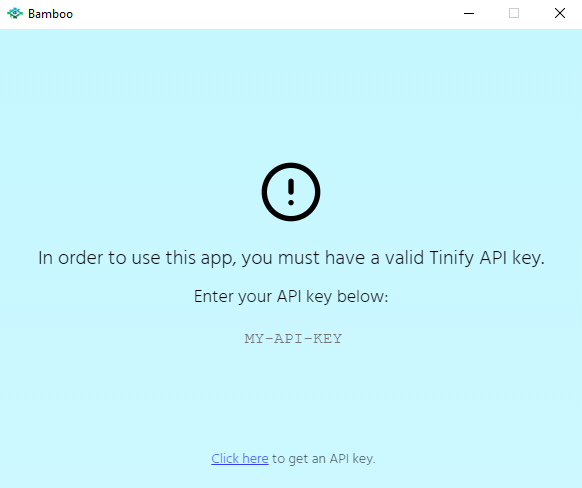
Now, click on Click here to get an API key and you will be redirected to a new tab in your browser like the following screenshot.
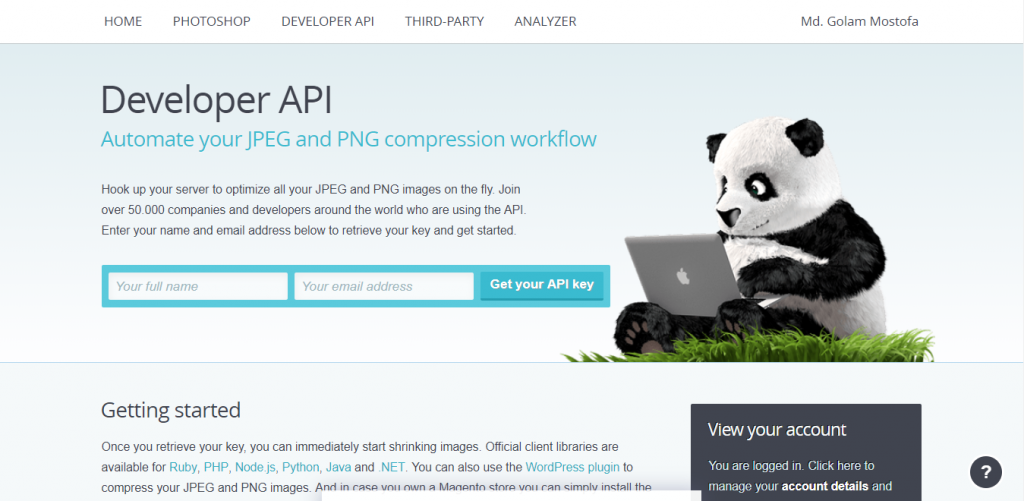
Write your full name and your email address to get the API. After filling up this two field, you will get an API in your mailbox. Just click on visit your dashboard. Copy the API and paste on the My API key field.
Now you are ready to use the tool. Click on the + icon to upload and resize your image.
4. Image Resizing With WordPress Plugins
As you know, one of the main reason of the popularity of WordPress is its tons of Plugins collections. All types of plugins available in store. To resize and serve scale images you can use WordPress plugins also. Few of them are…
WP Smush.it
This plugin is good enough for compressing your images automatically without depressing the quality of the image. Once installed this will automatically compress all existing images and newly uploaded images behind the scenes.
WP Smush Pro is also one of the best WordPress Plugin that helps in ranking your site higher in search engines. With the Smush Pro, the quality of the images remains same, but the size gets compressed by ten times than its actual size.
EWWW Image Optimizer
EWWW Image Optimizer is the image optimization plugin that will save WordPress website. You can use EWWW Image Optimizer to optimize images when uploading them to your site, as well as previously uploaded images
You can easily convert images to file formats that are smaller in size. The plugin uses the gifsicle, jpegtran, pngquant, pngout and optipng image tools to optimize your images without losing actual quality.
Hammy
Another WordPress plugin that takes hold of the images on your website and reproduces them to make images that are much smaller in size.
Hammy has been proved to be very effective in using both of smartphones or the desktop computers. It takes the images and produces a smaller sized images.
CW Image Optimizer
As soon as the images are uploaded on your website CW Image Optimizer WordPress plugin starts to optimize your images automatically. The plugin concentrates on optimization without causing any loss and damage to the original quality of the image and website.
Image Optimization for Search Engines
When you properly optimize your images by using any tools and give a name according to your content, it will be easier to show up in related image search results via search engines.
This will increase the traffic to your site in Google Image searches. Image optimization takes a very short time but can make a huge difference in your site traffic. Here are just a few additional tips on image optimization.
Don’t forget to check out our WordPress SEO Guide to learn more about SEO.
Final Words
In this tutorial, we’ve covered what scaled images are, the benefits of using scaled images, and how to serve scale images. Serving scaled images not only will decrease the loading times for your webpages, but it will also help you to rank higher on search engines.
So far, we have discussed how to serve scale images with WordPress for image optimization. Another way you can optimize image with WordPress.
Add Alt Text – this is one of the classic image optimization tool. By adding image Alt Text, you will not only help your readers about your image but also help Google to crawl the image for search purposes.
Optimize Caption – just like alt text, captions also help Google and visitors understand the context and substance of an image.
While no technical knowledge is required to serve scale images, if you need any help or have any questions about image optimization, please put your comment on the below comment box.


Add your first comment to this post