Do you want to create a multilingual WordPress website? Wondering how to translate your WordPress website? In this tutorial, we will show you how to create a functional multilingual WordPress site with ease.
Do I need to set up a multi-site WordPress installation for each language?
The answer is No. You do not need to have a multi-site WordPress, nor you need to install WordPress for each language. There are quite a few plugins that you will be able to use to translate your WordPress posts, pages, themes, tags, and categories into as many languages as you want.
Creating Multilingual WordPress Websites
We will look at the standard practices adopted by WordPress multilingual site owners.
The first approach is to use plugins that give you the ability to manually translate all of your content into the languages of your choice.
The second method does not the ability to translate actually. Instead, it adds translation service to your existing content by harnessing the power of Google Translate.
The first approach is generally better as it offers you full customizability. Translating content on your own is a better approach as it helps to maintain quality throughout your website. You can convert the content yourself, or you can hire others to do that for you.
If you do not have the time to translate each string manually, but you still want to offer users your content in other languages, then you can opt for Google Translate. Google Translate adds a multi-language switcher on your website. Upon clicking the switcher, your content will be translated to the preferred language using Google Translate. One of the drawbacks of this approach is that the quality of translations will not be as good. However, if your site is looking to translate into more popular languages, then Google Translate does a satisfiable job.
Let’s start by building a multilingual WordPress site with manual translations with the help of WordPress plugins.
Creating a Multilingual WordPress Site (Manual Translation)
There are a few plugins that offer translation services. WPML and Polylang are some of the great translation plugins.
WPML (from $29)
One of the best translation plugins is WPML. WordPress Multilingual Plugin is now better known as WPML. WPML supports more than 40 languages out of the box, and you can even add your language variants.
WPML offers you the option to place translations on the same domain, a sub-domain, or an entirely different domain, making it a handy solution for maintaining a multilingual website.
The starting licenses start at $29, however, to access the full range of features you’ll need to upgrade to the $79 option.
WPML has both auto and manual translation services. WPML syncs with ICanLocalize and Cloudwords services to automatically translate your content. It sends your content to translation services and uses the translated strings on your website.
If you would like to create translations manually, you can add your reading via the WordPress, text editor. This will allow you to write the adaptation alongside the native language content.
Translation using Polylang (Free to Use)
If you want to start translating for free, you need to do is install and activate the Polylang plugin. If you do not know how to install a plugin, please follow our tutorial on WordPress plugin installation. After activating the plugin, go to Settings » Languages to configure the plugin.
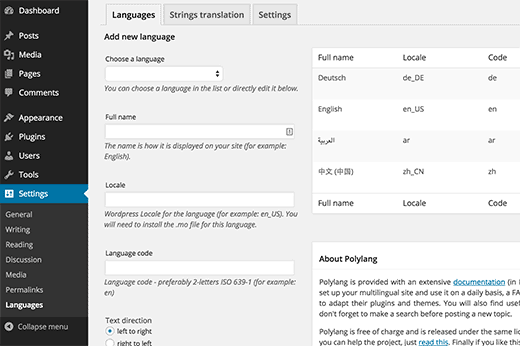
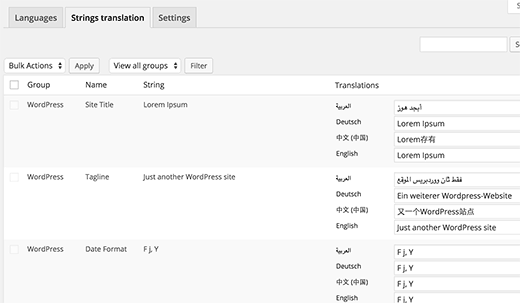
Right away you will see three tabs. The first tab is ‘Languages.’ You can add your preferred languages from here. After adding the languages, go to ‘Strings Translations’ tab. You can translate site title, description, and other things including the date and time format.
Switch to the Settings tab. You can select a default language for your website from the Settings tab and tweak some other technical settings.
Setting Up URL Structure Using Polylang
First of all, we do not recommend changing the URL. Because in future, if you turn off this plugin, then all those translated page links will be broken. That will cause harm on your on-page SEO as broken links can affect your site’s ranking on Google.
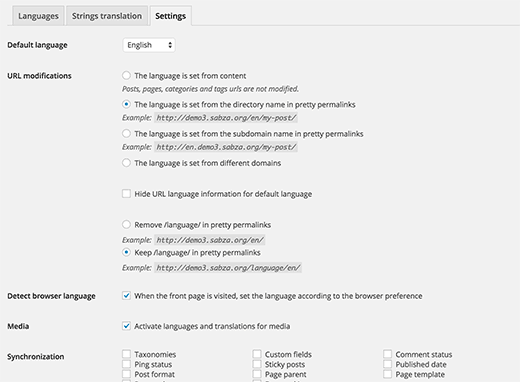
To take the full advantage of multi-language SEO, then choose the second option labeled as Pretty Permalinks as shown in the screenshot above.
Then check the option for detecting browser’s preferred language. This will automatically show the content in the user’s preferred language. Click on Save Changes button to save your settings.
Adding Multilingual Posts in WordPress
Polylang makes it very simple to add content in other languages. When you are creating a new post or editing an article from WordPress Dashboard, you will now notice a new languages meta box.
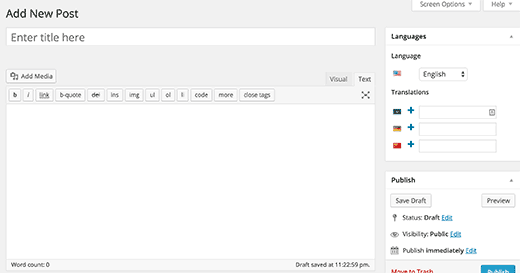
The default language will be selected automatically. You can add your content in the default language, and add translations later. You can add new translations by clicking the + button which is just next to languages.
You can repeat the process as many times as you want for all the new languages you are adding. You can publish your posts and pages after finishing.
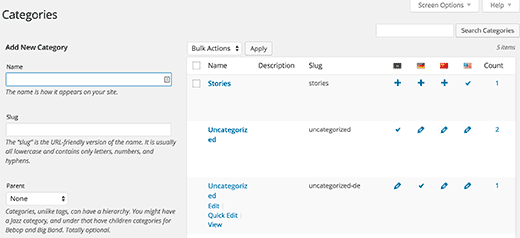
Translating Categories, Tags in Polylang
You can also translate categories and tags. If you want to translate categories, go to Posts » Categories and add your translation.
Multi-Language Switcher/Translation on Your WordPress Site
If you do not want to add the manual translation, then adding a language switcher is a good idea. Language switcher allows users to select their preferred language when viewing your site.
Polylang makes it easy to add a language switcher.
How to Add Language Switcher with Polylang
Go to Appearance » Widgets and find language switcher widget. Once you see it, drag the language switcher and add it to your sidebar or another widget-ready area.
How to Use Google Translate to Create a Multilingual WordPress Website?
Adding human translations provides the perfect user experience, but you might not have time to add translations for all the languages. Google Translate can help you in this regard. You try using Google Translate to translate content on your site automatically.
- First, install the Google Language Translator plugin and activate it. Refer to our plugin installation tutorial to know how to install a plugin step by step.
How to Configure Google Language Translator on WordPress
- Go to Settings » Google Language Translator
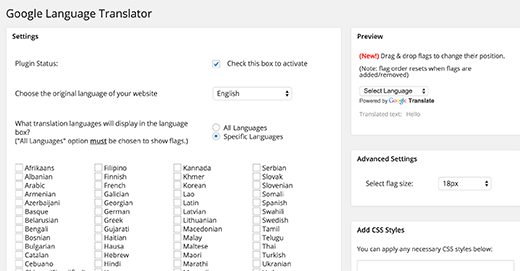
The plugin will give you the options to select the languages that are available with Google Translate. Google Translate currently supports more than 50 languages. You can configure the plugin as you like it as there are quite a few options.
Automatic and Manual Translations using Weglot (Free trial + Free plan)
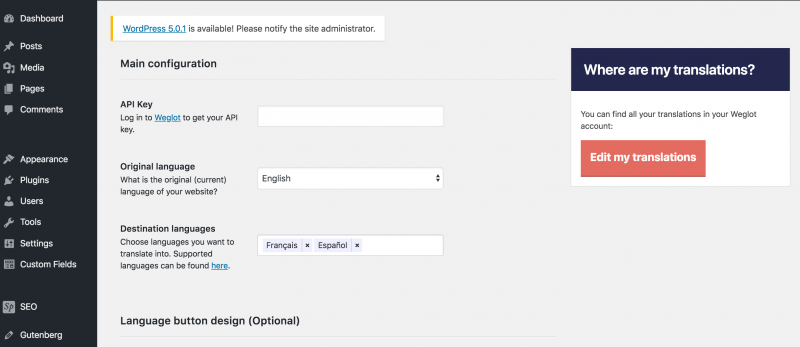
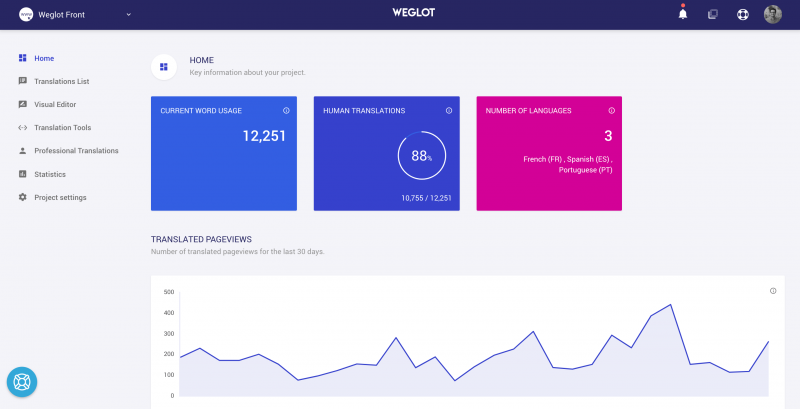
If you want to a mix of both automatic and manual translation, you should use the Weglot plugin. Once installed and activated, all you need to do is select your original language and destination languages. Weglot will then detect all your content and apply the first layer of automatic translations from the best translations APIs (Google, Bing, DeepL or Yandex depending on the language pair).
Weglot supports more than 100 languages out of the box and is completely SEO compliant. One of the main advantages of Weglot is that it works with every WordPress plugin and theme (including WooCommerce, Elementor)
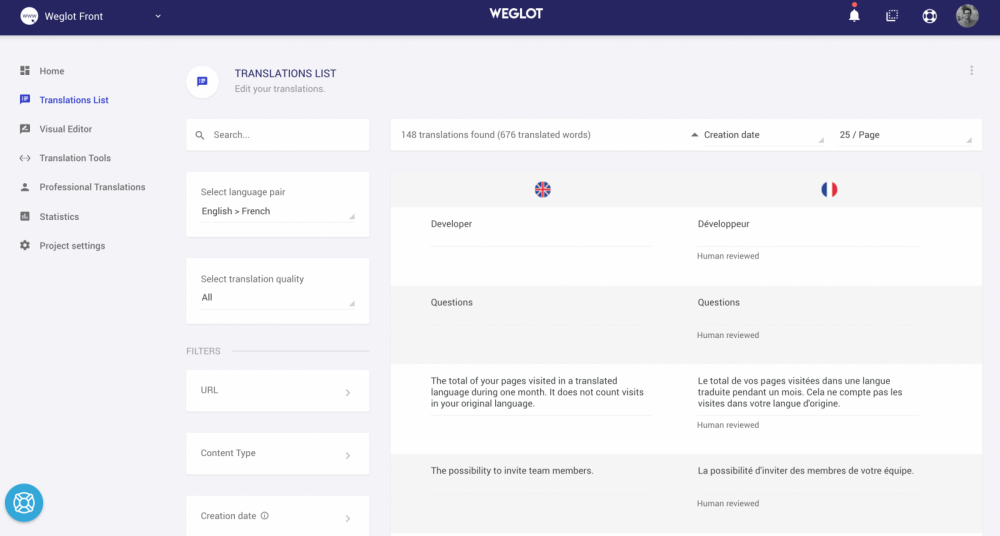
Manually Edit Your Content with Weglot
Once Weglot has applied the automatic translations to your content, you can then manually edit all the translations from the Weglot dashboard to make sure that they are correct, using the Translations list or the Visual editor. If needed, you can easily order professional translations directly inside Weglot.

With Weglot, no need to create a new page for each translated language every time you add a new post. Weglot handles all the technical part for you, you just need to focus on your content and translations.
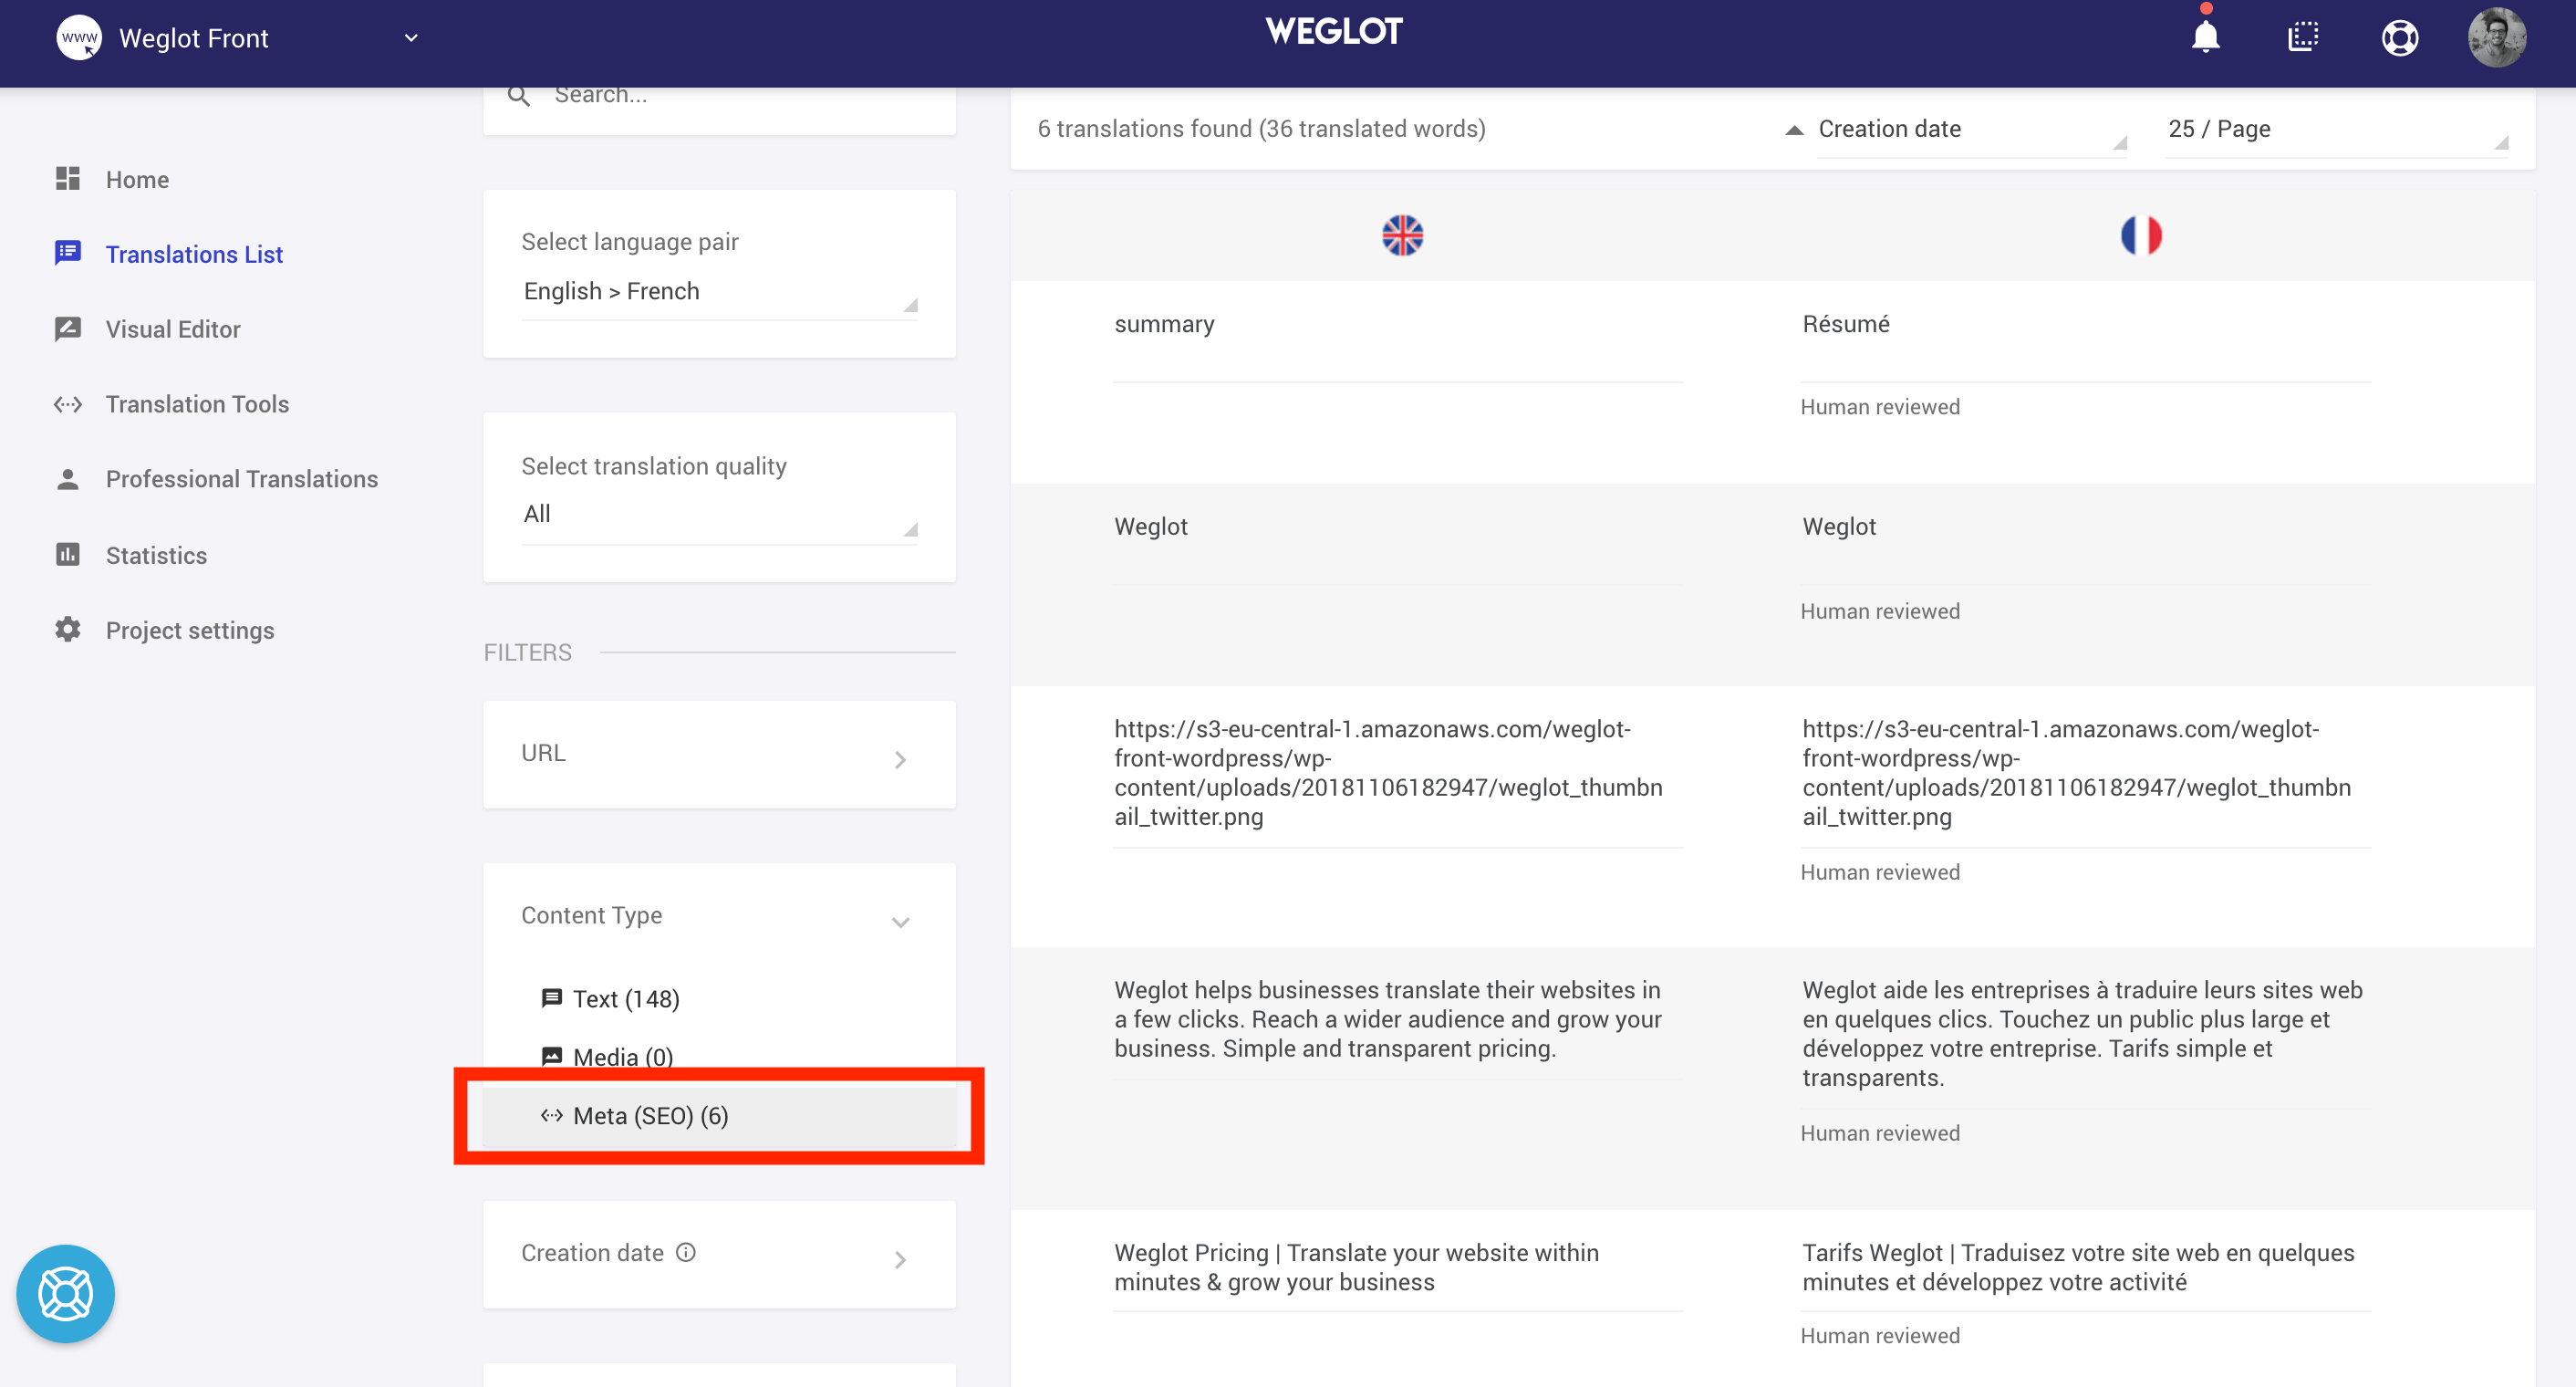
Translate your Categories, Metadata, and Images
Weglot allows you to translate every content on your website from Categories, Header, Footer, content from other plugins. You can also translate all your metadata content like your pages titles and descriptions which is very important for SEO.
You can also change your images depending on the translated language if there is text inside them.
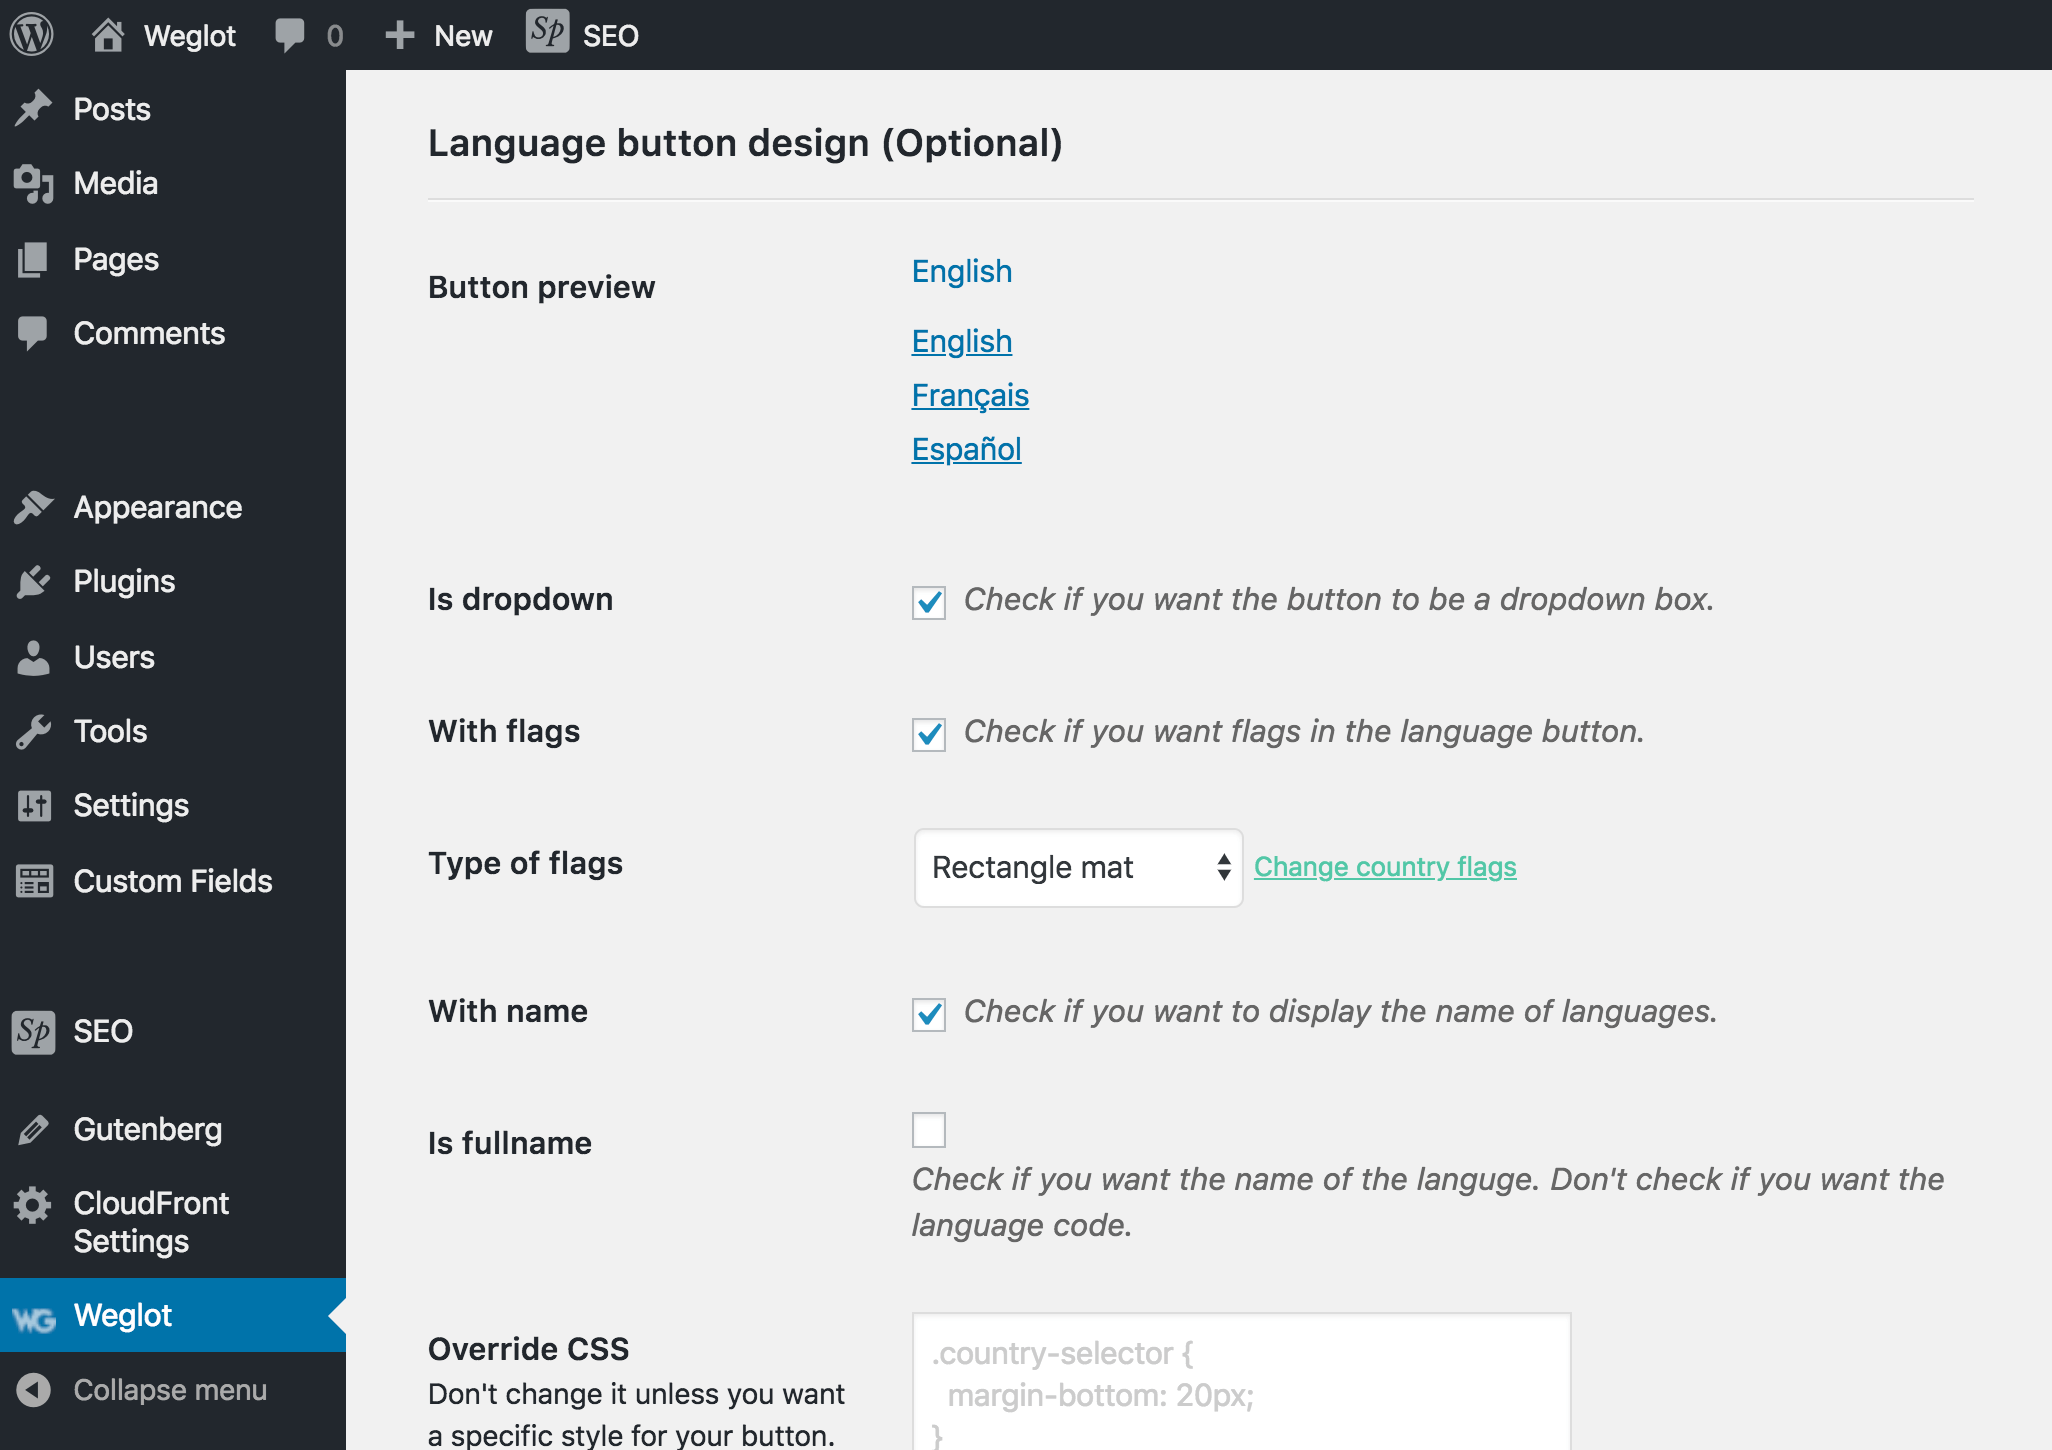
How to Add Language Switcher with Weglot
Weglot automatically adds a language switcher on the bottom-right corner of your website. You can, of course, edit the language switcher design and position. To do so, go to your WordPress Admin Dashboard » Click on Weglot.
Wrapping on Multilingual WordPress Websites
We hope this article assisted you to learn how to create a multilingual WordPress website. Adding new translations can always provide a more personalized feel to your website as it helps to maximize user interaction. Know other ways to increase the conversion rate of your WordPress website.
If you want to fix your multilingual WordPress website’s vulnerabilities and improve its security, please follow our WordPress Security Guide for multilingual sites.
Follow us on Facebook and Twitter for more beginner-friendly WordPress tutorials and reviews.


It was a very informative article. Creating a multilingual website with WordPress can be done effectively using best practices and plugins. Here’s a step-by-step guide to help you get started:
1.Choose a Translation Plugin
2.Install and Activate the Translation Plugin
3.Configure the Translation Plugin
4.Translate Your Website Content
5.Implement Language Switching Options
6.Ensure SEO Compatibility
7.Test and Maintain
According to my point of view, these points must be in your article.
Thank you, dear reader, for taking the time to comment on our blog post! We can foster an interactive and vibrant community through your thoughtful comments and insights.