
It sounds unusual to make WordPress site private. Because people create websites to share important information, generate traffics, or make profits. So, why they want to make their site private so that people can’t access them?
Believe it or not, there are many website owners out there who want to keep their website invisible from the public eyes. In this world of technology where there no information is safe, keeping some things private is important for some people.
So, upon some users’ requests, today we are going to show you how to make your WordPress website private using the simple steps. You can use custom coding if you have the coding knowledge, or hire someone to do it.
But we are going to show you how to make your site private using a WordPress plugin.
Before that, we are going to justify why some websites need to have privacy.
Is It Fruitful to Make Your Website Private?

It may sound unusual to make WordPress site private. Why would anyone create a website and won’t reveal it to outsiders? Because a lot of effort goes into creating a website. That is why it sounds weird.
However, if you think carefully there may be a lot of reasons for making a website private.
- If you create a membership website with paid articles, then you have to privatize your website. That way only the people who purchased the access can visit your website.
- You need to work with a dedicated team when a website is being developed in your company. So, you obviously don’t want anyone outside of your team to have access to the website
- Also, you want a corporate employee’s related site, which they can access from anywhere and is restricted to people outside of the company.
- You have a personal blog site that only a few people are allowed to read. So, that’s why you want to make your website private so that other people can’t visit.
- That goes for any type of family blog as well. You can avoid using social channels to share your photos, videos but use a private website to share them with your family members. Although this type of website is rare or we wouldn’t know because they are private.
- If you are a teacher and want to share all your notes, slides, presentations only with your students and attendees then you can make your website private.
These are few examples out of many. Although we are using the word private, however, that’s not entirely true for WordPress sites. You see there are roles in a WordPress site and these roles limit the access level to the site.
We can say,
Although if you make WordPress site private, it is not invisible. Administrators and editors can still see your private content.
How to Make WordPress Site Private?
So, maybe we have succeeded to establish why some website owners need to make their website account private. Now, we are going to show you how you can make a WordPress site private easily.
However, WordPress doesn’t come with a built-in fully private option. But, don’t worry. There are a few plugins available in the WordPress repository that will make the process easy.
So, if you install a plugin, follow the simple steps, you can get your site protected from Google and other people you don’t want to visit your site. So, after some research, we found the My Private Site plugin simple and easy to set up.
We are going to show you the steps of setting up this plugin so that you don’t need to look elsewhere.
Moreover, installing this plugin is as simple as installing any other WordPress plugin. So, we are not going to bore you with going over those steps again. Now, let’s get on with the steps, shall we?
Step 1: Activate Private Site Functionality
After installing the plugin, you will see the My Private Site on your sidebar. Now,
- Navigate to WP Admin-> My Private Site-> Site Privacy
- You will see a notification “SITE IS NOT PRIVATE“
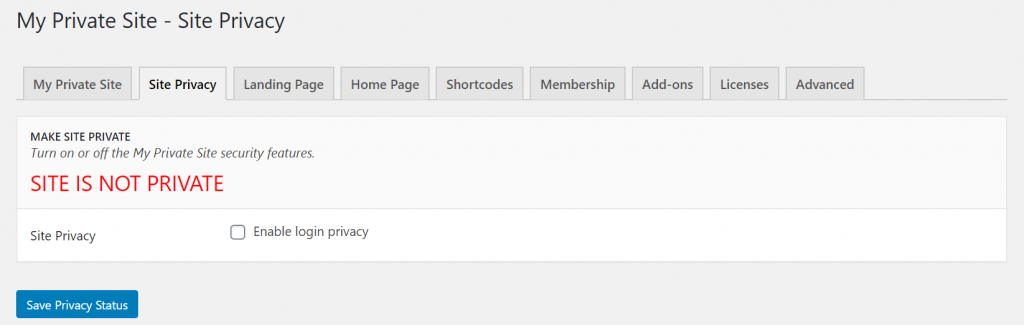
- Now, check the Enable Login Privacy from the Site Privacy option
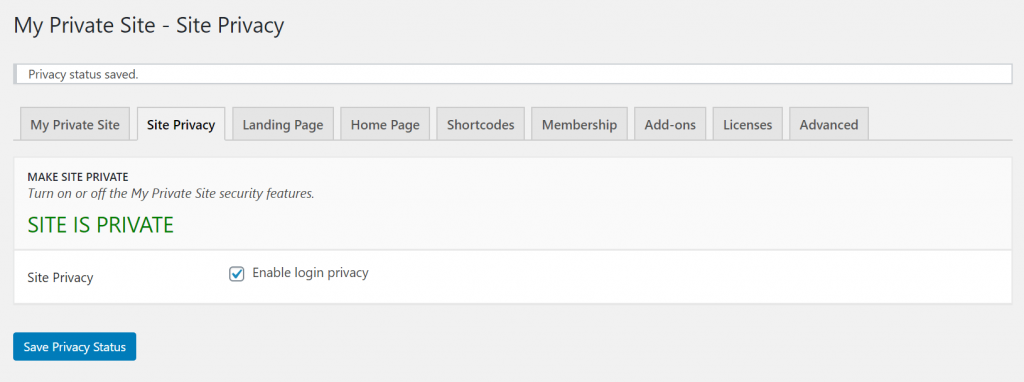
- After you click the “Save Privacy Status” button, you will see that the notification will be changed to SITE IS PRIVATE.
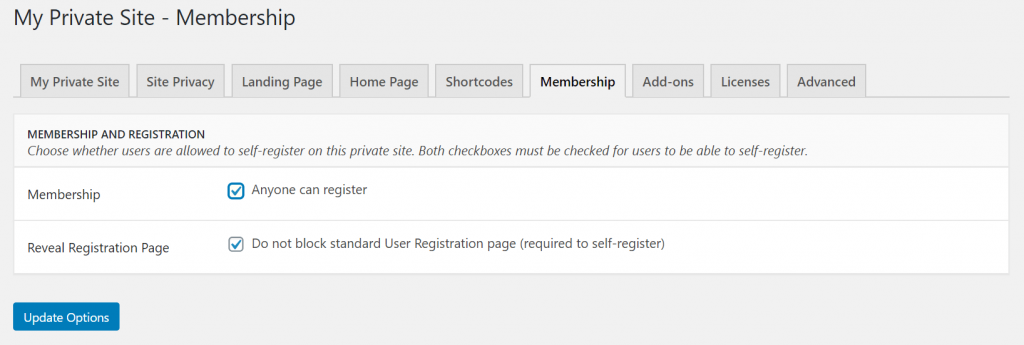
Step 2: Decide Who Can Register
Remember we said that, only way people can access your private site if they register. You can allow this function using this plugin.
- Go to the Membership option
- Now, you need to check both the boxes in order for people to self-register
- Click on the “Update Options” button to save changes.
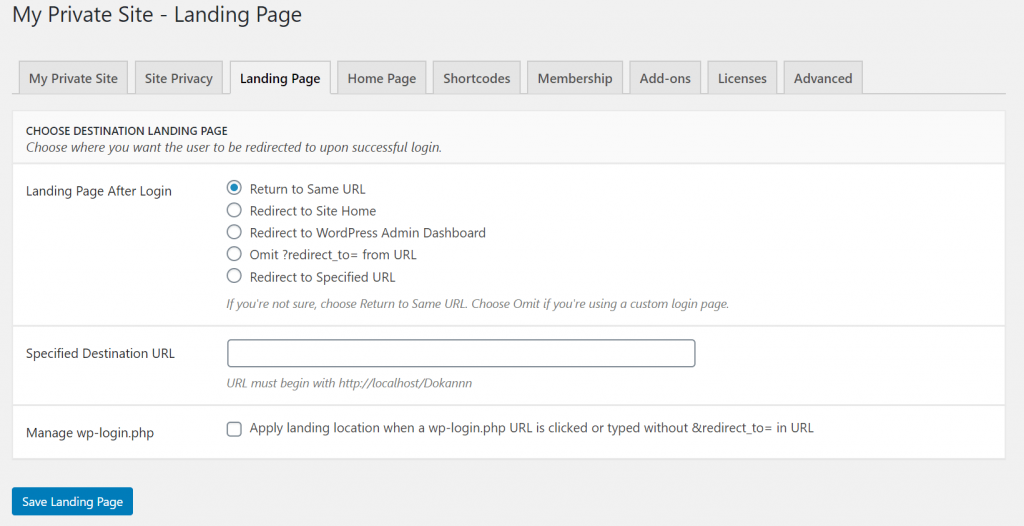
Step 3: Control How Users Login to Your Site
In the Landing Page section, you can:
- Choose which page a user goes to after they log in
- Create your own custom login page to use instead of the default WordPress login page.
Therefore, you can see how easy and simple it is to make WordPress site private using the My Private Site plugin. If you follow these simple steps, then you can do it in no time.
However, that’s not all. What if you want to make a specific blog post or page private instead of the whole website? Yes, you can do that also. And no, you don’t need to install another plugin for that. Here let us show you.
How to Make a Blog Post or a Single Page Private
WordPress has the feature to make a post or a page private. So, you don’t need to take the trouble of installing an extra plugin for that. However, to get the best out of this feature, we will share some cool tips. So, bear with us.
To access the privacy settings, edit the post or page you want to make private. Now look for Visibility option under the Publish box on the right hand side. Click on it.
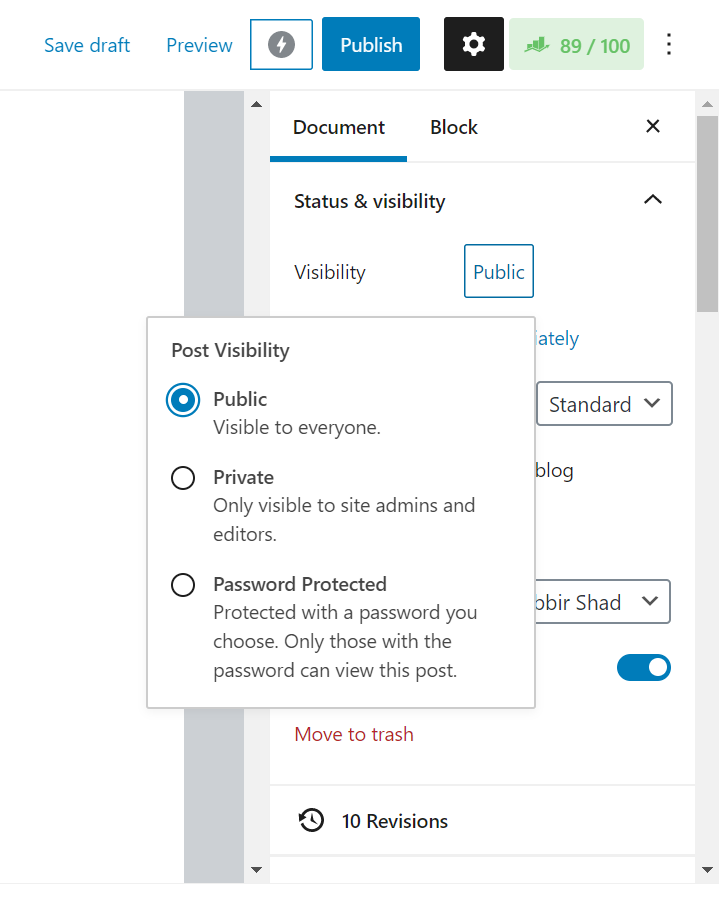
You will see 2 options,
- Private: Users who are logged in and with high-level privileges can see those posts. Other users will get 404 or an error page.
- Password Protected: Users will need to enter a password to view the post or the page.
Choose one and click on Update to finish. Now, you need to know how these two functions actually work.
When You Choose Private
When you choose to make the post or the page private, then users who are logged in and have user roles like Administrator or Editor will be able to view the posts. WordPress will add the word Private in front of the post’s title.
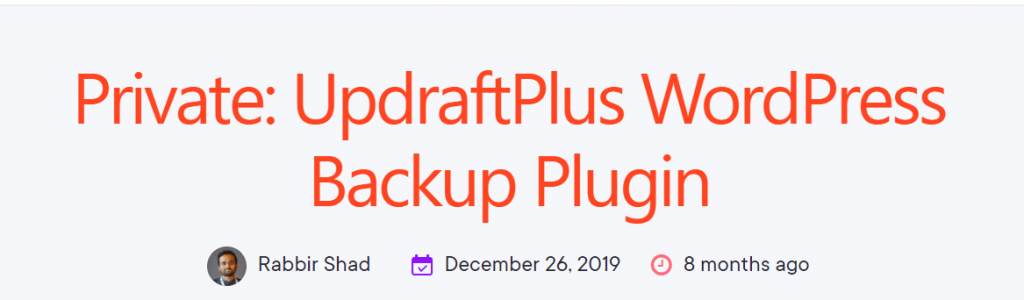
Moreover, that particular post will not appear on the blog archive page. So, when someone tries to access it, they will see a 404 or an error page.
Tip: If you want users other than the Administrator or Editor role to access these private posts or pages, use the User Role Editor plugin to do that.
When You Choose Password Protected Option
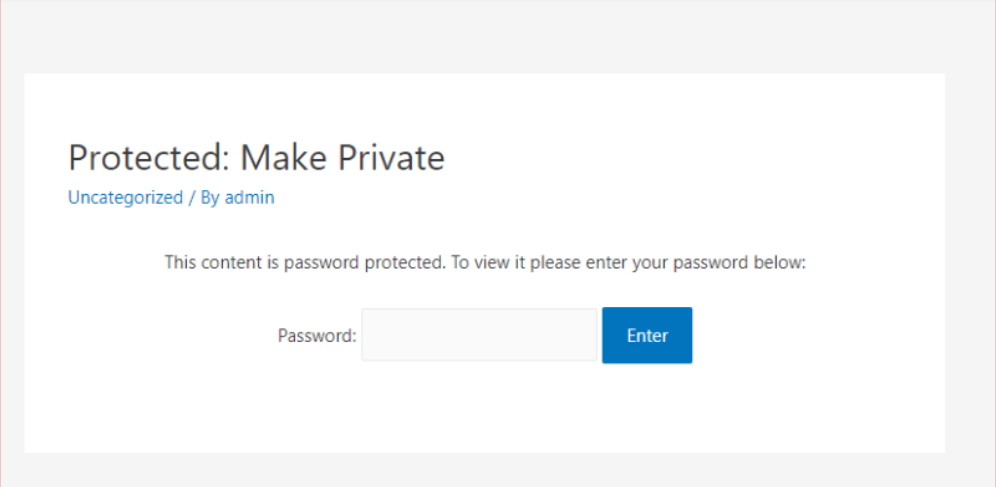
Upon choosing the password protected option, you need to enter a password. That password will be used to access the post or page. So, when the blog or page will show up in the blog archive, the word Protected will be written before the post’s title.
Here is a cool suggestion. If you make all the password the same for every post or page, users will be able to access all the password-protected posts and pages using only one password. But, if you use different passwords for every post, they have to enter a different password for every post.
By making the passwords the same (or different), you can easily make multiple posts private and still have detailed control over who has access.
Ending Notes
There you have it. Now you know how to make a WordPress site private or even a post or a page private. So, you can easily get privacy on your site for whatever reason you want.
Also, it is a great way to share content only with the selected people.
One thing to remember, even when the posts are password-protected, private pages are not suitable for important or sensitive information and always pay attention to whom you’re assigning user roles and their capabilities.


Add your first comment to this post